People love sliders, and they demand to have them on their site. As an Elementor user, I’m sure you’ve wanted to have one, too. Or you had a client who wanted to have a gorgeous slider on their site. However, finding the right Elementor slider solution isn’t an easy task. In this article, we’re going to explore what kind of carousels are available in Elementor. Additionally, I’ll introduce you to another slider solution, which you can use to create modern Elementor sliders for your website.
What are the best sliders for Elementor?
- Smart Slider
- Revolution Slider
- Elementor Slider widget
- Layer Slider
In this article we’ll cover Elementor Slider widget and Smart Slider. If you want to learn more about the other sliders, be sure to check out article about the best WordPress sliders.
Sliders in Elementor
If you’re using the Pro version of Elementor, there are a couple of widgets that allow you to create sliders. For Free users, however, only one carousel widget is available. In any case, all of these widgets are fully integrated into Elementor. As a result, you can configure them the same way you set up any other Elementor widget. This ensures a seamless and familiar experience during slider creation.
So, you need a slideshow and you use Elementor. You can choose from the following built-in solutions to add an Elementor slider to your site:
Carousel widget: Free Elementor slider solution
In the Free version of Elementor, you can find a Carousel widget, which you can use to create sliders with. It’s a simple solution that allows you to add basic image galleries. The carousels you build are responsive and look great on mobile.

Using the Carousel widget you can select images directly from the Media Library. Do you want to leave your visitors guessing why you have added the images? If not, you can display the image title, description, or caption below the pictures. You can configure the text you want to be displayed at the WordPress Media Library.
At the widget, you can select the image size and also the number of slides you want to see next to one another. It’s also possible to set how many images you want to scroll together. For example, let’s say you have a carousel with 6 slides, and 3 slides display at the same time. You can set the “Slides to Scroll” value to 3. As a result, all visible images will change together, as opposed to going through them one by one.

Additionally, you can make your slides switch automatically by the given interval. This way you can create simple, autoplaying slideshows for your site. It’s pretty great, right?
Slides widget: Elementor Pro slider solution
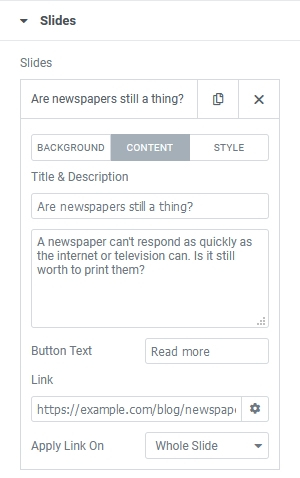
In the Pro version of Elementor, you can find an actual slider widget. It’s much more suitable for creating sliders for your site. Additionally, it allows you to put content on the slides you make. You can add a heading, a description and a CTA button on each slide.

Each slide can have a background image or a color. If you choose to have a background image, you can set a colored overlay for it. Additionally, there’s an option to adjust the blend mode of the background. Moreover, the popular Ken Burns Effect is available as well.
You can add a title, a description and a button with a link to each slide. These are the most essential elements you’ll need to create a slideshow for your website. In conclusion, the Elementor slider widget is suitable for creating a basic content slider.
Other notable carousels in Elementor Pro
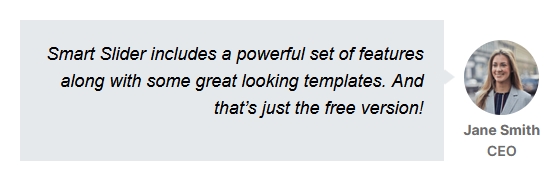
Elementor Pro has other widgets that can create a slider-like result. With the Testimonial Carousel you can display your client’s words in a nice slideshow. You can enter the content of the testimony, give the name and title of the person and upload an image. You can choose from two skins and five layouts to make the testimonial stand out.
With Elementor’s Media Carousel you can create a media gallery. This widget can create a thumbnail slider. Also, you can set it to show the enlarged image in a lightbox. It’s called Media Carousel because it also accepts YouTube and Vimeo URLs in the lightbox. In this case, the image is just a simple thumbnail that launches the lightbox.

Using the Reviews widget you can display your reviews in a tweet-like manner. You can upload a picture, set the name, title and rating and also choose an icon for the review. Also, you can set the actual review text. In short, you have all the tools you need to create a review slider.

A summary of Elementor’s slider widgets
There are many great widgets in Elementor that help you add carousels to your site. These sliders are easy to use and responsive, just like Elementor is. However, there’s one notable difference between them and Elementor: they feel a lot less customizable. You can create anything you want with Elementor. Unfortunately, the same isn’t true about these carousel and slider widgets.
How to create more customizable Elementor sliders?
Every website is different. With Elementor you can create simple sliders. That might be enough for a couple of sites you create. But on other sites, you might need to create more content-heavy slideshows. You might need to add another CTA, more paragraphs, images next to the text (not behind it), or even icons.

So you need to look for a slider, which works well with Elementor. Additionally, it needs to be responsive and easy to use, and have the features you need. Have a look at Smart Slider, the best Elementor slider solution for your website.
What is Smart Slider?
Smart Slider is a super popular WordPress plugin. It allows you to enrich your site with beautiful, modern and responsive slideshows. There’s a free version available, where you can create sliders or blocks. In the Pro version (starting at $49) there are more slider types: Showcase and Carousel. Additionally, each package offers lifetime updates and support for your activated domains.
Smart Slider has its own Elementor widget which makes the publishing super easy. Additionally, it is compatible with Elementor 3.
Comparing Smart Slider and Elementor’s carousels
Elementor’s slider is a simple but feature-rich slider plugin. In the table below I have compared its features with the Free and Pro version of Smart Slider.
| Elementor Slider | Elementor Image Carousel | Smart Slider Free | Smart Slider Pro | |
| Layers | 3 | ❌ | 6 | 23 |
| Custom layer order | ❌ | ❌ | ✅ | ✅ |
| Adjustable Content width on each slide | ❌ | ❌ | ✅ | ✅ |
| Custom layer positions on each slide | ❌ | ❌ | ✅ | ✅ |
| Slide Captions | ❌ | ✅ | ✅ | ✅ |
| Typography options | ✅ | ✅ | ✅ | ✅ |
| Background image | ✅ | ✅ | ✅ | ✅ |
| Ken Burns Effect | ✅ | ❌ | ❌ | ✅ |
| Background overlay | ✅ | ❌ | ✅ | ✅ |
| Blend mode | ✅ | ❌ | ❌ | ❌ |
| Autoplay | ✅ | ✅ | ✅ | ✅ |
| Navigation arrows, bullets | ✅ | ✅ | ✅ | ✅ |
| Thumbnail navigation | ❌ | ❌ | ✅ | ✅ |
| Transition options | 2 | ❌ | 10 | 55 |
| Content animation | 6 | ❌ | 5 | 5 |
| Layer Animation | ❌ | ❌ | ❌ | ✅ |
| Video slides | ❌ | ❌ | ✅ | ✅ |
| Lightbox | ❌ | ✅ | ❌ | ✅ |
| Showing more slides at the same time | ❌ | ✅ | ❌ | ✅ |
Can you create the same looking slider in Elementor and Smart Slider?
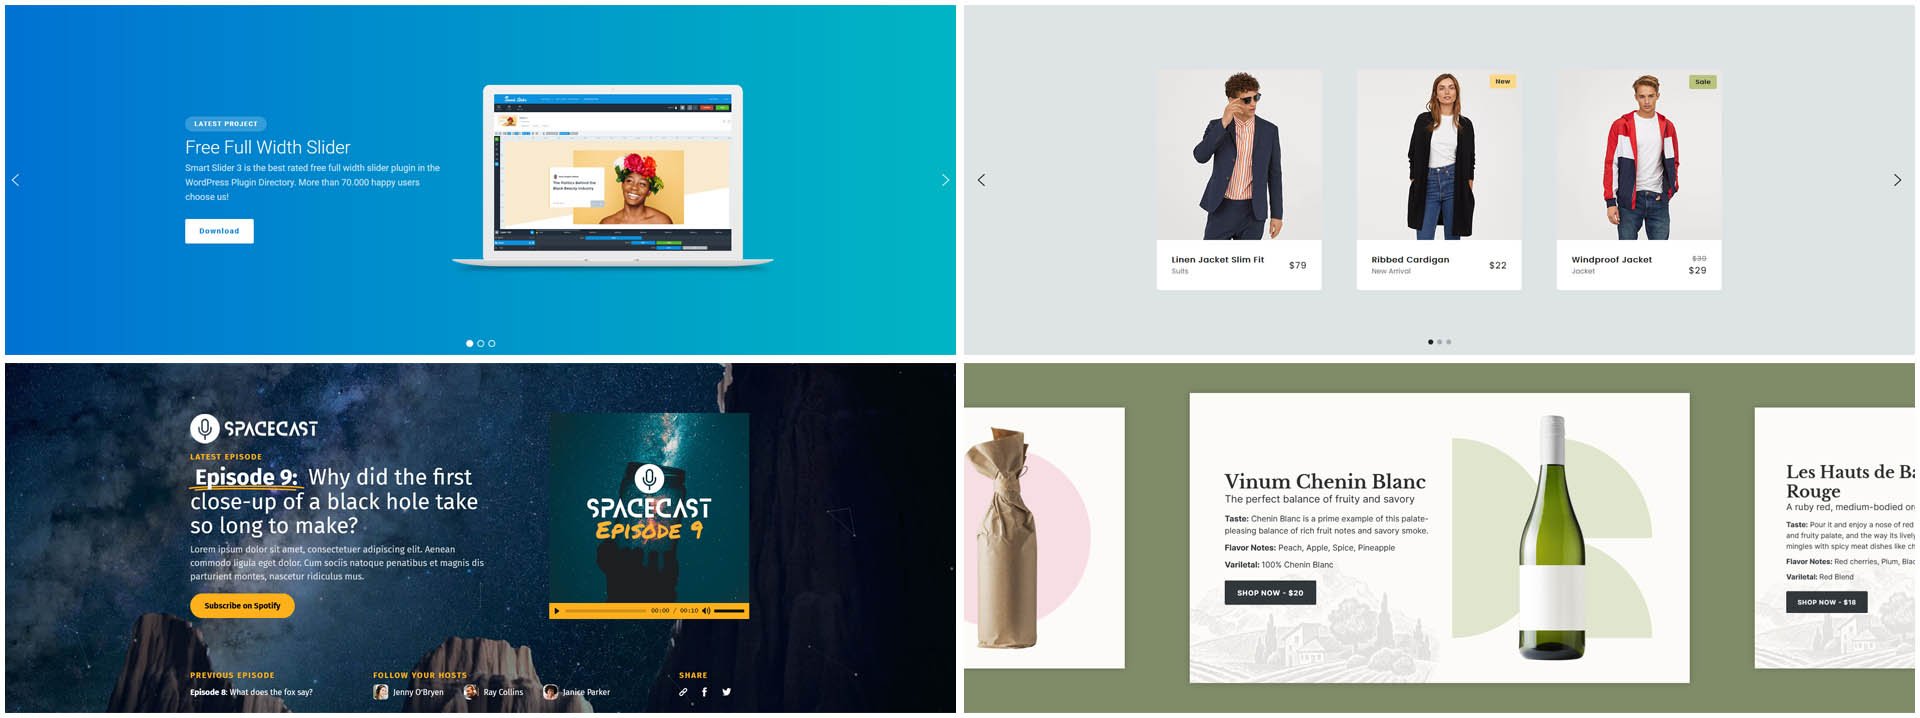
The table above highlights the features you can expect from Elementor Slider and Smart Slider. Apart from telling you a couple of things you can do with these sliders, I also want to show you an example. In other words, I’ll try to create the same slider in Elementor and Smart Slider. As a result, you’ll have a better idea on the sliders you can create with each software.
But here’s a twist: I’ve chosen an existing Smart Slider Pro template to recreate. It’s one of the most popular full-width templates of Smart Slider. It looks really cool and fits any site. What’s more important: it uses only 3 layers in the same order as the Elementor Slider needs them.

Highlights of the Fullwidth Slider template
Before I start recreating this slider in Elementor of Smart Slider free, let’s see some of its details. First, the layout, which is quite simple: it contains a heading, a text and a button layer. These layers are placed into a 1200px wide container and aligned to the left inside it. As a result, on larger screens, there’s more space on the left side of the content than on smaller screens.
The heading uses the Highlighted heading layer of Smart Slider Pro. This layer can highlight the most important part of your text with the shape of your choice. Additionally, you can see a nice movement when the highlight happens. But there’s much more on this slide, so let’s move on!
On the button layer, there’s a cool hover effect. The color changes and the button grows a little. The growth happens because of the bigger padding on hover. Furthermore, the small image icons react to the mouse movement by trying to follow it. This happens because of the layer parallax effect.
Also, the slide navigation arrows are placed to the bottom-right corner of the slider. This is the slider I’ll try to replicate in Elementor’s slider solution and in Smart Slider Free. It’s time to get started!
Building in Elementor slider
It wasn’t challenging, nor time-consuming to create this cool full-width slider in Elementor. I did, however, have to cheat a little: to be able to make the texts bold, I needed to use some HTML codes. I also needed to write HTML to make the bold text white in the description. Nonetheless, Elementor’s slider is easy to understand and fast to work with. Below you can see the pretty great-looking result:

However, for some reason, I wasn’t able to get the content to align to the middle, inside a 1200px wide container. I did the set 1200px content width, but that seemed to make no difference as my content wasn’t wider than 1200px. As a result, the final look of the slider looks a bit uncomfortable on the left side of the screen. Additionally, it’s far away from the guy in the picture.
I also couldn’t get the arrows to be on the same side. Elementor’s slider only allows placing the arrows on the inner or outer sides of the slider.
✅ Can do:
- Add all three needed layers
- Set the styling (font color, size and family)
- Set the layer positions
- Make the slider 700px high
❌ Can’t do:
- Adding line breaks without HTML
- Styling part of the text without HTML
- Placing the content to the middle into a 1200px wide container
- Placing both arrows to the bottom-right corner
Building in Smart Slider Free
Smart Slider makes it easy to build responsive sliders fast. I just needed to drag the layers to their place and change the Inner align on their parent to finish the layout. For the “Make products that matter” text I used two heading layers. This way I was able to adjust the font weight and family in Smart Slider’s visual editor. At the text layer, I added an empty link, which I selected at the layer window. As a result, I could change the color by changing the color of the link.

I was able to style the arrows and position them to the bottom right corner without problems. Then I created a Static overlay, that’s above all slides in the slider, and placed the small images there. I used Absolute positioning to add these images and position them on the canvas.
As you can see the result is really close to the goal. Basically, the only difference between the slider made in the Free and Pro version is the Pro effects.
✅ Can do
- Create a 1200px wide container and align the content inside it
- Place the arrows to the bottom-right corner
- Make the slider 700px high
- Create an overlay to place the small images to
- Create the hover effect of the button
❌ Can’t do
- Create the parallax effect for the small images
- Create the animated shape around the “that matter” text
What more can you get with Smart Slider Pro?
With the Pro version of Smart Slider, you can create much richer slideshows. For example, if you click on the “But how?” button, a couple of new layers will appear. These are the layer animations, that you can trigger with an event. In this case, the event was clicking on the CTA button.
Clicking on any boxes takes the visitor to another slide within this slider. Using such navigation makes your slider look unique and ensures a memorable user experience.
Why should you choose Smart Slider as your Elementor Slider?
Elementor is a powerful page builder which you can use to create a beautiful site. On the slider front, however, it only allows you to create something basic. So if you need more functionality, you’ll need a slider plugin. Unfortunately, the market is full of slider plugins to choose from, which makes it hard to pick one.
I recommend giving Smart Slider a try. It has an excellent Free version you can try at no cost. Additionally, you can create amazing sliders even with the Free version. If the slider example above weren’t convincing enough, below is a list of reasons to choose Smart Slider.
Why should you choose Smart Slider Free?

- It’s free. Free things are always nice to have. Smart Slider offers a powerful slider builder tool, without having to spend a penny.
- Easy to use. Smart Slider is just as easy to use as Elementor’s Carousel and Slider widgets. But it’s much, much more powerful.
- 6 unique layers. There are 6 layers available, each suitable for a certain type of content. You can add as many headings, paragraphs, buttons, images, YouTube or Vimeo videos as you want to each slide.
- Default positioning. Add rows and columns to display your content, the same way you use Elementor.
- Absolute positioning. Need to add some decorative elements? Use Absolute positioning which gives you the freedom of placing the layers anywhere.
- Freedom to build what you want. With Smart Slider, you can build anything you imagine.
- Style as you want. Make the layers look the way you want to! As a result, the slideshow can bend into your site perfectly. Or you can create a slider that truly stands out.
- Customizable controls. Add arrows, bullets or thumbnails to your slides. Then customize them to your heart’s content.
- It’s responsive. With Smart Slider, you can create sliders that look gorgeous on any device. You can use responsive tools, like the Text scale to fine-tune the result on small screens.
- Post Sliders. Create sliders from your most recent blog posts using the dynamic slide generator. The best part is that the generator automatically updates when you add new posts.
- Beautiful templates to start. Need to create something good looking fast? Import one of the 11 ready to use sample sliders and customize them to your liking.
Why should you choose Smart Slider Pro?
The Free version of Smart Slider is an already amazing and highly customizable plugin. But if you want more power, have a look at Smart Slider Pro! It has all features the free version, and much more. Some reasons to go Pro:

- Much more layers. There are a total of 23 layers in the Pro version to create content with.
- Self-hosted videos. You can use MP4 videos in your slides to avoid having to use a 3rd party service for it. Additionally, an MP4 video can look great as the background of the slide.
- Cool effects. You can find the coolest and most popular effects in Smart Slider. For example parallax, particle, Ken Burns effect and Shape Divider.
- Layer animation. Breathe some life into your layers by animating them separately. Build any layer animation you like or select from our preset animations.
- Reveal animation. Reveal animation is a special type of layer animation, that gives a modern touch to your slides.
- Layer events. Events let you start layer animations when visitors interact with the slider. For example, you can make a layer show up when the visitor clicks on another layer.
- Lightbox. Display your images in a lightbox, which allows the visitors to enjoy them in a larger size.
- More beautiful templates to start. Get a headstart and choose from more than 180 sliders.
- Friendly pricing. All Smart Slider packages come with lifetime updates and support. You don’t need to renew your subscription yearly to be able to get help or access the latest features.
Conclusion
Elementor already has some great built-in slider solutions. They let you create nice-looking, responsive sliders to your site. But in some ways, they lack functionality and creative freedom. So, if you need more functionality and features, you need a slider plugin.
Give Smart Slider a try. It works well with Elementor, which makes it an excellent choice to create sliders for your site. Even the free version can fulfill your website’s slider needs. You can add unlimited layers and create any layout you want. But if you need more features and some cool effects, you can go for Smart Slider Pro. I’m sure you won’t regret it!