Sliders, carousels, slideshows. There’s no other design element that’s as versatile as they are. And there’s no other element that divides web designers and developers as much as sliders do. Nonetheless, clients love and demand to have sliders. So if you’re in a position where you need to find the best WordPress slider, you’re lucky. I’m here to help you with this hands-on guide.
How to recognize the best WordPress slider plugin?
There are so many sliders out there, and of course, they all claim they’re the best sliders for WordPress. In fact, there are many great sliders but how do you find the best one? What makes a slider plugin the best WordPress slider? Well, finding the all-in-one slider solution for WordPress isn’t as hard as it seems. Simply find a plugin that matches the following criteria:
1. Interface
Even if you don’t think it’s a big deal, it actually matters how your slider plugin looks on your WordPress admin. If the UI is ugly, it’s likely hard to navigate, and creating a slider will be fiddly. So, the best WordPress slider plugin needs to have an interface that looks great and is a joy to use.
2. Ease of use
Slider plugins tend to have many options to allow you to create whatever you want. Too many options can be confusing, especially if they’re not laid out logically. The best WordPress slideshow needs to be simple to use. Having to add a new slider or slide shouldn’t stress you out.
3. Available layers
In sliders, you can create content with layers. They allow you to add text, images, buttons and other cool stuff to your slideshow. The best slider plugin needs to have layers. Additionally, it needs to have enough layers to create a modern slider.
4. Styling
It’s not enough to be able to add many layers to your slideshows. You need to be able to style them, to make the slider fit into your website nicely. So I’ll check the available styling options each slider plugins offers.
5. Slider navigation
A slider contains a bunch of slides. Your visitors need to be able to go through them in an intuitive way. For example, using arrows, bullets or thumbnails. These controls need to fit into the color scheme of your website, and also remain visible over the images. In other words, the best slider plugin for WordPress must offer customizable navigation options.
6. Post slider
Being able to create a slider from their posts is a must-have for any serious blogger. Post sliders help to showcase the amazing content they have on their site. Of course, not all websites have blog pages, but running one can have SEO benefits.
7. Effects
The best WordPress slider needs to help you deliver that wow factor. In other words, it needs to have all the fancy effects you can use to amaze your visitors. You have only 50 milliseconds to create a good impression. And your slider needs to help you with that. You need effects like Ken Burns or Parallax, which look great on any website. Also, a trendy transition effect to switch slides can make the slider more appealing.
8. SEO friendly
There’s a common misconception that sliders are bad for SEO. This might be true for some sliders, especially if they’re outdated. But it’s not so true for modern sliders. Additionally, if a slider wants to be the best WordPress slider plugin then it must be SEO friendly as well.
9. Responsive
In 2020 around 50% of all website traffic is coming from mobile phones. That’s an insane amount of small screen usage, but it’s perfectly understandable. Phones are always around in people’s pockets or bags, ready for browsing. For this reason, your website needs to look great on mobile. Similarly, you need a responsive slider, that’s a joy to look at on a small screen.
What are the best WordPress slider plugins?
The better a plugin is, the more people use it. So, it makes sense to think that the best WordPress sliders are those, which are used by most people. During my research, I found 6 super popular plugins, used by tens of thousands of people all over the globe. How do I find the best slider plugin for WordPress? I’ll compare the most popular plugins I’ve found. I’ll use the criteria listed above for my comparison and see how each plugin performs. These are the six best WordPress slider plugins I choose to compare:
Slider Revolution
Smart Slider
LayerSlider
Master Slider
Soliloquy
Meta Slider
As I want this article to be the most comprehensive one, I’ll be as objective as possible when I test the sliders.
Slider Revolution
If you’ve ever searched for a slider to use on your site, I’m sure you’ve come across Slider Revolution. It’s a super popular slider plugin for WordPress. It’s bundled in many premium WordPress themes which might be the reason for its fame.
People generally choose themes based on the features the theme offers. Often this feature comes from a plugin bundled into the theme. Premium themes usually bundle slider plugins, because they’re great eye candies. Thus, they make the theme more appealing to potential buyers.
But bundled plugins have a huge disadvantage: they come without a license key. As you know, you need to activate premium plugins to be able to update them. But you also need an activated copy for the premium services. These services typically include the support and the template import. So, if you use a bundled plugin, you get a premium plugin for free, but without any support. Unfortunately, this isn’t a very good bargain.
Interface ⭐⭐⭐⭐
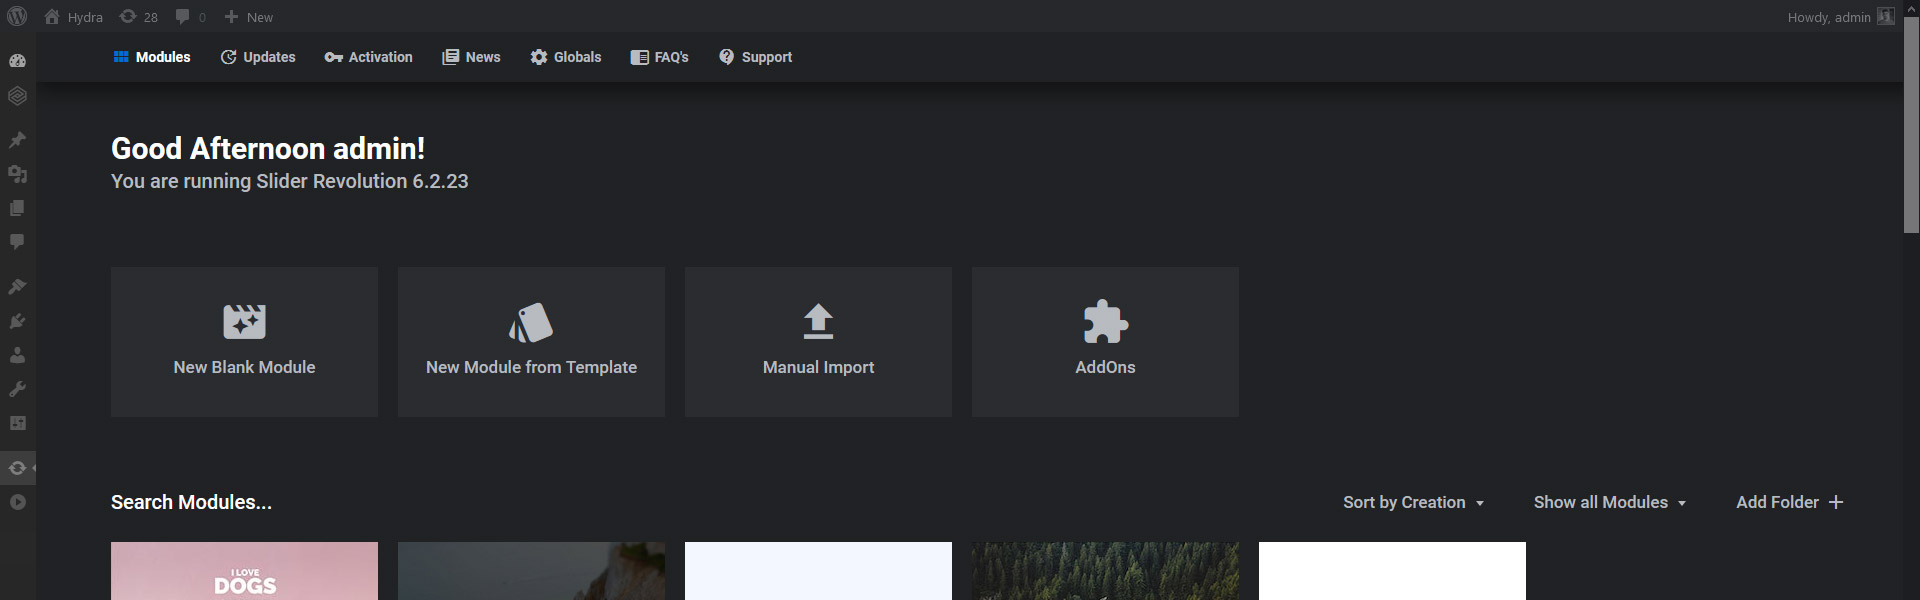
The first thing I noticed about the Revolution Slider’s interface is that it’s incredibly dark. By default, I found it hard to read, as there are gray texts on the black background. Turning on High Contrast mode helps a lot with the legibility.
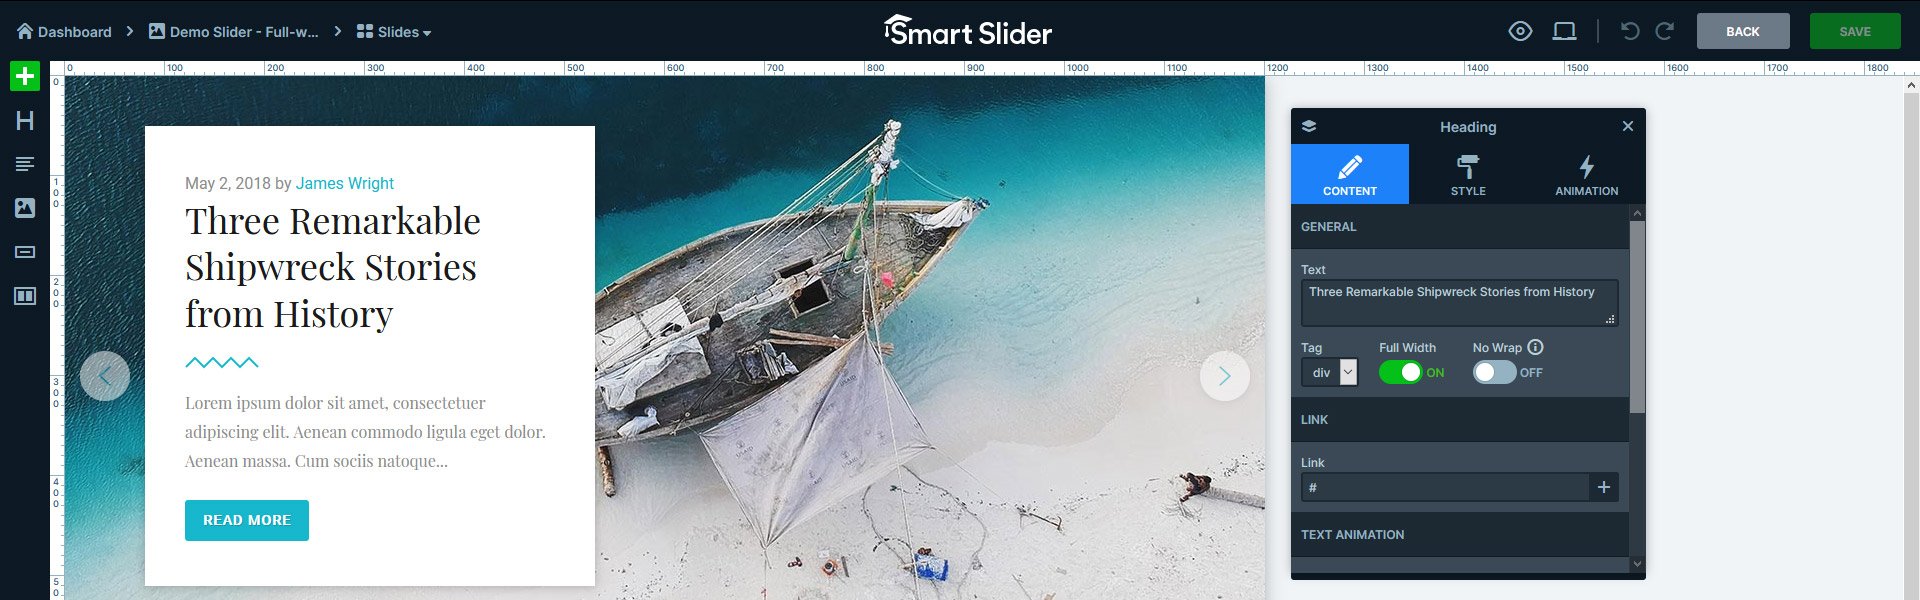
Slider Revolution interface
Slider Revolution uses the same interface for the slider configuration and slide editing. In other words, there’s no separate page where you can configure your slider. The large area on the left is where you can set up the slide. The sidebar on the right side is where the settings are. For example, this is where you can name the slider, or style the layers you added. It’s an interesting approach, and it takes a lot of clicking around to get used to it.
Ease of use ⭐⭐⭐⭐
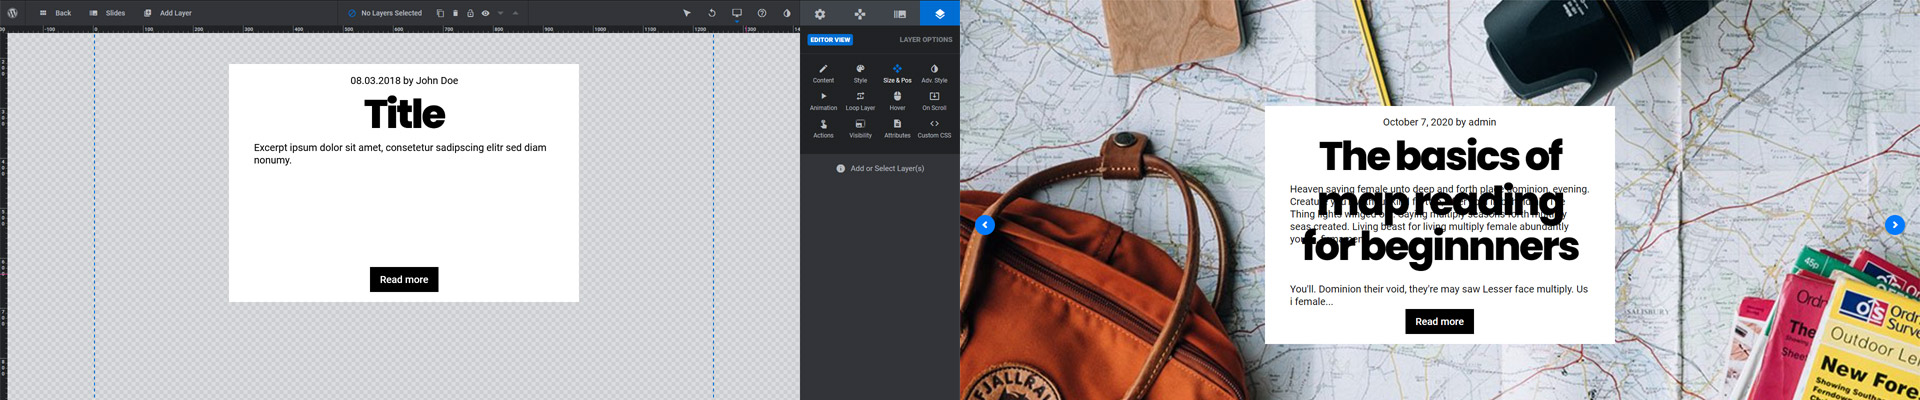
What caused the most difficulties for me is the lack of tooltips. In fact, Slider Revolution uses icon buttons in many places for example, at the top of the sidebar, or above the timeline. Unfortunately, it’s hard to guess what these icons do, sometimes even after clicking on them. It would be nice to have a tooltip that tells the name of the option on hover. This could help to give a clue about what’s going to happen if the icon is clicked. I did find the help mode, but it didn’t work on these icons.
Slide editor in Slider Revolution
Rev Slider has a drag and drop interface to create the layout of the slide. As a result, it’s easy to learn and use. However, the positioning leaves a lot to be desired. Imagine this: you want to create a heading, a text and a button layer, and they should start from the same position. By default, layers only stick to each other when they touch. If they’re at least 1px away, they no longer stick. As a result, there’s a good chance they’ll be misaligned. To be able to do pixel-perfect positioning, you need to enable the grid or layer-based adjustments.
Luckily, Revolution Slider offers many great slider templates. You can import them with a single click and customize them to your liking. As a result, you can have a great looking slider for your WordPress website fast. Additionally, you won’t need to spend time positioning your layers.
Available layers ⭐⭐⭐⭐⭐
You can find the basic layers and some more in Slider Revolution. There’s a text layer where you can put a heading or paragraph text. You can add buttons, images, videos, audios and icons to your slides. If you want to darken the background image to increase the legibility of the layers, use the Shape layer.
The available layers are enough to create any kind of layout you can imagine. As a result, it’s safe to say that Slider Revolution is a multipurpose slider plugin. So, you can use it to create high-quality sliders for your WordPress site.
Styling ⭐⭐⭐⭐⭐
You can configure any layer to your liking with Rev Slider. At text layers, you can set the font size, family, color, weight and even the letter spacing. But there’s also an option to set the background color, padding and margin on each layer.
The first confusion I bumped into was when I wanted to create a button for my slider. I needed to change the normal and hover background, but they are in different places. The Style, which has an artist palette icon, has all styling options. For example, that’s where I found the normal background color option. However, the hover color is under the Hover settings, which has a mouse cursor icon. There’s some logic behind this, as the hover color activates on a mouse interaction. In any case, it’s an interesting choice to put these options so far away from each other.
Slider navigation ⭐⭐⭐⭐
There’s no default navigation enabled when you create a new slider module. In other words, if you want arrows, bullets or thumbnails on your slider, you need to enable them yourself.
You can choose from many predefined navigation styles. Hovering on their name shows them on the slide editor which makes it easier to choose the one you like the most. You can also change the colors to ensure the navigation stays visible over the slide content. I thought that setting a normal background and turning off hover would make the same color show for both. Instead, Slider Revolution sets some kind of default color as the hover background. So if you want the same color for hover and normal state, you need to set it at both.
Post Slider ⭐⭐⭐⭐
Being able to create sliders from the posts is something most bloggers want to do. Post sliders can highlight the latest post, and bring them more readers. They can also showcase the most popular posts from your blog. As Slider Revolution is one of the best WordPress slider plugins, it can create post sliders.
What’s great about the post slider is that it allows creating separate layouts for the post. Additionally, it’s simple: you just need to create more slides. For example, if you create two slides, your odd and even posts can have different layouts. In other words, it’s possible to create a different layout for every other post in your slider. Since the type of the slider is dynamic, you can’t put non-dynamic slides to your slider. This could be used, for instance, to create an intro or an outro to the dynamic slides.
Post Slide in backend (left) and frontend (right)
When you edit the slide, you can’t see the actual post data in your slides. As a result, it can be difficult to create a proper layout. That’s because the length of the content at the editor and the frontend can differ. Although it’s easy to build the slide, you won’t know how much space the content needs. As a result, the editing gets complicated, because layers can overlap. This can cause legibility problems. Additionally, overlapping content looks unprofessional.
Effects ⭐⭐⭐⭐⭐
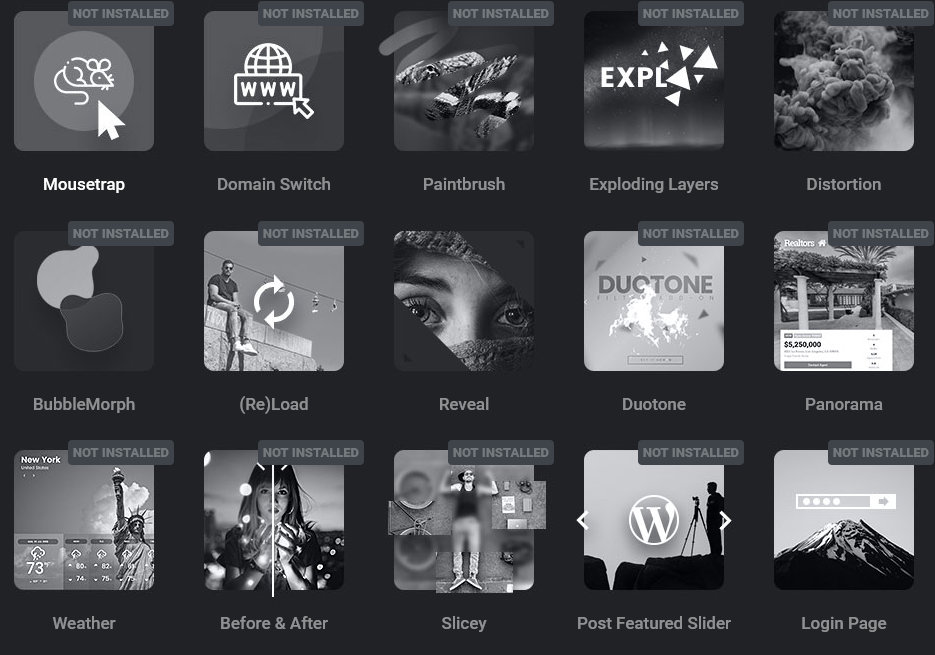
Slider Revolution is full of amazing effects to create truly gorgeous sliders. Unfortunately, many cool effects are available after you download their addon. Some of these popular effects are the before & after, particle, or typewriter effects. Obviously, addons have their own advantages and disadvantages. First, not including everything in the plugin makes the UI less bloated. As a result, it’s easier to navigate and more user friendly. Additionally, people will only have the effects which they actually use.
Addons in Rev Slider
However, there are some disadvantages to the add-on approach. First, it’s the fact that the site will have more plugins that need to be maintained. Whenever you update Slider Revolution, you need to ensure you update its add-ons. Otherwise, there can be compatibility problems. For example, some effects won’t appear on the sliders.
It’s also important to mention that add-ons are only available after activation. Since Slider Revolution is often bundled with themes, this can help to generate revenue. That’s because themes can’t include license keys, so their customers won’t be able to use the add-ons. But there are many great and popular effects amongst the add-ons, so there’s a good chance people will update.
SEO friendly ⭐⭐⭐⭐
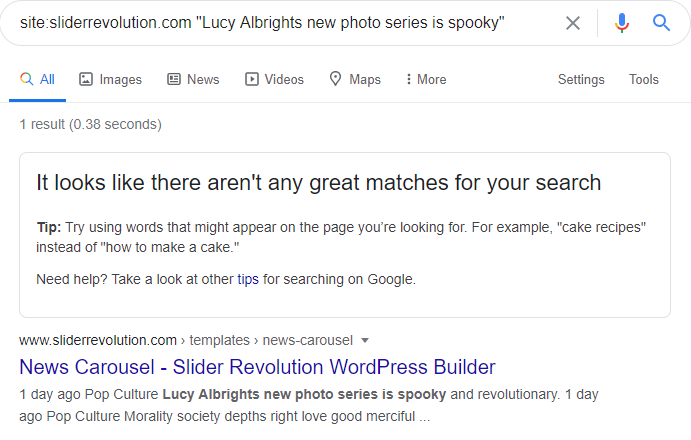
When you add text to the slides, Slider Revolution wraps it inside rs-layer tags. However, that’s not really good for SEO. Additionally, a Slider Revolution user claims they noticed an improvement in their keyword positions. I searched for content wrapped in the rs-layer tag. Then Google displayed a message about not finding any matches for my search. Even if the link to the page was just below this block, it seems to prove this user’s point. Google does not like the rs-layer tag.
SEO results with Slider Revolution
So, if you want your site to rank better, be sure to change the wrapper tag. Change h1 to h6 tags for your headings, and p tags for other texts. When you add images, their alt text is pulled from the WordPress Media Library. If you update it at WordPress, it’s updated at the slider as well. This way you won’t have to work twice.
Responsive options ⭐⭐⭐
Slider Revolution has the same responsive behavior as most sliders have. They scale down everything while keeping the aspect ratio of the slider. As a result, the layers can get too small and illegible on mobile devices. Luckily, you can improve the result and create a much more mobile-friendly slider by hand. However, first, you need to turn on the mobile editing to be able to make changes. This suggests you can create sliders that don’t need mobile-specific changes. Unfortunately, I wasn’t able to create a slider like that.
Mobile editing needs to be enabled manually in Slider Revolution
After you enable the mobile editing, you can move layers around. It’s also possible to adjust font sizes to ensure legibility. Additionally, you can hide layers on mobile, or on other devices. This is useful, for example, if you don’t have enough space for the layer. But you can also hide the layer if it’s not important for mobile users.
Smart Slider
Smart Slider is another popular WordPress slider plugin. Its free version is the fastest-growing slider plugin in the WordPress.org repository. So, Smart Slider is a popular slider plugin, and people love it for a good reason. It’s easy to use, has many features, and a huge amount of dynamic slide generators.
☝️ Note: Smart Slider has a free version on WordPress.org plugin library. In this article, I’m focusing on the Pro version.
Interface ⭐⭐⭐⭐
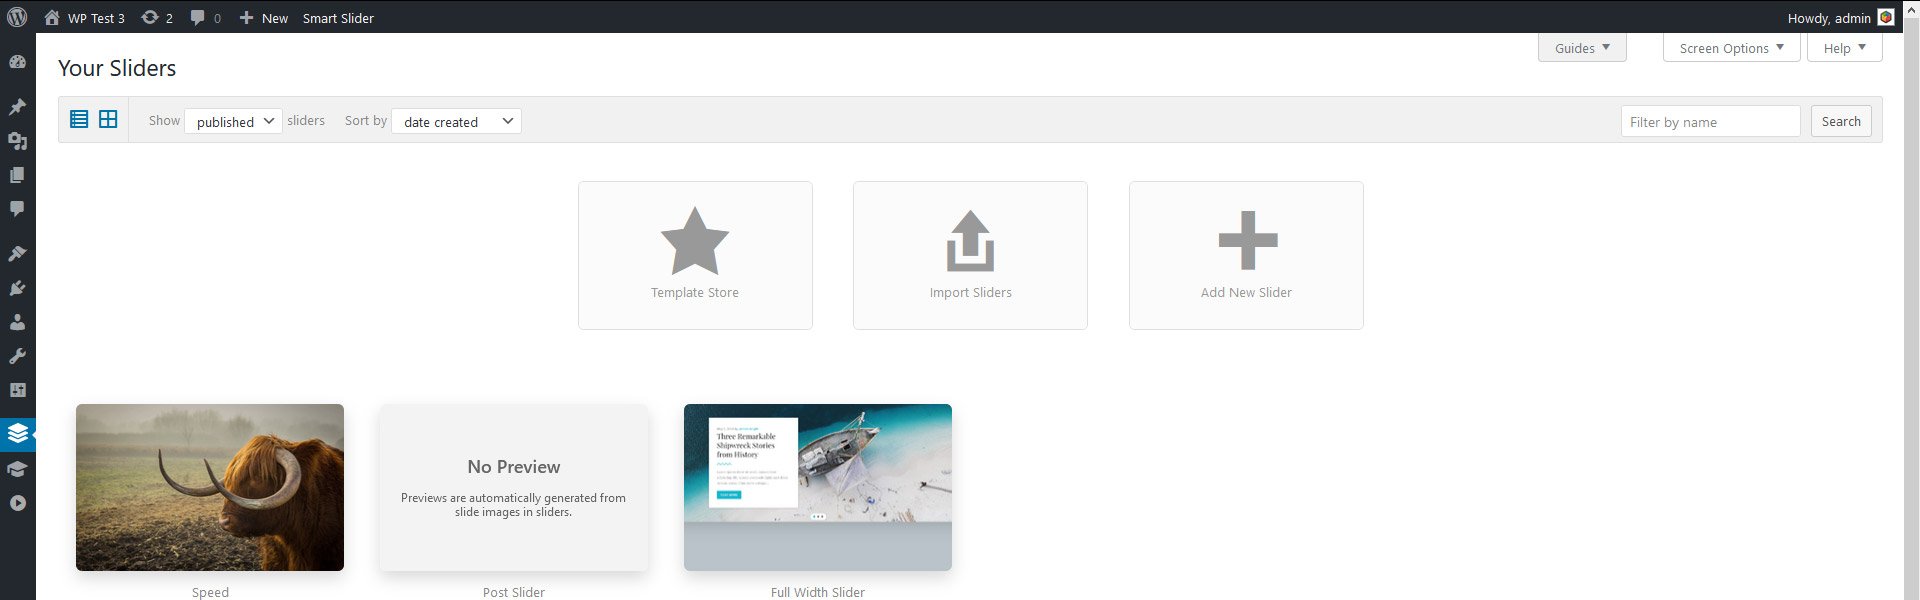
Smart Slider has a clean and colorful interface. First, you arrive on the Dashboard where you can find the sliders you created. Also, this is the place where you can create a new project. Clicking on any slider thumbnail takes you to the slider settings page. This page displays the slides in the slider on the top, and the settings below. You can edit the slide by clicking on their thumbnail. The slide editor takes up the entire screen, which is great because it gives enough space to edit the slide in a comfortable manner.
Interface of Smart Slider
Smart Slider has an incredible amount of options. Just the Slider settings page has 9 tabs full of them. While so many options can be confusing at first, they’re placed very logically. For example, on the Controls tab you can find all options you can use to switch slides.
The three levels (dashboard, slider settings page and slide editor) are easy to distinguish. The UI differs enough to give you a clear idea of where you are right now. But the elements look so similar that you can always tell you’re still using Smart Slider. Also, there’s breadcrumb navigation on the top left corner.
Ease Of Use ⭐⭐⭐⭐
Creating a slide with layers is the easiest and fastest amongst the sliders I’ve tried for this article. That’s because Smart Slider has two positionings: Default and Absolute. Absolute positioning is what you can find in every other slider. You drag and drop the layers anywhere, and they scale up or down with the ratio of the slider. As a result, they can overlap on smaller screens. In any case, they make responsive editing seem like a nightmare.
Smart Slider: Slide Editor
On the other hand, you can’t freely drag and drop Default layers. Instead, you need to position them from their container, which can seem restrictive at first. But you can learn it quickly, and create sliders with really great results.
The layer styling options are available in a floating window, which you can drag anywhere. As a result, there’s no need to scroll up or down to see the changes you made. Also, since the layer window doesn’t have a fixed space, it doesn’t take up useful editing space.
Additionally, Smart Slider has many amazing slider templates. You can download them with a single click from the dashboard. Then change anything you want, including replacing texts, images or colors. The slider templates give you a great head start and also help to learn the plugin. If you don’t need a whole slider, just a slide, take a look at the slide templates in the Slide Library.
Available Layers ⭐⭐⭐⭐
There are 24 layers in Smart Slider. That’s an incredible amount of elements to work with. Obviously, there’s a heading, text and a button layer, which is already enough to create a hero header. But there are video layers to enrich your slider with YouTube, Vimeo and MP4 videos.
Having so many layers can cause choice overload. You might build your content with a layer, then find out there’s a better layer for your needs. As a result, you’ll need to style your layer again, causing time loss. For example, there’s a simple heading layer which has text animation. This animates the full text you entered, but if you want to animate certain words only, you’ll need the animated heading layer instead.
Styling ⭐⭐⭐⭐
You can find rich styling options in Smart Slider, so you can configure your layers to your liking. At the font family, you can choose from a huge list of Google Fonts, or you can write the name of the custom font you want to use. You can also adjust the font-weight, the line height, set background color, add a border and border-radius. But there are too many options you can play with, which can be confusing.
Additionally, you can save the styles you created and apply them to layers of the same type layer. For example, if you styled a cool CTA button, you can save this slide and use it at other buttons. Although styling a layer is easy, this option can save a lot of time.
Slider Navigation ⭐⭐⭐⭐
The typical slider navigation options are available in Smart Slider. This includes the arrows, bullets and thumbnails as well. The best thing about these controls is that they’re not theme-based. As a result, you can freely configure their look and position. However, the button that brings up the styling options bends into the UI so seamlessly that it’s easy to miss.
There are preset styles of course, what you can select, but you can customize these as well. For example, you can choose the arrow preset that has an orange background, and change the color to blue. Additionally, you can upload your own arrow image as well.
Post Slider ⭐⭐⭐⭐
You can create sliders from your post, and custom post types as well. What’s more, you can mix these dynamic slides with the non-dynamic slides. So it’s not the slider that’s connected to the post, like at Rev Slider, but the single post slide. If you want to create a different styling for the second, or third slide, you can create more dynamic slides. However, you need to adjust their settings to make them show just the second or third slide.
The backend (left) and frontend (rigth) result match exactly when you create a Post Slider in Smart Slider
Another thing that makes the post slide really great is that you can actually see the result in the editor. So you’ll know how much space the layers need when you create your layout. However, it doesn’t really matter, because you will work with Default layers anyway. These layers will make space for themselves, and won’t overlap.
Effects ⭐⭐⭐⭐
As mentioned above, Smart Slider has many options. Naturally, the available features include cool effects as well. First, let’s see the effects you can add to background images. The most popular one is the Ken Burns effect which you can set for every slide or individual slides. But you can also select background animations and the parallax effect, too. Additionally, the parallax effect is available for the layers as well. Now that I have mentioned layers, it’s possible to animate them with cool layer animations.
Also, you can find many slider level effects in Smart Slider. For example, you can use the Particle effect to give some subtle movement to the slider. But you can use the animated Shape divider for a modern look. Unlike at Revolution Slider, these effects are immediately available. So you don’t have to download and maintain add-ons.
Seo Friendly ⭐⭐⭐⭐⭐
Smart Slider is another slider you can use for SEO purposes. You can specify alt and title text at every slide background and image layer. At the heading layer, you can choose from h1 to h6 tags to help to structure your content. If you need simple paragraphs for the content, use the text layer. Additionally, search engines can easily read the content you write into Smart Slider.
Google easily reads the content from Smart Slider
When you add images from the WordPress Media Library, Smart Slider sets the alt tag you wrote there. Later you can adjust the content of the alt tag at the layer window if you need to.
Responsive Options ⭐⭐⭐⭐⭐
The best thing about Smart Slider is the Default positioning. As mentioned above, for first-time users it can seem limited and harder to use. But when it comes to the responsive result, it couldn’t be any better. The layout I have created with Default layers didn’t actually need any responsive changes. In fact, the slide looked fantastic without having to do anything. As opposed to Absolute positioned layers that other sliders have. Additionally, these layers take longer to position.
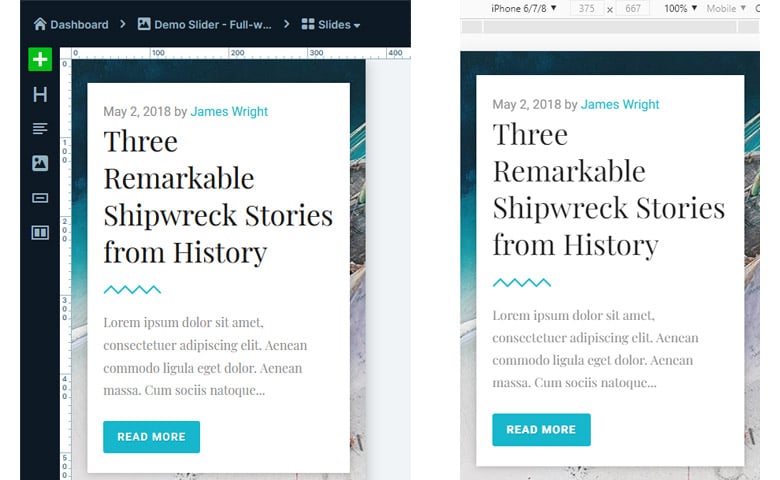
Mobile result in Smart Slider (left) and on the frontend (right) without making any changes
Should you need to make responsive adjustments, here’s what Smart Slider can help you with. First, you can use the Text Scale option to adjust the font sizes. If your texts are too small, you can increase them with this option. But if your texts are too big, you can use the Text scale to decrease the font size. It’s also useful if you want to make your heading text fit into one line. Additionally, you can hide layers on any device. As a result, you can hide unnecessary layers on mobile. But you can also replace complex desktop layers with simpler ones on mobile.
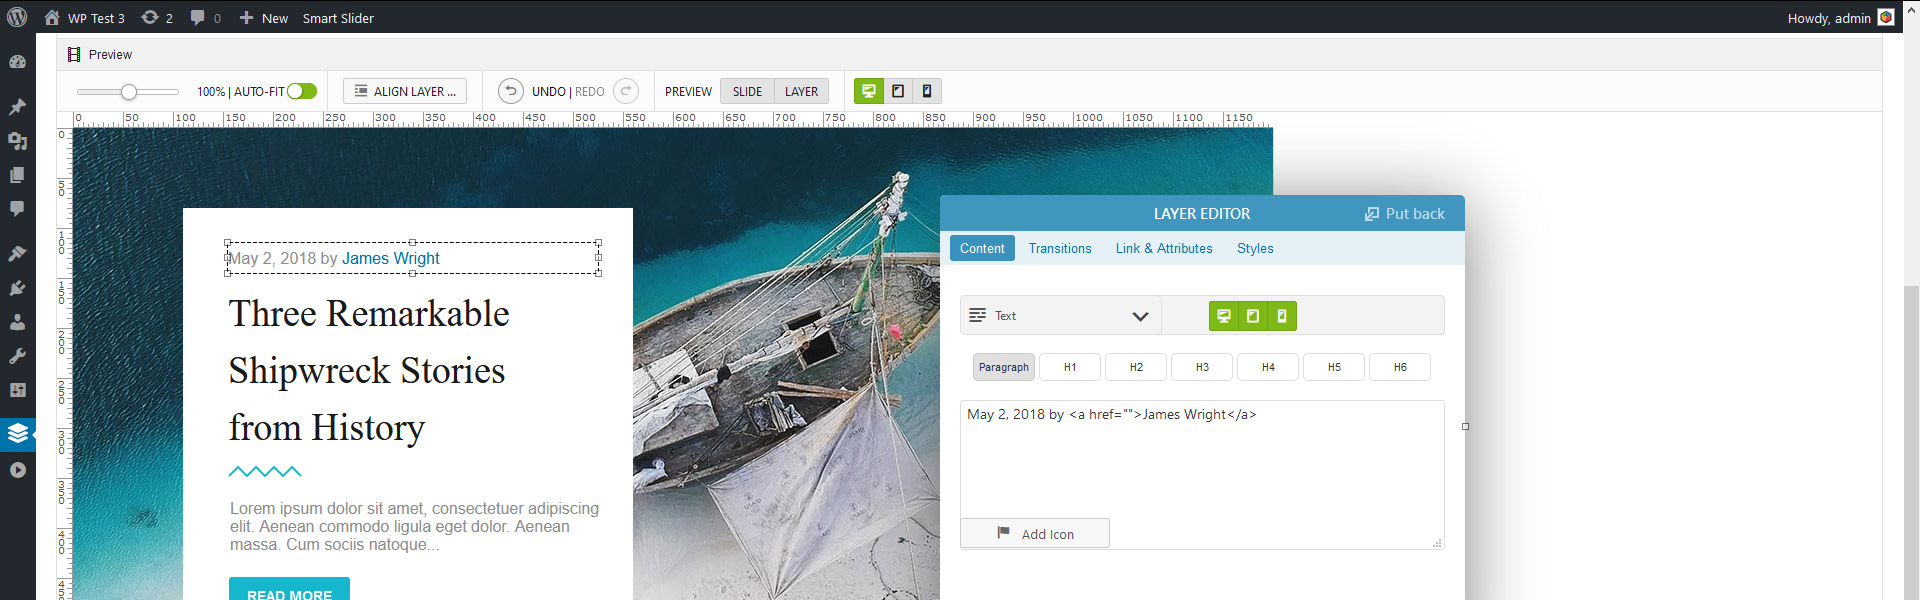
LayerSlider
Layer slider is yet another slider that’s typically bundled in premium themes. You can find it in themes like Avada, Enfold or Bridge. As mentioned above, bundled plugins have many disadvantages. First, you can’t get premium support. Then you can’t download templates or update the plugin via WordPress. In LayerSlider’s case, some features are also locked behind the activation wall. For example, the popup usage feature needs a license key.
Interface ⭐⭐⭐⭐
The interface of LayerSlider is very minimalistic, mostly just gray and white. The only place where you can find colors is the activation area. When LayerSlider is not activated, there’s a blue Activate button, and a red label. The latter turns green after the activation. Because of this, the interface feels a bit empty.
Interface of Layer Slider
Ease of use ⭐⭐⭐
Editing a slide in LayerSlider involves lots of scrolling. You need to scroll up to see the layers, then scroll down to see the configuration options. It’s an unfortunate placement, and it makes the editing process tiring. To avoid this problem, make sure you toggle the Popup editor. It creates a floating box from the settings, so you can style your layers much more comfortably.
Layer Slider Slide Editor
It’s good that layers snap to one another, but they need to be really close. Otherwise, it’s easier to use the arrow keys or the positioning options at the Styles to set their position.
When I worked with LayerSlider, I wanted to create a specific design. The first part of the design was breaking a text into three lines. I tried to do this by limiting the width of the layer using its dragging points. However, as it turned out, these dragging points don’t limit the size of the layer in the way I thought. In fact, they only increase or decrease the font size. As a result, the text I entered stayed in one line. I found this approach very interesting, and rather confusing. Additionally, leaving line breaks at the layer’s content field had no effect either. I found only one way to limit down the width of the layer. I had to manually write the size at the Styling options.
Available layers ⭐⭐⭐⭐
There are 8 layers in LayerSlider. That doesn’t sound a lot, but it’s enough to create good content. The most basic layers, like the image, text and button are available. Additionally, you can add video or audio, or write your own HTML codes.
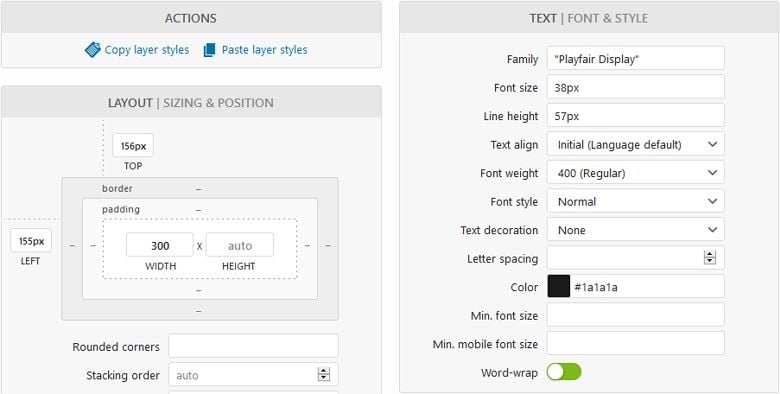
Styling ⭐⭐⭐
LayerSlider offers a bunch of configuration options for the layers. You can set the font size, family or color for the layers. Although there are not many fonts in the dropdown, it’s possible to write the name of the custom font you want to use. This dropdown is present at some other options, like the font size, too. The problem with them is that they make the editor seem restrictive because it seems you can’t actually set anything but the suggestions.
Layer Slider styling options
Another good option is the rotate, which lets you create interesting layouts by rotating the layers. But there are some options which don’t seem to work well. For example, the min font size option has no effect in the slide editor. It seems to work fine in the preview, but completely messes up the layer in the frontend.
Slider navigation ⭐⭐⭐
You can add bullets and arrows to the slides. However, their look depends on the selected slider skin under Appearance. Even if there are many skins to choose from, you can’t configure the navigation further. In other words, if the arrows have a white background in the skin you choose, you’re stuck with that color.
Post Slider ⭐⭐⭐
Creating a post slider is totally possible with LayerSlider. But there’s a catch: you will need to create as many slides as many posts you want to show by hand. Although you can create one slide, and duplicate it, so you won’t need to work a lot, if you need to change something on the slides, like a color or font size, you’ll need to edit each slide.
You can also mix post slides and normal slides within a single slider. It’s a really useful feature.
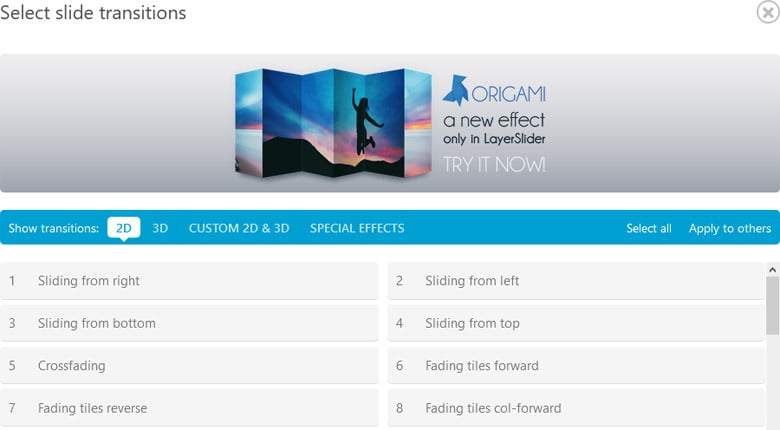
Effects ⭐⭐⭐⭐⭐
You can find popular effects like the Ken Burns effect in Layer Slider. Additionally, there are layer animations to enrich sliders. There’s also a timeline, although it’s easy to miss. Additionally, it’s possible to copy and paste the effects you set. You can also enable the parallax effect on the layers. Additionally, you can enrich your slides with many great looking slide transitions.
Slide transition effects in Layer Slider
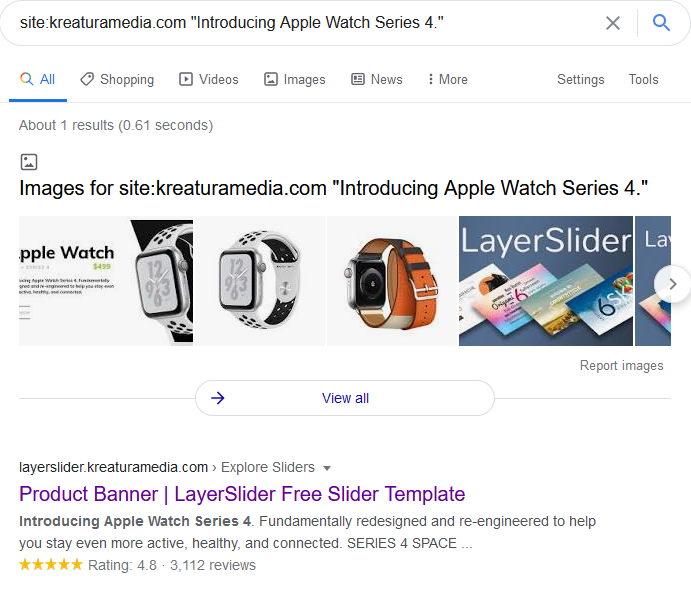
SEO ⭐⭐⭐⭐⭐
At the text layers, you can choose between h1 to h6 and p tags to display content. As a result, LayerSlider can help you write a structured text for SEO purposes. This is good news because it means you can use the content of the slider to earn a higher rank in search engines. Additionally, LayerSlider pulls the alt tag for the images from the Media Library. Thus, you won’t need to edit the alt tag twice.
Search engines can read text from Layer Slider
Responsive options ⭐⭐
LayerSlider scales up and down the slider to match the set aspect ratio. As a result, the text sizes might end up being too small. Luckily, the developers have thought of that and made a minimum mobile font size option. But there’s a catch: the result doesn’t show in the editor. Additionally, the minimum mobile font size doesn’t show in the preview either. So you can only test how the slide looks with the set font size on the frontend. This means doing lots of back and forth editing.
Also, LayerSlider has an option to hide the slider you made on a mobile device. Alternatively, you can hide the slider above or below the given screen width, in pixels. In other words, if you want to have a decent looking slider on mobile, you’ll need to create and maintain two sliders. Unless you create simple image galleries or add just a few lines of text, you’ll need separate sliders.
Apart from the above options, LayerSlider has no other responsive tools. These options are not enough in 2020 when so many people browse from their phones. Modern websites need responsive content, which means LayerSlider isn’t suitable for these sites.
Master Slider
Master Slider is another popular slider you can use on your WordPress site. It allows you to create image slideshows with layers. Additionally, it’s simple to use, and touch-friendly as well. Also, it offers a bunch of cool slider templates to start with.
☝️ Note: Master Slider has a free version on WordPress.org plugin library. In this article I’m focusing on the Pro version.
Interface ⭐⭐⭐⭐
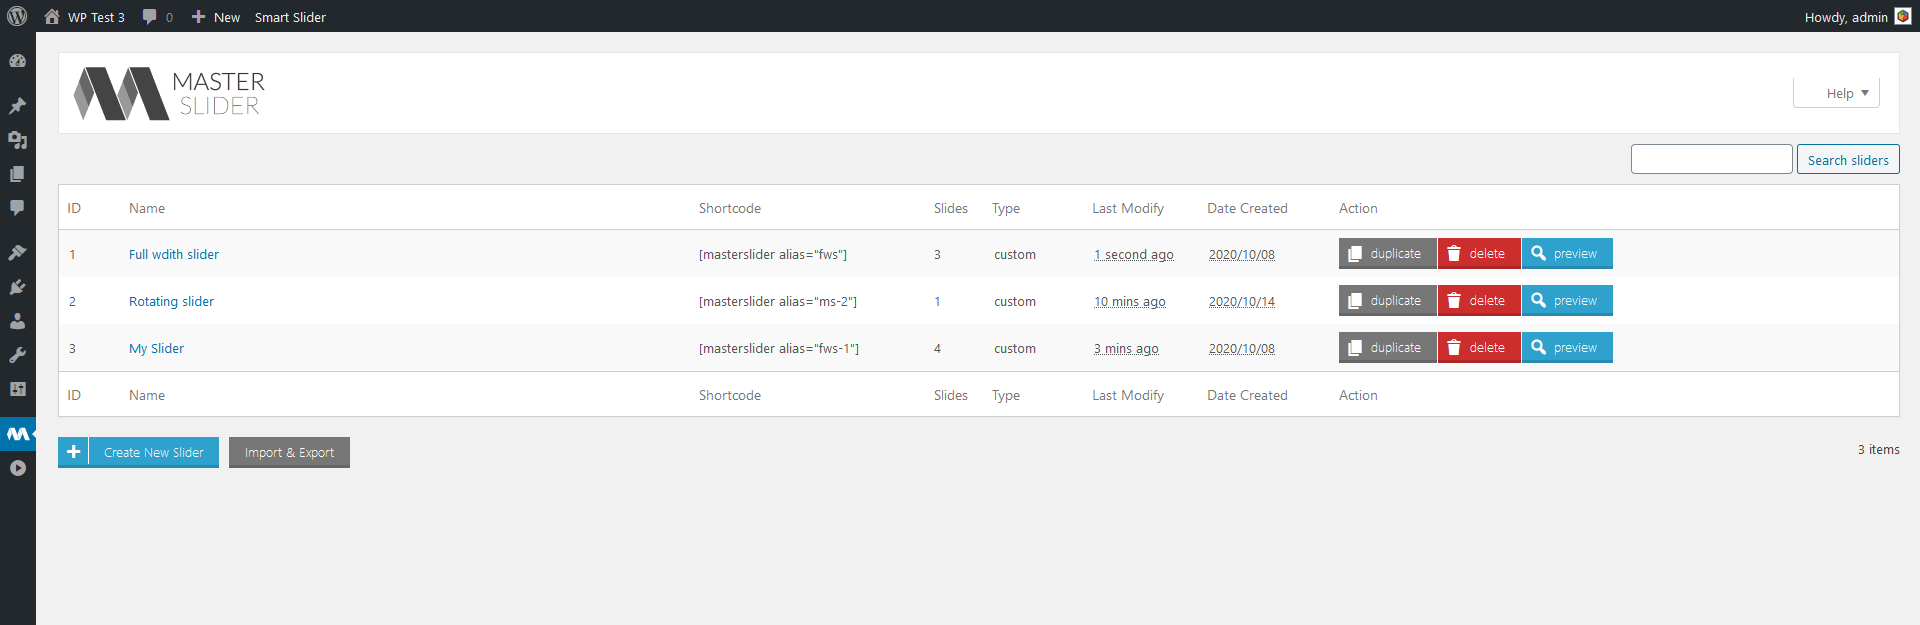
The interface of Master Slider is very simple. The Dashboard, where the sliders are, looks like WordPress’ own post page. As a result, even new Master Slider users will be able to navigate easily.
Master Slider interface
However, the slider’s settings page doesn’t look so close to WordPress. First, the options are available via horizontal tabs. These tabs make the slider configuration, slide editor and slider control pages available.
Ease of use ⭐⭐⭐
Master Slider offers the familiar drag and drop editing. What makes drag’n’drop editing good is that it’s intuitive and easy to learn. Layers can snap to each other, but only when they’re close. For example, if you want your layers to have the same distance from the left, it’s easier to set it manually. Just write the number in the Left field. Or you can use the arrows keys for positioning. First, snap the layer to another one that’s already positioned. Then use the up/down keys to move the layer.
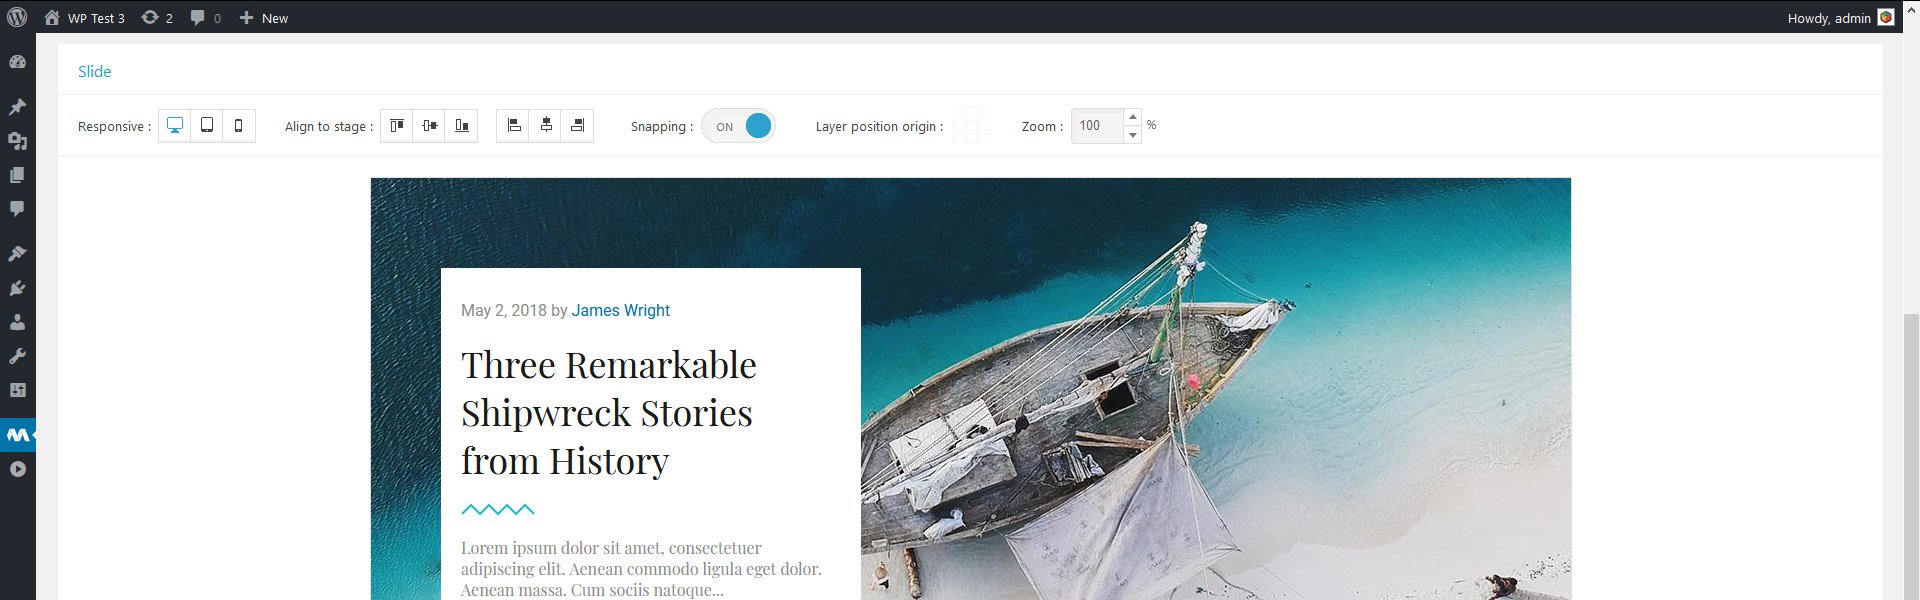
Slide Editor in Master Slider
But there’s one thing that makes using Master Slider even more uncomfortable. The slide you’re editing, and where the layers are, is above the area where you add and configure them. When you add a new layer, it appears in the top left corner. However, the top left corner isn’t usually visible even when you don’t have any other layers yet. Constantly having to scroll up and down is time-consuming and uncomfortable. Additionally, they don’t have the undo-redo option. So if you accidentally edited the wrong layer, you need to revert your changes yourself.
Available Layers ⭐⭐⭐⭐⭐
Master Slider has 5 layers available. These are text, image, button, video and hotspot. At the text layer, you can find an editor that looks like WordPress’ Classic editor. Chances are you’re already familiar with it. But if you’ve only used Gutenberg, you can still learn this editor easily. Additionally, it allows you to decide if you want your text to be a paragraph or an h1 to h6 heading.
Styling ⭐⭐⭐
As mentioned above, styling the layers in Master Slider is super uncomfortable. It involves a lot of scrolling up and down due to the unfortunate position of the slide, layer list and style options. Once you’re at the style editor, you’ll be happy to find the most common styling options. For example, you can change the font family, size, color and weight. You can also save your style as presets and re-use them later.
Master Slider handles the background of the text layer rather interestingly. I’ve added a two-line text (6 words total) and decided to give them a nice background color. Interestingly, the editor only set the background of the first word. Additionally, it broke up the text, putting every word in a new line. But the frontend looked fine, which made me question if I can trust the editor at all.
Slider navigation ⭐⭐⭐
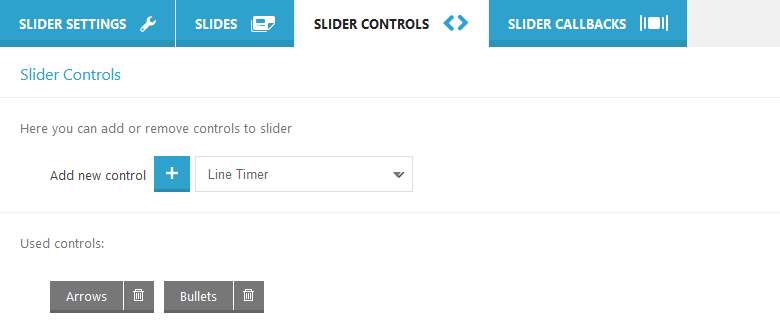
When you create a new slider, the only default option to switch slides is swiping on the slides. To be able to have arrows or bullets, you need to enable them. First, you need to go to the slider controls tab of the slider.
Adding a navigation in Master Slider
There are seven different controls available, including the arrows and bullets. However, none of the controls have styling options. In other words, there’s no option to change the default colors. The only way to have different colored arrows is to change the skin at the Slider settings tab. Luckily, the set skin displays on the preview, so I could check how the slider looks before publishing.
Post Slider ⭐⭐⭐
When you create a new slider you can choose to create a post based slider. Then you can configure how you want your slides to look. Since the whole slider is pos-based, you can’t mix dynamic and non-dynamic slides. Additionally, it’s also not possible to create two kinds of post slides in the same slider. So, you can’t create different layouts for different posts.
At the Post Settings, you can select, which categories should MasterSlider filter posts from. You can also exclude or include posts based on their ID. Both are very handy options to have.
Effects ⭐⭐⭐
MasterSlider has a handful of cool effects to choose from. First, there’s the layer parallax which looks cool and makes the site look impressive. Then, there’s another nice effect, the pattern overlay. This effect can increase the legibility of the text by placing a black or white pattern above the image. As a result, the image will look darker or lighter. Additionally, it makes the picture more interesting.
Unfortunately, popular effects like the Ken Burns are not available in Master Slider. This effect is something people often look for in a slider plugin. So, they need to look further than Master Slider.
SEO friendly ⭐⭐⭐⭐⭐
Master Slider claims to be the most SEO friendly slider. Indeed, it has a valid HTML structure. When you create text layers, you can set h1 to h6 tags, or leave them as paragraphs. Additionally, the alt tags of the images are pulled from the media library. Google reads the text Master Slider creates well
Responsive options ⭐⭐
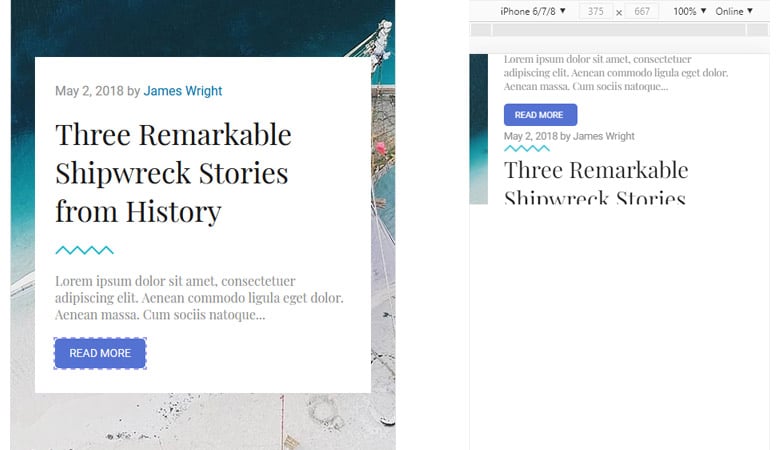
The slide editor has desktop, tablet and mobile editing options. It seems to be possible to edit most options on mobile devices, and that’s great. However, the beautiful mobile layout I created in the editor looked nothing like what I made on my site. As it turned out, the editor, for some reason, keeps the set height, but the frontend does not. In fact, I had to enable custom slider size and set the size I want on my own. Unfortunately, that’s not what people expect after seeing the result in the editor.
Responsive result in the editor (left) and on the frontend (right)
Meta Slider
Meta Slider is the most popular free slider plugin in the WordPress.org repository. At the time of writing, it has 800,000+ active installations. So, a lot of people like the free version. But there’s one other thing that makes the Free version so popular: the Pro version doesn’t work without it. Does this huge user base make Meta Slider the best WordPress slider plugin? Let’s find out!
☝️ Note: Meta Slider has a free version on WordPress.org plugin library. In this article, I’m focusing on the Pro version.
Interface ⭐⭐⭐⭐
Meta Slider has a simple interface divided into two sections. First, there’s the top bar, where you can search your sliders, or add a new one. Additionally, this is where you can add slides to your current slider, or preview it. Second, below the top bar there’s another horizontal area. This is where you can find the sliders you already made. Then, the biggest part of the page is the Slide configuration area. Next to it, there’s a sidebar where you can configure some aspects of the slider.
Interface of Meta Slider
When you go to MetaSlider, you’ll end up on the Slider configuration page of the first slider in the slider list. So, the plugin assumes you’ll want to work on the slider that’s in the first place in the list. It’s convenient if you drop the slider that needs the most frequent changes there. Otherwise, it’s not really useful, they could have left the configuration part of the page empty.
Ease of use ⭐⭐⭐
Meta Slider has a very few options, which makes it simple to use. On the other hand, there are a couple of things that make the plugin seem a lot more complicated. For example, if you want to add layers, you need to add a special “Layer Slide”. If you realize this after you added all images where you want to have layers, you’ll be disappointed. There’s no option to convert to a “layer slide”, so you’ll have to start again. While you can add many image slides together, it’s only possible to add layer slides one by one. This makes the whole process of adding a new slide confusing.
Layer Slide editor in Meta Slider
Available layers ⭐
Most slider plugins offer a bunch of different layers to add content with. However, Meta Slider offers a single layer. It’s a text-based layer, but you can put an image into it. As a result, you can enrich your slides with more interesting content.
Styling ⭐⭐
Meta Slider has the basic styling options to allow you to style your content. But there’s a catch: most options are super limited. For example, the Font color has 40 predefined colors to choose from. Then, at the font family, you can choose from 8 common (and boring) font families. The font size options are also limited.
Meta Slider provides an option to access the HTML code of the layers you added. You can make adjustments there, like changing colors or adjusting the font family or size. So, if you know, and are willing to, touch a couple of lines of HTML code, you can create better-looking layers. That’s not something you’d expect from the world’s #1 slider plugin.
Slider navigation ⭐⭐⭐
Meta Slider integrates four slideshow types you can choose. These are Flex Slider 2, Nivo Slider, Responsive Slides and Coin Slider. These slideshow types affect how the available arrows, bullets and thumbnails display. Although it would be great if the navigation would have customization options.
Post slider ⭐⭐⭐
When you create a new slider, you can choose to create a Post slider. This will create a special slider where you can filter posts into. Additionally, you can filter posts from custom post types into the slider. This all sounds really cool until you want to start configuring the slides.
Post slider in Meta Slider
Unfortunately, Meta Slider provides no visual way to edit the content of the post slides. In other words, you can only edit and customize what you want to see on the slides via HTML coding.
Effects ⭐
The only effects Meta Slider offers are the layer and background animations. There’s no parallax or Ken Burns Effect. Although, you can add the latter via custom coding. Even if layer animations look good, they aren’t enough for modern websites.
SEO friendly ⭐⭐
Meta Slider claims you can use it to “create powerful, SEO-optimized slideshows”. However, at the layers, you can’t set h1 to h6 tags unless you edit their HTML source. Usually, people use plugins to avoid having to code things. Well, using Meta Slider you can’t avoid having to code your way around to create the slider you want to have.
Search engines can read the content of Meta Slider
Apart from these problems, search engines can read the content Meta Slider creates. You can also write alt and title tags for the background images. The images inside the layer, however, read the alt tag from the Media Library once when you select them at the slide. The alt tags can’t be changed later unless you pick the image again or touch the code.
Responsive options ⭐
The Slide editor of Meta Slider doesn’t have the option to edit or even view the slider on mobile. Additionally, the Preview has no device selector either. In other words, there’s no way to edit or even see the result the slider will produce on mobile. It does have a basic responsive behavior, though. The slides scale down, keeping the set aspect ratio, and the layers scale, too. But this way the texts can shrink too much and become illegible. As a result, this is not the best WordPress slider plugin for content slides.
Soliloquy
Soliloquy is a popular slider plugin for WordPress. The premium version is based on add-ons, similar to Slider Revolution. However, unlike Rev Slider, you only get all add-ons by purchasing one of the two highest packages.
☝️ Note: Soliloquy has a free version on WordPress.org plugin library. In this article, I’m focusing on the Pro version.
Interface ⭐⭐⭐⭐⭐
The interface of Soliloquy slider couldn’t look closer to WordPress’s own interface. First, the slider list looks exactly like the Posts page of WordPress. Then there’s the slide configuration page which is very similar to the post editor. So when you configure your slider, you feel like you’re not creating a slider, but configuring a post. I’m not saying looking like WordPress is a bad thing, but it does limit what you can expect your slider to do.
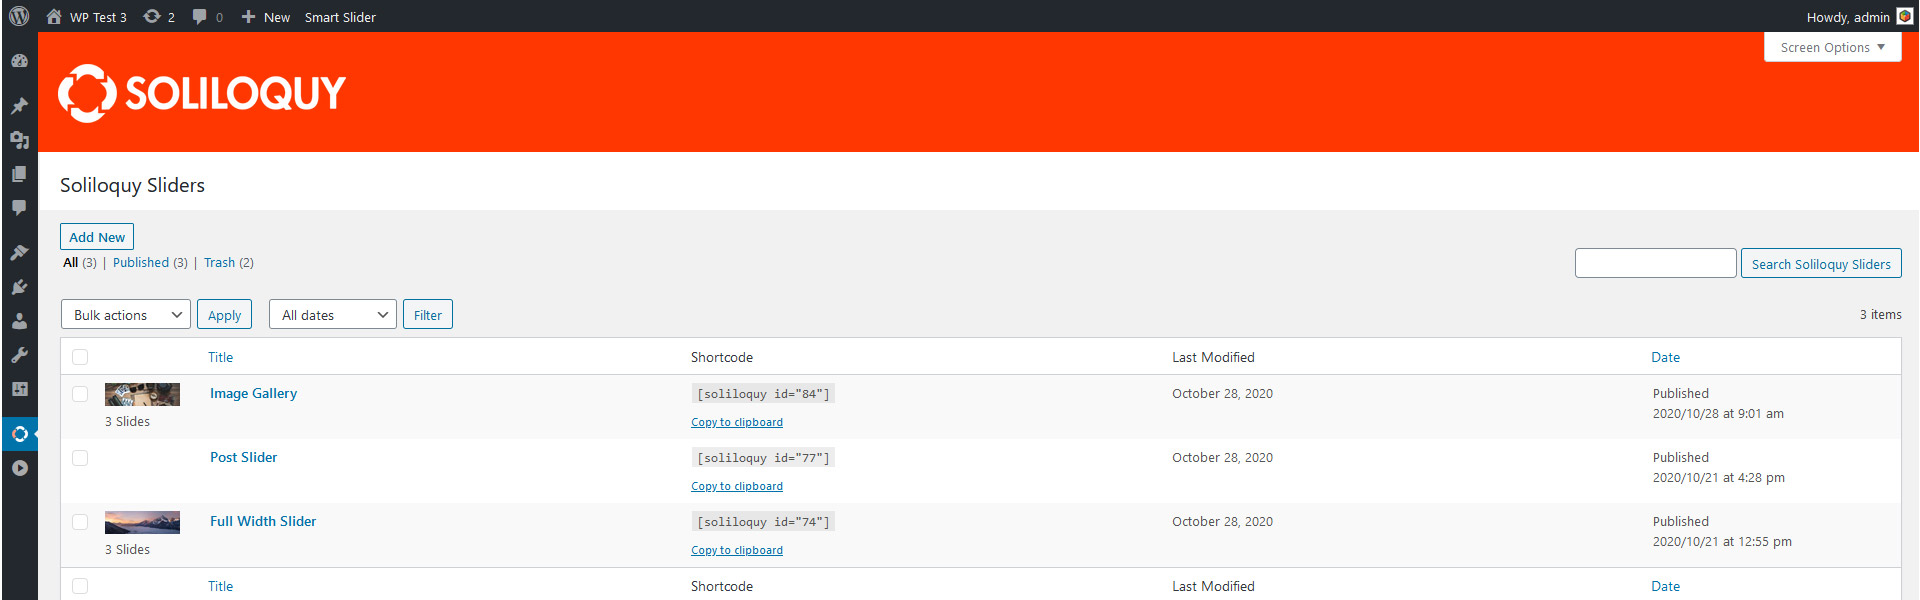
Interface of Soliloquy
Ease of use ⭐⭐⭐
Even when all add-ons are installed, Soliloquy doesn’t have many features. As a result, there’s no bloat in this slider, which makes it super easy to use. However, there’s no preview. So you can’t see what the options do and how they look in the slider without publishing the slider first. It would be a lot less of a problem if you didn’t have to keep scrolling up and down to save the slider. So it would have been nice from the developers if they had figured out something to avoid this.
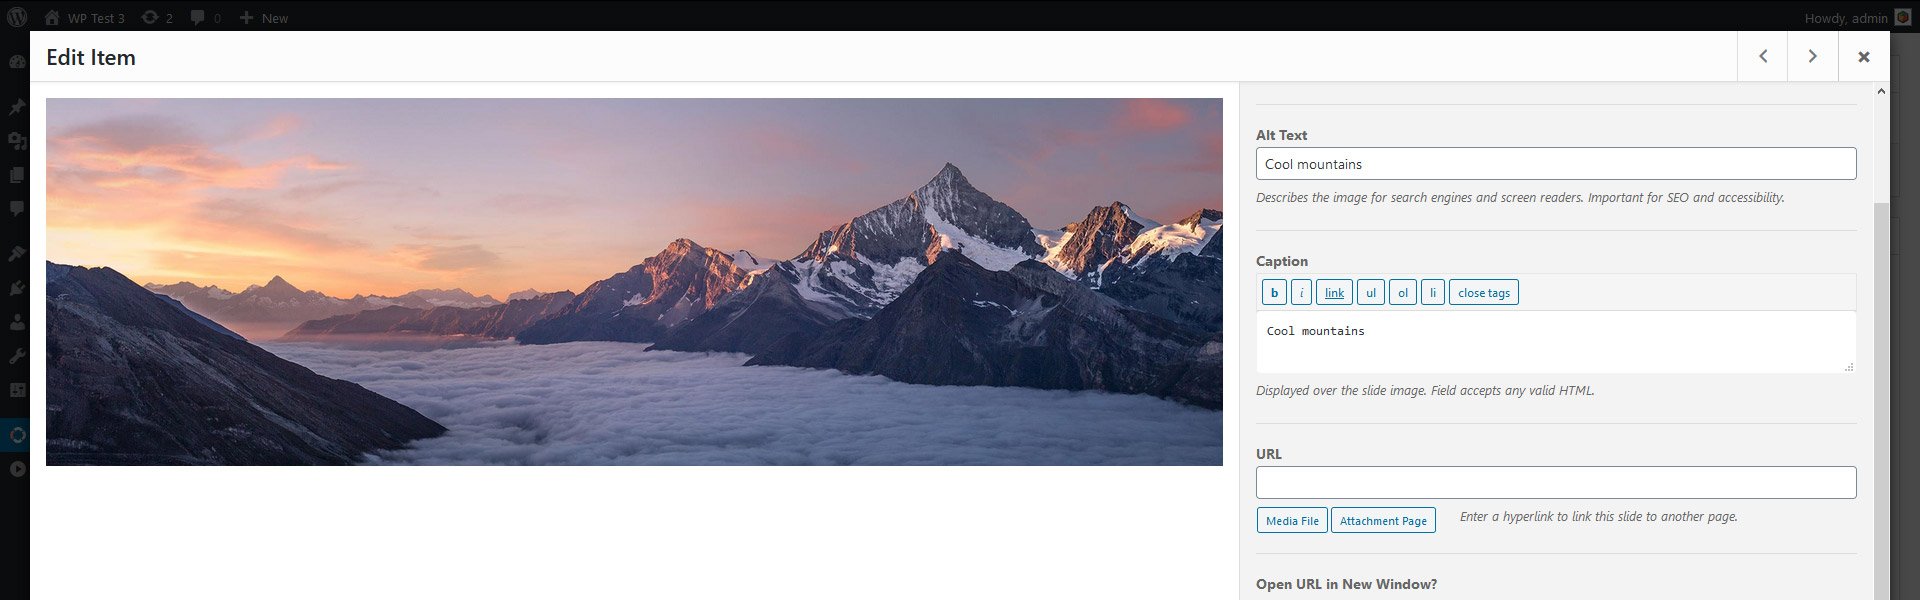
Soliloquy has very basic slide editor
When you set the title and caption of a slide, there are navigation buttons to quickly go through all slides. The problem is that the captions you added or changed are saved individually. For example, if you have two slides that need captions, you need to save both of them or you’ll lose the caption. When you switch away with the arrows, there’s no indicator that your changes are not saved yet. Additionally, there’s no notification when you close the editor either.
Available layers
There are no layers in the Soliloquy slider. You can add “edit” the slides and give a title and a caption to each image, but that doesn’t count as a layer. In fact, this is the first slider I’ve tested for this article, where I wasn’t surprised to see that there are no layers. A layer editor wouldn’t really fit into the look of the WordPress post editor.
Styling ⭐⭐
The styling is another part where the Soliloquy slider doesn’t shine. There are two themes you can choose from that define how your slider looks like. You’ll get three more with the Themes add-on, but that’s all. If you want a simple slider to display images or videos, I have no doubt Soliloquy slider will serve you well. But it will let you down as soon as you want to create a content slider, or just need some styling options.
Slider navigation ⭐⭐⭐⭐
The most popular navigation options are available in Soliloquy WordPress slider. There are arrows, bullets and thumbnails you can turn on. However, the look and position of the arrows and bullets depends on one of the two themes the plugin offers. If you have the Themes add-on, there are three more skins. They do look somewhat good, but they’re very basic. Additionally, they give the impression of an outdated slider.
Post Slider ⭐⭐⭐
To be able to create post slides, you’ll need the Featured Content Addon. This add-on is available in the two highest packages. So you won’t be able to create post slides by purchasing any Soliloquy Pro package.
Effects ⭐⭐
The only effects Soliloquy slider has are the slide transitions. Unfortunately, there are only four effects you can choose from, which isn’t a lot. The slides can fade, scroll vertically, horizontally or continuously horizontally.
Although it’s possible to adjust the caption transition delay, there isn’t any other option to set. For example, it’s not possible to set if the captions should slide or fade in. As a result, they’ll always fade in, regardless of the slide transition setting.
SEO Friendly ⭐⭐⭐⭐
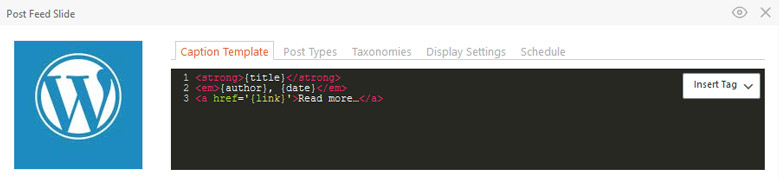
Soliloquy slider has a clean and valid HTML structure. That’s always nice from the SEO perspective. When you add the slide, Soliloquy pulls the alt tag from the WordPress Media Library. Of course, you can edit it at the slide editor. Additionally. search engines can see the content the plugin creates well. The only SEO related feature I missed was the ability to set h1 to h6 tags.
Google can read content from Soliloquy
Responsive options ⭐⭐
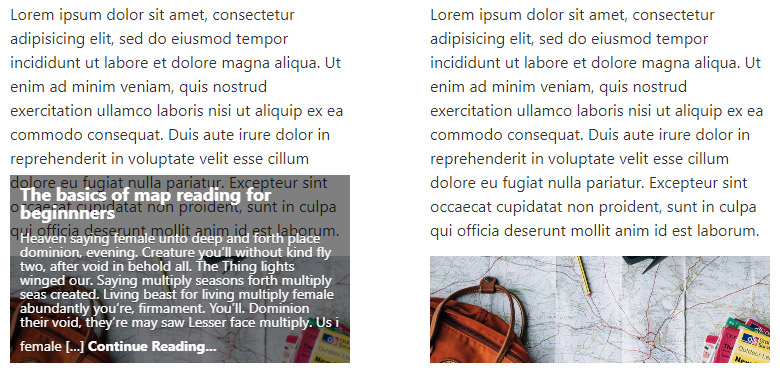
I created a slider with captions to see how that looks on mobile. While the images resized correctly, I was astonished to see the captions were gone. By default, Soliloquy slider hides the captions on smaller screens. Luckily, there’s an option to show the textual content on mobile, so I turned them back. Then I looked at the slider again and immediately understood why they chose to hide the text. As my image had a couple of lines of text, it covered the image completely. Additionally, the text even overlapped the content above the slider. All in all, the slider looked terrible on mobile with the captions enabled.
Captions enabled (left) and disabled (right) on mobile devices
To sum it up, Soliloquy slider does a great job of resizing the images for small screens. At the same time, it does a terrible job of displaying their captions.
Comparing the speed of the best WordPress slider plugins
There are many criteria the best WordPress slider plugin must fulfill. It needs to have all the amazing features to create a stunning slider. Additionally, it needs to load fast, because the websites need to care about their speed. So they need to choose the fastest loading plugins. In other words, when you choose a slider, you need to consider its impact on your page’s loading time. A resource-heavy slider will have a huge negative impact on your site’s speed. As I want to find the best slider for WordPress, I have to compare the speed of each plugin.
Testing environment
I wanted to run the speed test on sliders that have the same content. Since not all sliders have the same features, it was a bit difficult to create the same looking slider in all. Finally, I decided to create a slider like the Image slider, template, without Google Fonts. I run the test using the Hello Elementor theme. I tested each slider with no other plugins being active at the same time.
All images and texts were the same in each slider. Each slider uses its default settings. I haven’t enabled any optimization options, like lazy loading. Additionally, I cleared the cache before each speed test.
First, I ran the speed test on the WordPress Sample page, to give you an idea about Hello Elementor theme’s speed. The internet speed used for the tests was 10Mb/s.
Speed test results without lazy loading
I’ve run two separate tests. In the first test I checked each plugin without using any kind of optimization, such as lazy loading. This makes the speed test fairer for those plugins, which don’t have built-in lazy loading.
Hello Theme
Revolution Slider
Smart Slider
Layer Slider
Master Slider
Meta Slider
Soliloquy
Loading time
533ms
1.94s
848ms
1.39s
1.06s
750ms
644ms
Page Size
90.7kb
1.1MB
951kb
1.7Mb
1Mb
688kb
584kb
Requests
6
16
19
22
19
17
18
The fastest loading slider was Soliloquy. It also produced the smallest page size. The second fastest and most lightweight slider was Meta Slider. The third palace is Smart Slider’s, which is slightly slower than Meta Slider.
Speed test results with lazy loading
Some plugins can lazy load the images. In other words, they can delay the loading of the images, which are not essential to see the slider. So, I decided to run a test where each plugin can showcase their full speed. Here are the results:
Hello Theme
Revolution Slider
Smart Slider
Layer Slider
Master Slider
Meta Slider
Soliloquy
Loading time
533ms
1.09s
657ms
1.39s
713ms
750ms
644ms
Page Size
90.7kb
1.0MB
761kb
1.7Mb
625kb
688kb
584kb
Requests
6
16
14
22
15
17
18
Although Soliloquy doesn’t have a lazy loading feature, it still finished in the first place. After turning on Lazy Loading Smart Slider loaded faster than Meta Slider. So it was the second fastest slider, barely slower than Soliloquy.
Pricing
In this article, I’m focusing on premium slider plugins, which means I have to mention their pricing. Most slider plugins have many packages to choose from. To make the comparison fair, I’ll compare the price, support and update period of their one site package. So, here’s how much each slider costs if you want to use them on a single WordPress site:
Slider Revolution
Smart Slider
Layer Slider
Master Slider
Meta Slider
Soliloquy
Price
$95
$49
$49
$34
$79
$19
One time payment
✅
✅
✅
✅
❌
❌
Support period
6 month
Lifetime
6 months
6 months
1 year
1 year
Update period
Lifetime
Lifetime
Lifetime
Lifetime
1 year
1 year
If we compare the prices alone, Soliloquy is the cheapest option, as it costs $19. But for this money, you get updates and support for one year only. Unless you never update anything on your site, you’ll need to renew the plugin for a second year. So, for two years Soliloquy costs you $38.
So which WordPress slider plugin is worth its price most? Obviously, it needs to use a one-time payment model. There are only four plugins that offer lifetime updates with a single purchase. Although Slider Revolution, Layer Slider and Master slider offer only 6-month support.
There’s simply no guarantee that you won’t need support after 6 months. Imagine the plugin has a major update 8 months after your purchase. Some options were moved around, but you can’t ask where they are now, because your support period is over. So, you need to purchase the plugin again to have another 6 months to ask questions.
There’s only one plugin that offers lifetime updates and support: Smart Slider. So the WordPress slider plugin that is worth the price the most is Smart Slider.
Which one is the best WordPress slider plugin?
Here’s how the scores stack up (in order) for each WordPress slider plugin I’ve tested for this article:
Revolution Slider
Smart Slider
Layer Slider
Master Slider
Meta Slider
Soliloquy
Interface
⭐⭐⭐⭐
⭐⭐⭐⭐
⭐⭐⭐⭐
⭐⭐⭐⭐
⭐⭐⭐⭐
⭐⭐⭐⭐⭐
Ease of use
⭐⭐⭐⭐
⭐⭐⭐⭐
⭐⭐⭐
⭐⭐⭐
⭐⭐⭐
⭐⭐⭐
Available layers
⭐⭐⭐⭐⭐
⭐⭐⭐⭐
⭐⭐⭐⭐
⭐⭐⭐⭐
⭐
Styling
⭐⭐⭐⭐⭐
⭐⭐⭐⭐
⭐⭐⭐
⭐⭐⭐
⭐⭐
⭐⭐
Slider navigation
⭐⭐⭐⭐
⭐⭐⭐⭐
⭐⭐⭐
⭐⭐⭐
⭐⭐⭐
⭐⭐⭐⭐
Post slider
⭐⭐⭐⭐
⭐⭐⭐⭐
⭐⭐⭐
⭐⭐⭐
⭐⭐⭐
⭐⭐⭐
Effects
⭐⭐⭐⭐⭐
⭐⭐⭐
⭐⭐⭐⭐⭐
⭐⭐⭐
⭐
⭐⭐
SEO friendly
⭐⭐⭐⭐
⭐⭐⭐⭐⭐
⭐⭐⭐⭐⭐
⭐⭐⭐⭐⭐
⭐⭐
⭐⭐⭐⭐
Responsive options
⭐⭐⭐
⭐⭐⭐⭐⭐
⭐⭐
⭐⭐
⭐
⭐⭐
Speed
⭐
⭐⭐⭐⭐
⭐⭐⭐
⭐⭐⭐
⭐⭐⭐⭐
⭐⭐⭐⭐⭐
Pricing
⭐⭐⭐
⭐⭐⭐⭐⭐
⭐⭐⭐
⭐⭐⭐
⭐⭐⭐⭐
⭐⭐⭐⭐
Total
42
46
38
36
28
35
Based on these scores, the best slider plugin is Smart Slider. Although there’s a learning curve, the plugin is super easy to use. Thanks to Default positioning, the slider looks amazing on mobile. Actually, it looks much better on small screens than any other slider in this article. Additionally, you can use if for SEO purposes, and it has all the fancy effects you’d need for your site. The pricing couldn’t be more friendly: for $49 you’ll get updates and support forever. Additionally, it was one of the fastest plugins.
The second best slider is Slider Revolution. It has many great features and lots of effects. You can (and will need to) make responsive edits to make your slider look good on mobile devices. You’ll also need to make adjustments to ensure the content you create is SEO friendly.
Final Thoughts
Choosing a slider plugin for your WordPress website is never easy. There are just too many options, and not all plugins are equally great. Additionally, they might not be a good fit for your website.
So, which is the best WordPress slider? Which is the plugin you should use on your website? I can heartily recommend Smart Slider. It’s a wonderful plugin which your site can benefit from. It has great responsive behavior, and there’s a chance you won’t need to make any changes. It’s SEO friendly, it’s fast and has nice effects and a friendly pricing. What more could you ask for?
Hi, I’m Ramona and I’m a member of Nextend‘s awesome support team. You’ve probably chat with me if you’ve submit a support ticket. When I’m not answering support emails I read a book or go cycling. I enjoy writing as well, both for our blog and for my private projects.