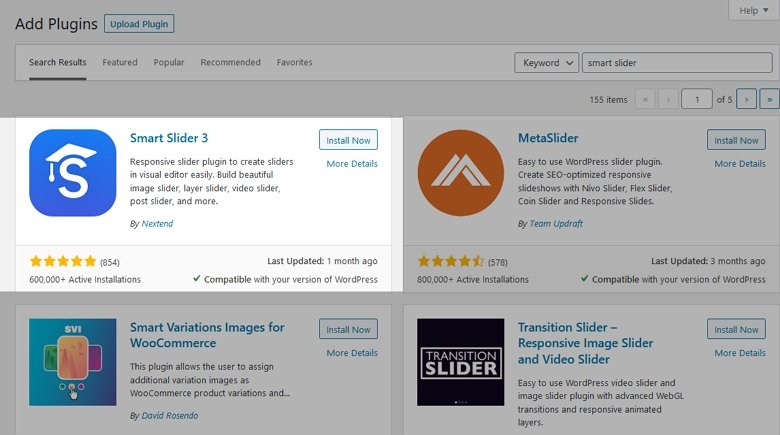
Looking for a great free slider? Easy. MetaSlider. It’s the most popular free slider available in the WordPress.org plugin repository with 800,000+ active installations. But is it the best free slider plugin for WordPress?
Interestingly, Smart Slider 3, which I recently found was the best premium slider plugin for WordPress in a recent comparison test, is the second most popular free plugin in the repository with 700,000 active installations. So… what’s so great about MetaSlider that 100,000 people prefer it over Smart Slider 3?
Having never used MetaSlider before, I was determined to find out.
In this post, I’m going to put the free version of MetaSlider and Smart Slider 3 to the test, comparing them side-by-side for their features, pricing and performance. I’ll also walk you through a comparison project where I’ll produce the same slider using both plugins so you can see how they work – and which one provides the best user experience.
As far as features go, MetaSlider and Smart Slider 3 offer a very different list of features in the free versions of these plugins. Here’s a side-by-side comparison of their features:
Meta Slider
Smart Slider 3
Templates
❌
6
Layers
❌
✅
Dynamically display WordPress posts
❌
✅
Default/Absolute layer position
❌
✅
Page builder support
❌
✅
HTML overlay slides
✅
✅ (available as a control element)
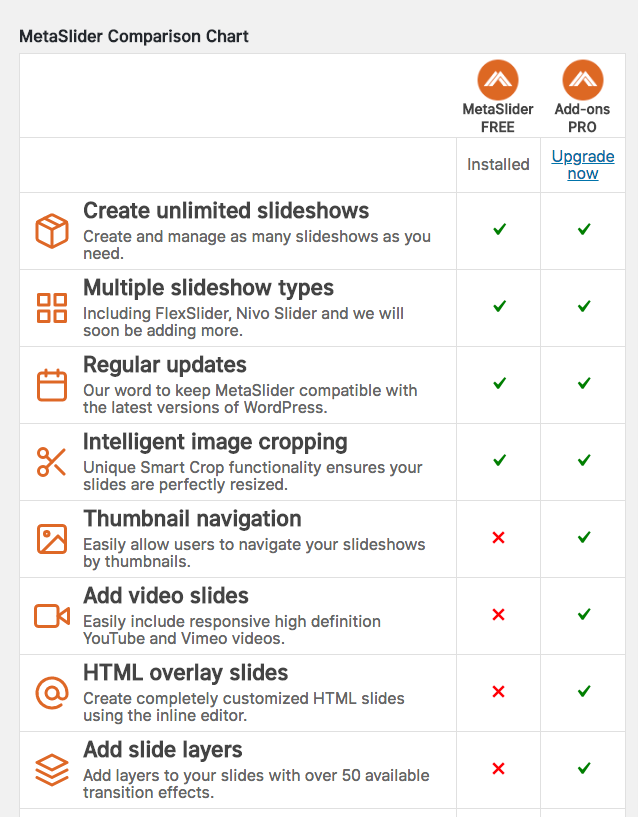
I’ve intentionally left out of the table the different slider types for both plugins because MetaSlider says it has four types in its marketing, when really it one. Smart Slider 3 has two distinct slider types (default and block).
As I discovered later during the comparison project (which I completed after putting this features section together), MetaSlider doesn’t offer layers as a free feature. This is a BFD. It means you can only create very basic, simple sliders, with no buttons or text overlays. This makes the free version of MetaSlider incredibly lacking in features compared to the free version of Smart Slider 3.
As you’ll see in the comparison project below, there is so much more you can achieve with the free version of Smart Slider 3 because it offers just the right number of features, so you can create a beautiful slider without feeling forced to upgrade for something as simple as layers.
Get on board! Join our 142,416 subscribers!
Get our latest news, tutorials, guides, tips & deals delivered to your inbox.
No spam. No charge. Just curated emails.
💰 Pricing
Both plugins are available to download for free from the WordPress plugin repository. But if you’re interested in accessing pro features, here’s what you can expect to pay.
Meta Slider
When you upgrade to Meta Slider Pro plan you get added support for:
YouTube and Vimeo slides
HTML slides
Layer slides with CSS3 animations & HTML5 video backgrounds
Dynamic post feed/featured image slides (content slider)
Custom themes
Thumbnail navigation
Premium support
There are five different pricing plans in addition to the free option:
1-2 site license
5 site license
20 site license
100 site license
Unlimited site license
$39
$79
$119
$189
$289
If you’re interested in upgrading from the free version, you can try MetaSlider risk-free thanks to a 30-day money back guarantee.
Smart Slider 3
The free version of Smart Slider 3 is one of the most feature-packed plugins I’ve ever come across in the WordPress repository. Seriously, it’s amazing for the price you pay – absolutely nothing!
When you upgrade to a paid plan, you also get access to:
Smart Slider 3 offers a handy 14-day money back guarantee if you change your mind and want to return to using the free version.
What I found a breath of fresh air when using the free version is that it doesn’t constantly nag you to upgrade like a lot of other free plugins do. Instead, the plugin simply displays a “Go Pro” link in the top-right of the slider dashboard. It’s unobtrusive and doesn’t interrupt the user experience – a big thumbs up from me.
The new way to build a Slider
Next generation visual editor, customizable animations & effects, and access to hundreads of premade templates.
The best way to compare two slider plugins is to create the same slider using both plugins. So in order to test MetaSlider and Smart Slider 3, I went searching for a slider I could try and emulate…
The Project
Rather than design a new slider, I wanted to recreate Spotify’s homepage slider:
It’s a fairly simple slider with four slides that all have the same background image, but different text and button text/links. I figured since I was testing free plugins, I shouldn’t attempt anything too complicated in case I couldn’t access the features I needed.
So I found a kind of similar background image from Unsplash to use for my slides – pretty much the only asset I needed.
So here we go…
🎓 Creating a Slider with Smart Slider 3
First thing’s first: I searched for “Smart Slider” in the repository and installed and activated it.
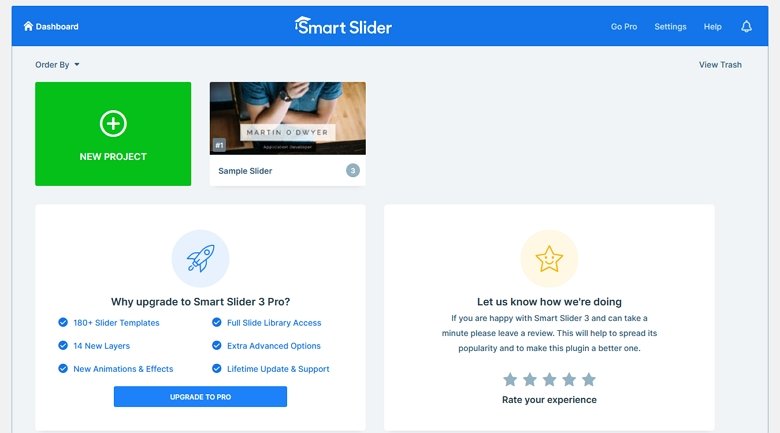
After activating the plugin, a menu item is displayed in the left-hand sidebar, which you need to click to access the Smart Slider 3 dashboard.
Once you’re in the dashboard, the top of the page displays a CTA linking out to a video on how to get started using the plugin. I watched the video and it was a good introduction to getting started with the plugin and adding sliders. Great start so far.
The dashboard is well-laid out, with large buttons that are clearly labelled so there’s no confusion about how to get started (simply click on the “New Project” button). To to access the template library if you want to get started with a template (just click on the “Template Library” button), check out a sample slider (click on “Start with a Template”) or check out what you get with a pro license.
It’s also nice to see that from the start there is easy access to support, in the header at the top. The link enables you to search Smart Slider 3’s extensive documentation, which is fantastic for a free product.
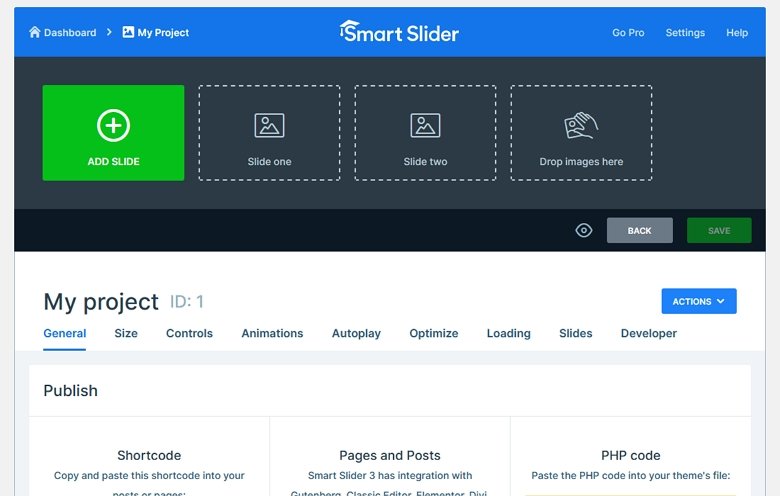
I clicked “New Project” to get started and a modal appeared, asking me to give choose if I want to Create a New Project or Start with a Template. I choose to Create a New Project, where I could give my slider a name and specify its dimensions.
After choosing my settings, I clicked “Create” and another screen loaded with the dashboard for my test slider.
Next, I clicked “Add Slide”, choose “Image” and uploaded the bubble image I had downloaded from Unsplash to use as the background for my slides.
Below the uploaded image slide there are various tabs for different features, such as controls, animations or autoplay. Before changing any of the Slider settings, I needed to work on my slides first. So I clicked on my first slide and was taken to the Slide Editor.
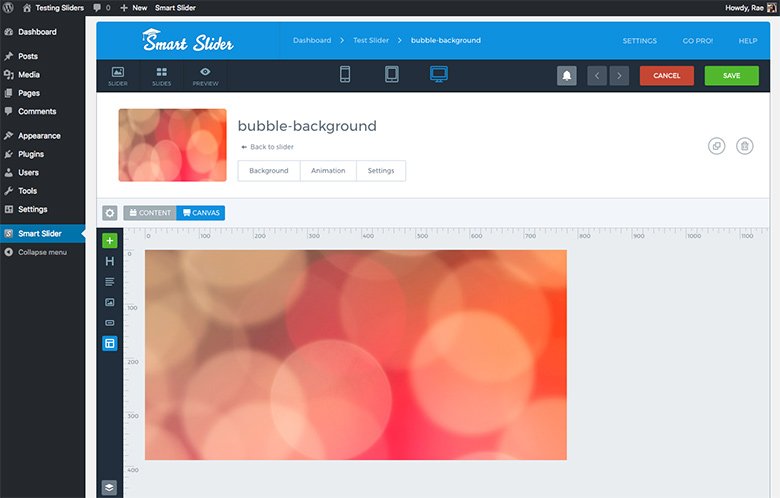
The editor is pretty basic, which I like – it’s not overwhelming and the icons to the left of the editor are easy to identify.
With my background image already in place, I started by adding the header text for my first slide. It’s pretty easy, just click the “H” icon to the left of the Slide editor and enter and style your text in the modal that appears. Rather than look for a similar font to Spotify’s headers, I decided to go with something a bit more fun.
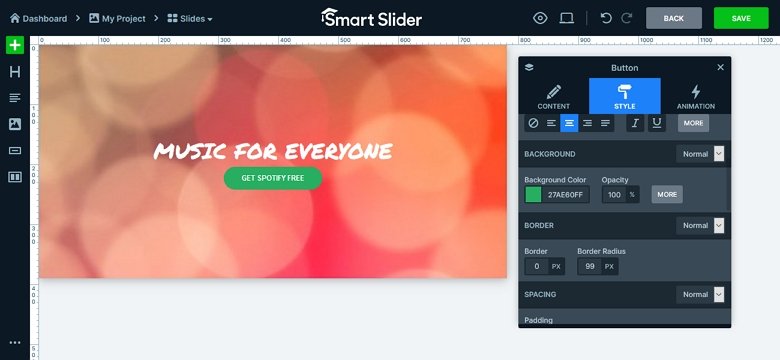
Next, I added a button by clicking the button layer in the sidebar. With the settings modal open, I updated the font (Arial) and styled the button to look like Spotify’s, with round edges, a green color and a lighter green color on hover.
Then I created a row and moved this button to the left column. I added another button to the right column and styled it with similar white colors that Spotify uses.
And voilà, my first slide finished! Now, that was really easy and took about 5 minutes, though I have used the pro version of Smart Slider 3 before so it wasn’t all new to me.
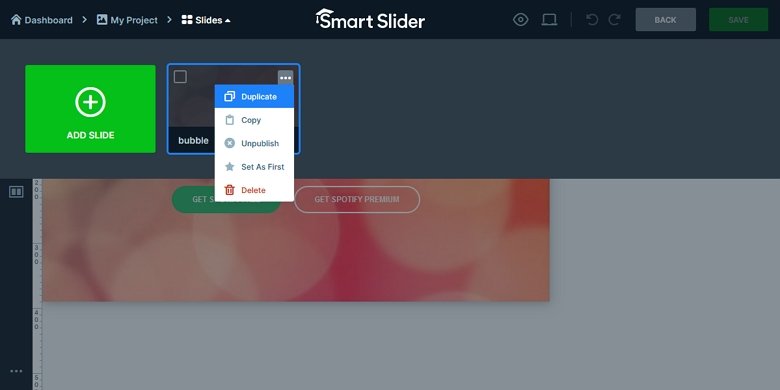
I clicked “Save” and then “Slides” to duplicate my first slide and start working on the second slide.
I then got to work replacing the header text and buttons for the second slide.
Repeating the steps above, I created a two more duplicate for the third and fourth slides and updated them with header text and button content.
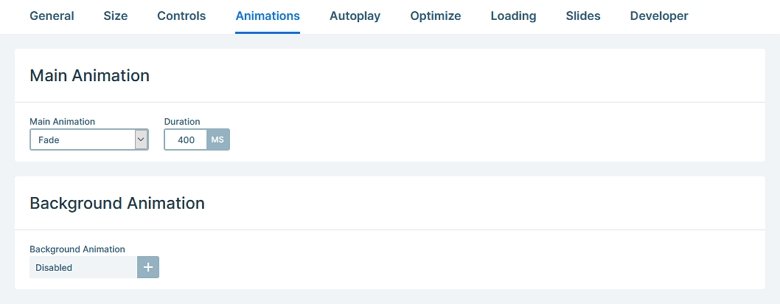
Next up, the animation. I needed the background image to remain static and the header text to fade with each change in slide. So I returned to the main screen for my slider and in the “General” tag, scrolled down to the animation section. I selected “Fade” and updated the duration to 400ms, since Spotify’s animation is faster than the 800ms default setting. I left the background animation as “disabled” since I didn’t want the background to change at all, just the text and buttons.
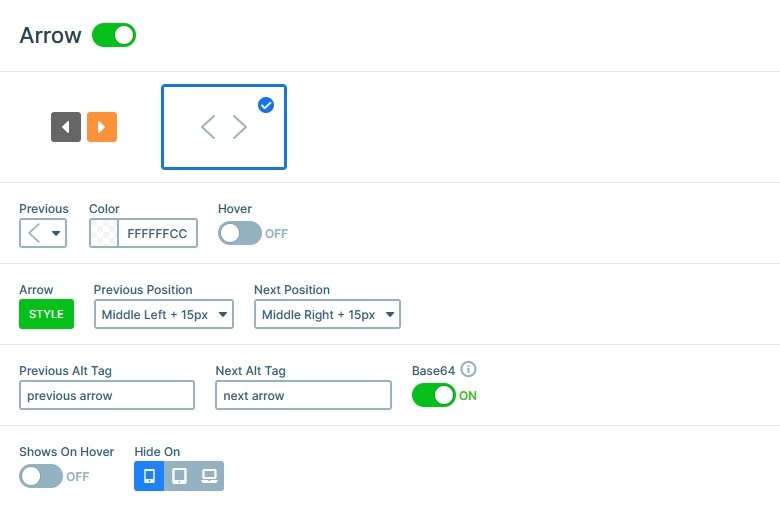
By this stage I’d been previewing my slider as I updated it and noticed the arrows were too far apart. The free version of Smart Slider 3 doesn’t offer any advanced navigational settings, which is fine because the arrows I needed were pretty basic. But it did allow me to offset the positioning of the arrows (update them to 50px) to bring them in closer from the sides of the slider.
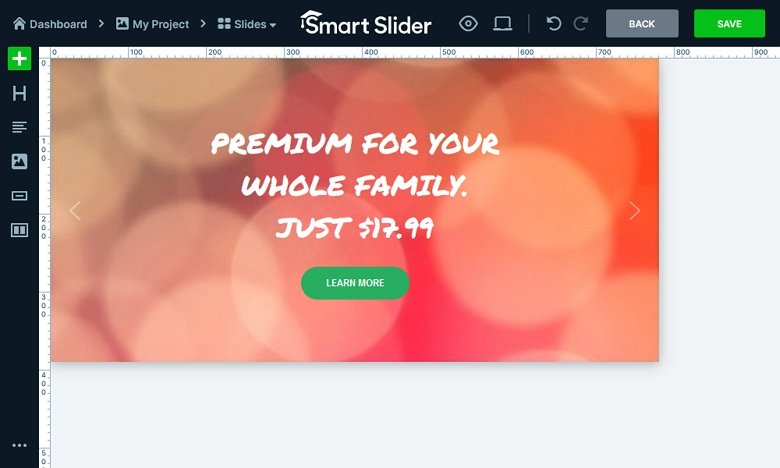
And here’s my finished slider:
I’m pretty happy with the result. It looks great and, more importantly, it was really easy to put together. I didn’t run into any problems at all using Smart Slider 3.
Now, let’s move on to creating the same slider with MetaSlider…
🖼️ Creating a Slider with MetaSlider
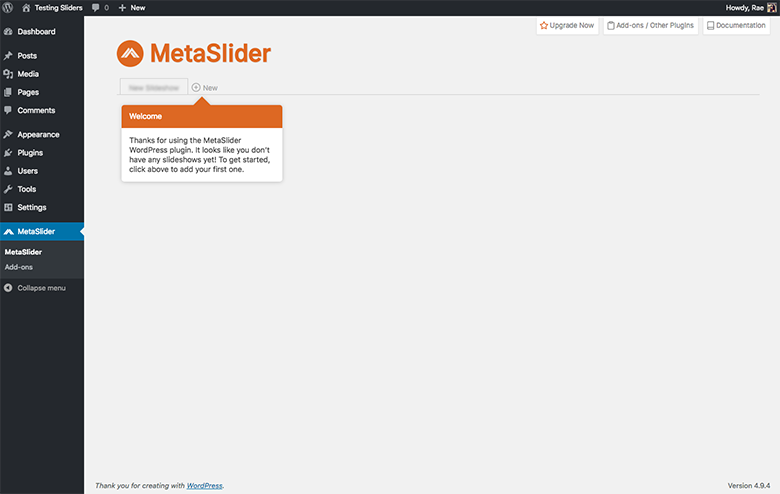
Like the free version of Smart Slider 3, I searched the plugin repository from within my WordPress site and installed and activated it. After activation, MetaSlider adds a menu item to the sidebar. The dashboard for the plugin is ultra minimalist, to say the least. Check it out:
There’s a simple wizard that prompts you to click “New” in order to create your first slide. Other than that, there’s an “Upgrade Now” button at the top, along with a button for add-ons and other plugins, and a third button for accessing documentation – very handy for MetaSlider noobs like me.
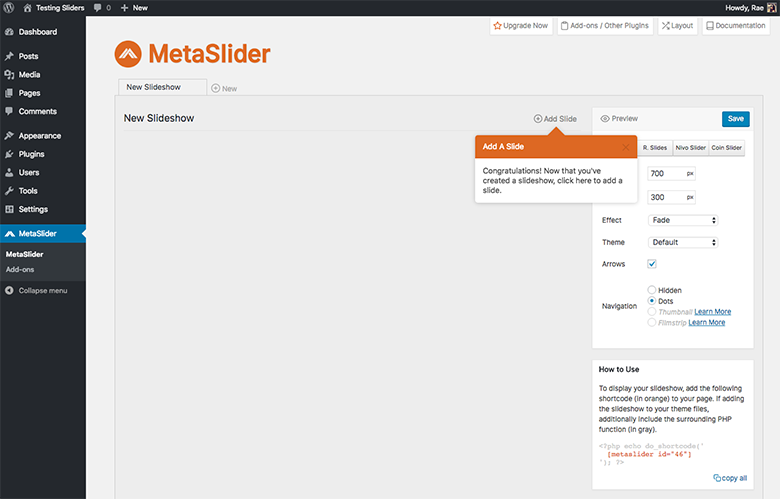
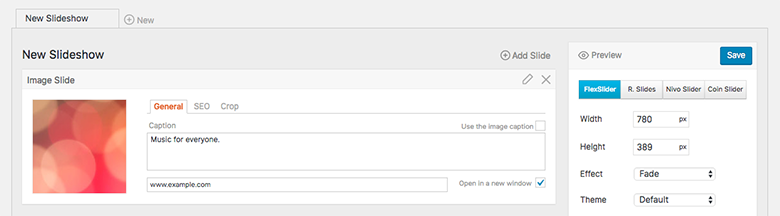
Not really knowing what I was doing, I clicked “New” and was taken to the slide editing screen. This screen is also pretty sparse, but the wizard clearly directs you to add your first slide. So I went ahead and clicked “Add Slide.”
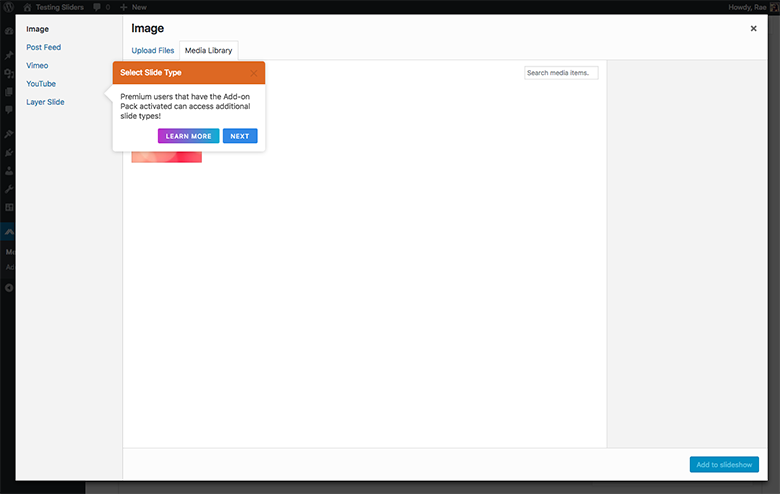
The Media Library modal then appeared, prompting me to upload a background image.
My first nag! I supposed it’s good to know that I can get more slide types with add-ons, but by this stage, I hadn’t really created anything yet so I wasn’t ready for an up-sell. Once I uploaded my background image and clicked “Add to slideshow” a modal popped up letting me know the tour was over and I was on my own. I do like wizards and product tours, so props to MetaSlider for using this technique to enhance the user experience.
The page then reloaded and my first slide appeared on the dashboard. I clicked around, not really sure what to do next. Where could I edit the slide? How could I add a text layer to the slide? How could I add a button??
Not really sure what was going on and why this screen was so basic compared to Smart Slider 3, I clicked on the “Add-ons / Other Plugins” button to see if layers were a pro-only feature… and sure enough they were.
What the…?! Well, there’s goes my idea for creating the same slider using MetaSlider and Smart Slider 3! Seriously, slider layers are a pro feature in MetaSlider??
My plan for this comparison project was to just jump right in and try recreating the Spotify plugin without investigating the plugins much (I wrote the “Features” section above after writing this section) and see what differences and issues I ran into while using both plugins. This was the first major hurdle I encountered and it was a big one.
I started to panic. What was I going to do now?! I had to decide what to do next. Well, what else could I do but push on? So I returned to the slider dashboard and continued editing my slider with the few options that were available.
Wow, I actually feel embarrassed right now after that last image. Since I couldn’t add a layer of text for the slide, I had to add it as a caption.
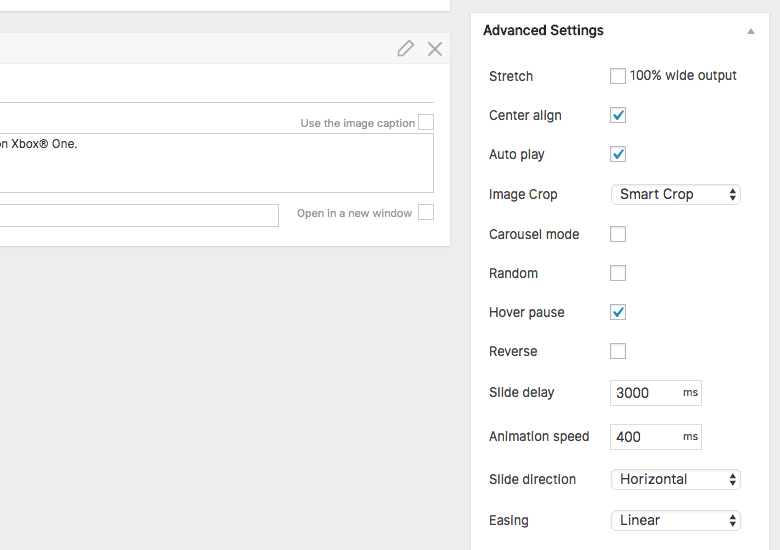
I added the three remaining slides and text as captions. Then I updated the animation speed in the “Advanced Settings” so it was 400ms.
OMG, I can’t believe those were the advanced settings. The free version of Smart Slider 3 has ruined me for using any other free slider plugin…
I regained my composure and nervously clicked “Preview” to see what my slider looked like…
Cringeworthy. Seriously, this is why people don’t like sliders – because of the 800,000 people who create ugly sliders like this.
⏳ Performance Test
Similar to the review I put together comparing Slider Revolution and Smart Slider 3, I wanted to run performance tests to see which plugin was faster. But since I wasn’t able to produce sliders that were comparable, with similar images and text, this was going to be tough.
I still wanted to know how each plugin performed, so I set up tests anyway. Before we dive in, I want to outline why I wanted to run performance tests. The common perception in the web development world is that sliders negatively impact website performance. Maybe they did a few years ago when sliders were clunky and badly designed (ahem… MetaSlider… cough…), but these days, slider plugins are generally fast as long as users add images that are resized and optimized and put thought into other assets they use.
The sliders I created for the comparison project used images that were 780px by 389px and each slide used the same dimensions, 780px by 389px. In order to test the plugins, I used a similar methodology to my Slider Revolution vs Smart Slider 3 review:
I scanned each of the plugins five times using WebPagetest before saving the results and using the median.
I did each test on its own page with the other slider plugin deactivated.
The page I tested featured the slider and no other content.
I cleared the cache after testing each plugin.
My test site is hosted with Cloudways.
Smart Slider 3
MetaSlider
Smart Slider 3 has more elements because the free version has layers! Interestingly, the results were only marginally faster for MetaSlider. And really, it should’ve been faster since the slider I created with it had optimized images, and no layers, buttons or fancy fonts.
Making Things Fairer…
The slider I created with Smart Slider included two HTTP requests for Google’s Permanent Marker font. I was interested to know how the slider would perform without having to download a third-party font, so I edited my slides to switch out Permanent Marker for Arial and cleared the cache. Here are the updated performance results:
Wow. Without any fancy Google fonts, but with the addition of layers and buttons, Smart Slider 3 easily is faster and outperforms MetaSlider.
🏆 The Best Free Slider Plugin: Smart Slider 3
OMG, why is MetaSlider the most popular slider plugin in the WordPress repository?!
MetaSlider absolutely pales in comparison to the free version of Smart Slider 3, which is packed full of features, and then has even more cool features when you upgrade. I mean, you can’t even use layers in MetaSlider unless you upgrade, because it’s a pro feature.
The slider I ended up creating with MetaSlider looks awful. In comparison, the slider I created with Smart Slider 3 is elegant and on par with the Spotify slider (I chose to use a different background image and fonts – didn’t want to copy too much!).
Overall, if I had to pick one plugin for creating free sliders, I’d choose Smart Slider 3. Hands down, it’s the best free slider plugin for WordPress. It includes a huge range of features – including layers – and provides an easy-to-use and intuitive user interface. Plus, it’s faster than MetaSlider when it comes to speed.
If you’re using another free slider plugin, make the switch to Smart Slider 3. It’s easily the best free slider plugin available at WordPress.org.
Raelene Morey is the Chief Bird at Words By Birds , an agency that helps WordPress businesses make better content. Computer science grad turned newspaper journalist and ex-managing editor at WPMU DEV. Raelene has been developing WordPress sites for over 10 years.