When someone lands on your website, it’s important to grab their attention right away. This can be tricky when you’ve only got so much space above the fold to display your message. Fortunately, image sliders provide an eye-catching and space-saving way to promote your services, showcase your products, and let visitors know what your site is all about.
If you’ve never created a slider before, I’ll show you how in this step-by-step tutorial. We’ll cover how to create a simple image slider, adding transitions and navigation, and then how to insert the slider on a post or page.
We’ll also take a look at some advanced features you might want to check out after you’ve got the hang of building a simple image slider. TL;DR: Here’s the simple image slider we’re going to create in this tutorial (I’ve taken inspiration from the Google Home Mini website):
Why Use Smart Slider 3?
Smart Slider 3 is a powerful yet easy to use simple image slider plugin that’s rich in features. I reviewed both the Free and Pro versions of the plugin recently and found both were absolute pleasures to work with.
Here are some of the things I really like about Smart Slider 3:
It’s packed with features. There are 4 slider types (standard, carousel, showcase & block) 100+ templates, 21 layers, 22 dynamic generators… This list goes on.
The Default/Absolute positioning is unlike anything you’ll see in other slider plugins. In Default positioning, the slider behaves like a page builder, while Absolute positioning gives you freedom to work with your layers unobstructed, much like you would in Photoshop.
It’s fast. Smart Slider 3 is fast – I’ve done the tests to prove it. You can even optimize and preload images to improve your website’s loading speed.
It’s SEO-friendly. You can add alt text to any image in your slides.
Now, let’s take a look at how to create a simple image slider. For this tutorial, I’ll be using the free version of Smart Slider 3.
The new way to build a Slider
Next generation visual editor, customizable animations & effects, and access to hundreads of premade templates.
First up, you need to install and activate Smart Slider 3 on your website. You can download the Free version or skip straight to the Pro version.
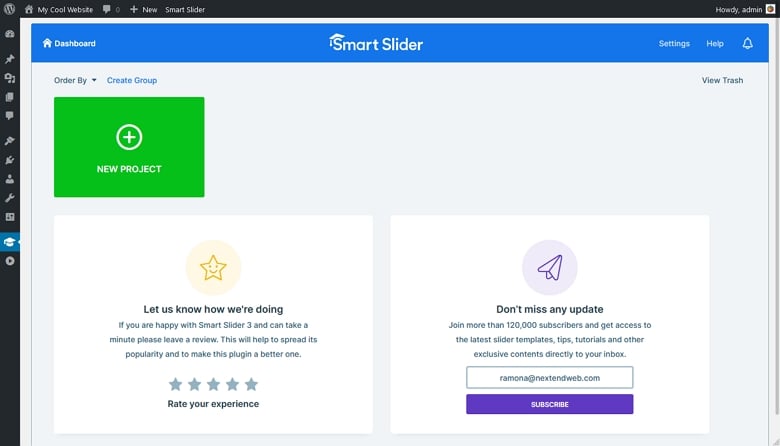
After you’ve activated the plugin, you’ll see a new menu item in your admin. Clicking on it will take you to the Smart Slider 3 dashboard. To create a new slider, click the green “New Project” button.
Create your New Project using the button
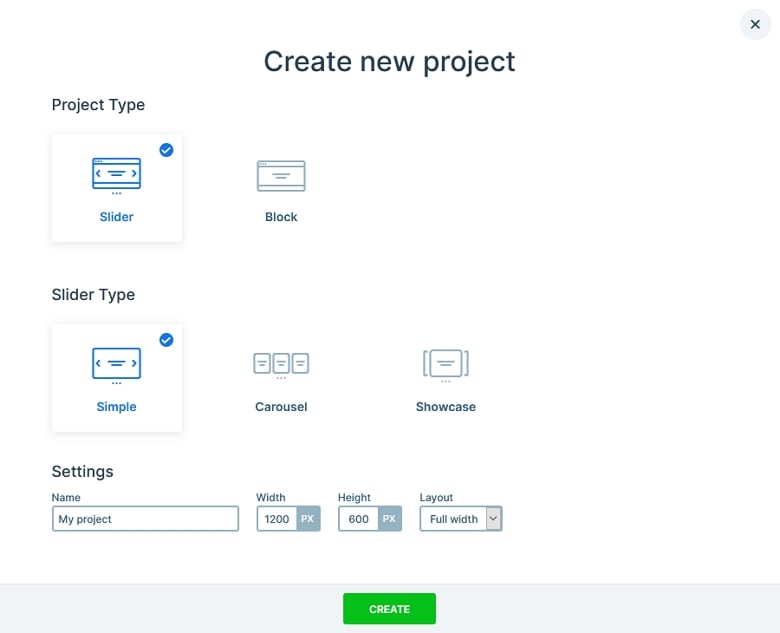
A modal will appear prompting you to choose whether you want to Create a New Project or Start with a Template. Select the first one, and enter a name for your simple image slider and the dimensions. There are also three different slider types to choose from depending on how you want your slider to look.
Create a new slider
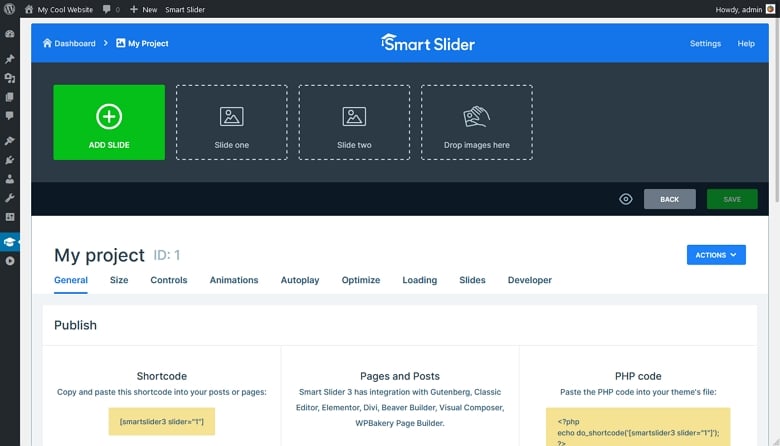
After you’ve clicked “Create,” you’ll be taken to the dashboard for your slider. Click on “Add Slide” and select “Image” to start working on your first slide.
The media library modal will then appear, where you can drag and drop in an image for your slide.
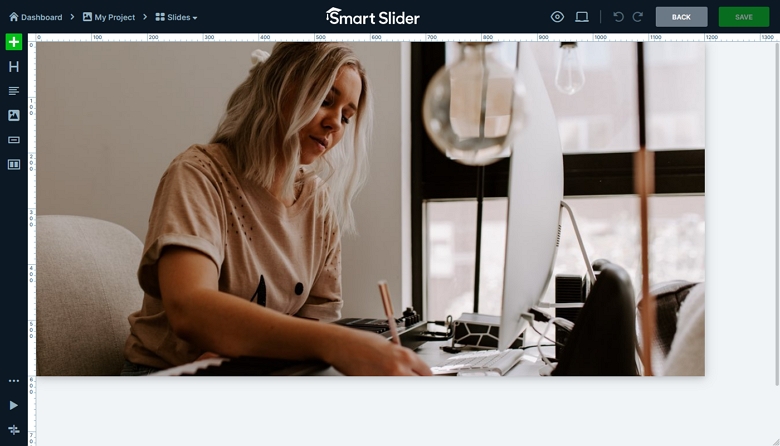
To add text to your slider, click on your slide (it’ll look like the image you just uploaded) to reach the Slide Editor.
Adding text is simple – just click on the text icon to the left of the Content/Canvas editor and a text layer will appear over your image. Replace the default text in the editing modal with the words you want to use, and then drag the text box where you want it to display over your slide.
Clicking on the paint bucket icon will bring up more style options for editing your text, such as fonts, colors, backgrounds and sizes.
And that’s the first slide done! At the top of the page, click “Save” on the right and then the name of your slider on the left to return to the slider dashboard.
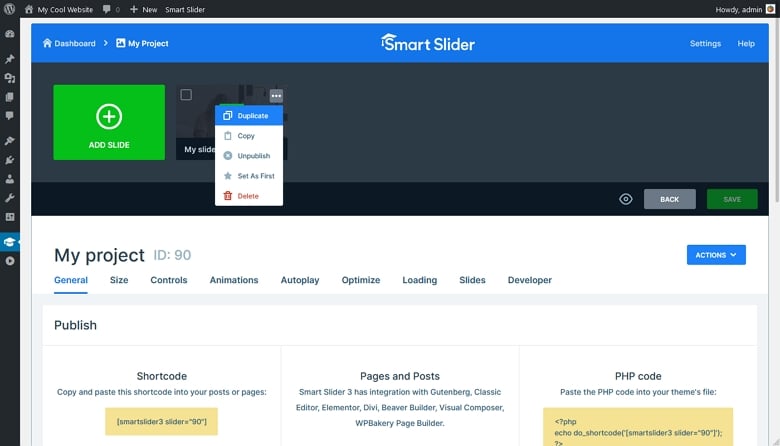
Rather than repeat all the steps above to create a second slide, simply duplicate the first slide. Then click the second slide to edit it.
On the second slide’s dashboard, upload a new background image and replace the text with new words. Click “Save” and your second slide is ready. Repeat the steps above to create as many slides as you need for your simple image slider.
Get on board! Join our 142,416 subscribers!
Get our latest news, tutorials, guides, tips & deals delivered to your inbox.
No spam. No charge. Just curated emails.
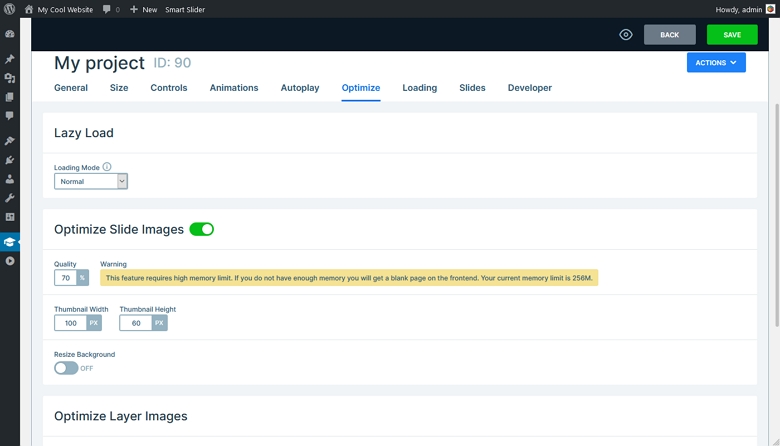
Optimizing Images
If you want your slider to be super fast, it’s important to optimize your images. You can get a head start by saving your images for the web using an image editor like Photoshop.
It’s also important that your images are the correct size for your slider, i.e. don’t upload 4000px by 2000px images for a slider that’s only 1000px by 800px in size.
Smart Slider 3 provides simple options for automatically optimizing your slide background images. On the slider dashboard, you can enable optimization and set the quality of your images. There are also options for optimizing thumbnails or layer images.
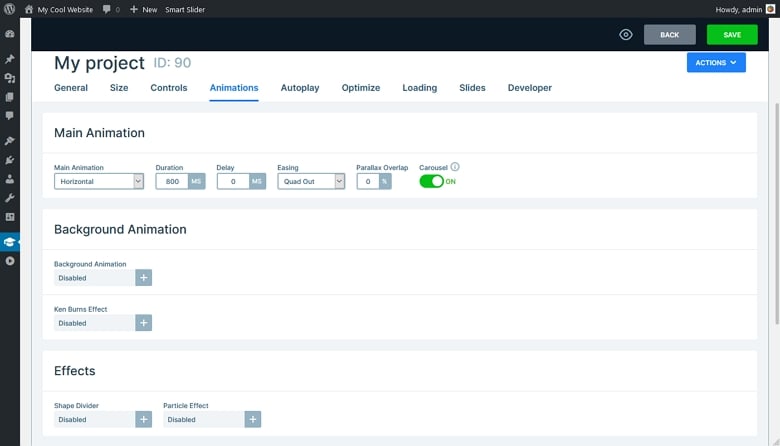
Configuring Animations/Transitions
With animations, you can configure how your slider moves between slides. Choose from six different animations and then set the duration.
For more advanced animations, it’s worth checking out Smart Slider 3 Pro. It has even more animation options for easing, parallax, speed, Ken Burns effect, particle and shape divider.
If you want to configure animations for your background images, you can do so in the dashboard for each individual slide.
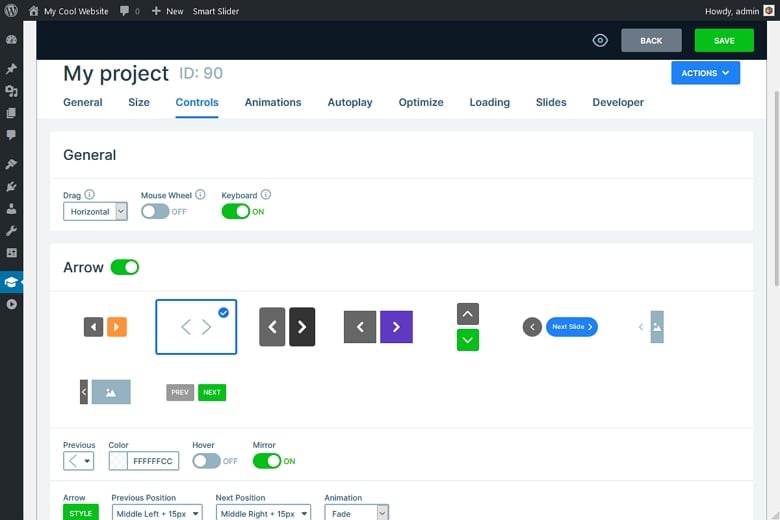
Configuring Navigation
Next, you’ll want to customize the navigation arrows for your slider. Visit the Controls tab, where you can choose from a range of different designs for arrows, set colors, and even position where you want them to appear over your simple image slider.
The sections here let you add bullets and thumbnails to your slider.
Adding Your Slider to a Post or Page
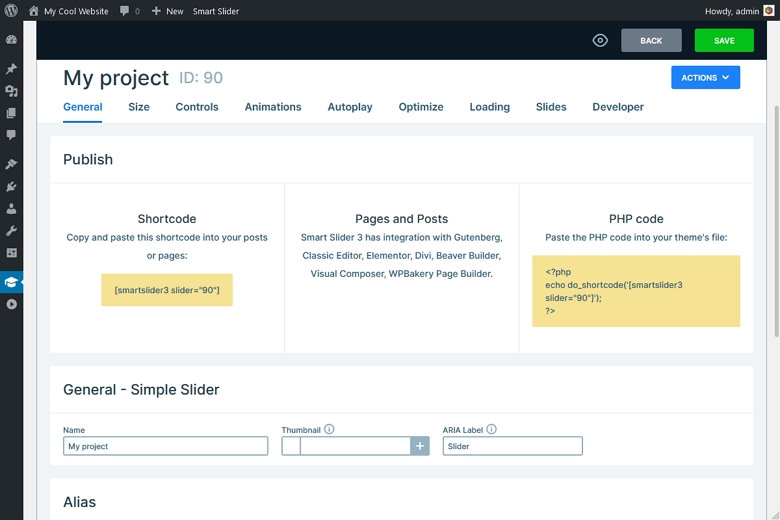
Once you’re happy with how your slide looks and animates – you can preview it by clicking “Preview” in the top-left – click “Save” one last time. On the dashboard for your slider, you’ll notice three options in the “Publish” section.
The instructions are straightforward enough:
Shortcode – Add the auto-generated shortcode into any post or page to display your slider.
Page or Post editor – Smart Slider 3 adds an icon to the page and post editors, which you can also use to insert sliders.
PHP code – For more advanced control over the placement of your sliders, you can copy-paste the provided PHP code.
Here’s what my finished simple image slider looks like on my test site (I used the shortcode option to insert it into a post):
Get Creative with Advanced Features
In this tutorial, I’ve walked you through how to create a simple image slider. But there’s so much more you can do with sliders – and with Smart Slider 3 Pro.
While the free version of the plugin is packed with features, the Pro versions let you pull dynamic content into slides, including WordPress posts, Pinterest and Flickr images, images from folders, YouTube videos, Facebook albums and more.
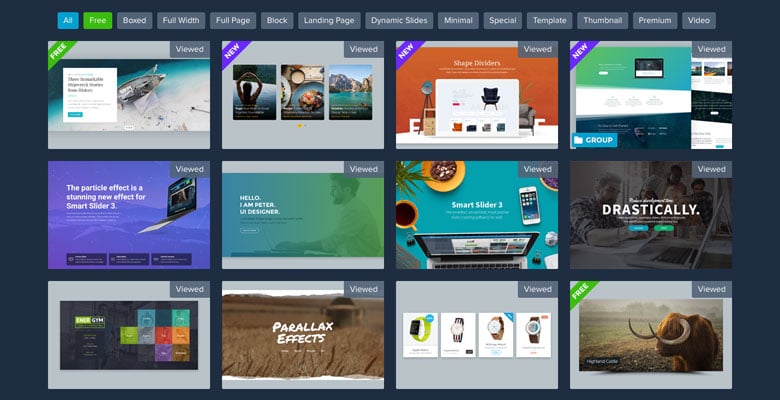
The best way to get a grasp of all the possibilities is to check out Smart Slider 3’s impressive Examples page, which features 100+ different sliders.
Like any of the examples above? You can use them! Each and every one of the 100+ sample sliders is available to import and customize in Smart Slider 3 Pro.
Wrapping Up
Smart Slider 3 is easily the best slider plugin for WordPress. Believe me, I’ve tested a lot of slider plugins and none even come close to offering the same ease-of-use and features.
Most free slider plugins are clunky and confusing to use. Smart Slider 3 has been designed with user experience at the forefront, ensuring that it takes no time at all to get the hang of how it works so you can put together a slider quickly and easily.
I hope this article has helped you with learning how to create a simple image slider for your site. If you have any questions, leave a comment below!
Raelene Morey is the Chief Bird at Words By Birds , an agency that helps WordPress businesses make better content. Computer science grad turned newspaper journalist and ex-managing editor at WPMU DEV. Raelene has been developing WordPress sites for over 10 years.