Welcome to the fascinating world of sliders! You’ve come to the right place if you are a WordPress lover wanting to add life to your website. This in-depth blog post will explore the captivating world of background colors and images in Smart Slider 3, a slider plugin that will advance your design skills.
We all know that visuals are everything in this digital world. Additionally, when it comes to sliders the background color and images are crucial to designing captivating interfaces. Not to mention that with Smart Slider 3, you have the resources at your fingertips, so you can easily turn your sliders into engaging displays.
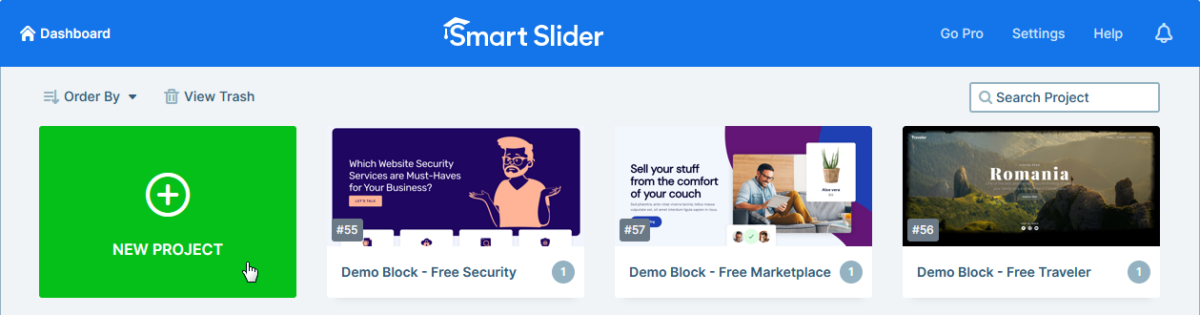
The new way to build a Slider
Next generation visual editor, customizable animations & effects, and access to hundreads of premade templates.
This article will guide you through your slider building process with useful tips and tricks on background color and images. What’s more, we’ll address your burning questions, including how to apply background images, change background colors, and even consider the best background color options for your images. So prepare to unleash your imagination and bring out the best in your sliders!
Are you prepared to add a splash of color to your sliders? You can easily modify the background color in Smart Slider 3 by following the instructions in this section. In addition, you can create the ideal settings for your slides thanks to its simple user-friendly interface.
How to Change Background Color
Let’s go through each step of changing the background color in Smart Slider 3:
Log in to your dashboard and find the Smart Slider 3 plugin. Then, open an existing slider or make a new one to edit.
Now there are two ways to accomplish it. You can either set the background color of your whole slider. Or simply change the color of each slide separately to your preferred one.
First, let’s look at how to set it for all of your slides in one setting:
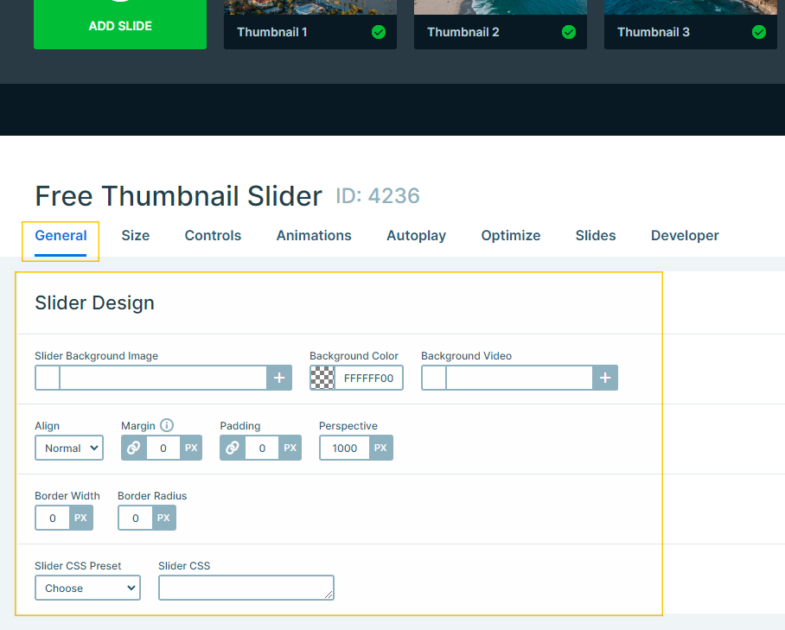
Find the “General” settings of your slide.
Scroll to the bottom of it and there look through the “Slider Design” section.
The “Background Color” option allows you to set a background color for the slider, which will be behind all slides. However, note that this option is only visible if there’s a background image set.
Now let’s move on to how to set a background color for individual slides:
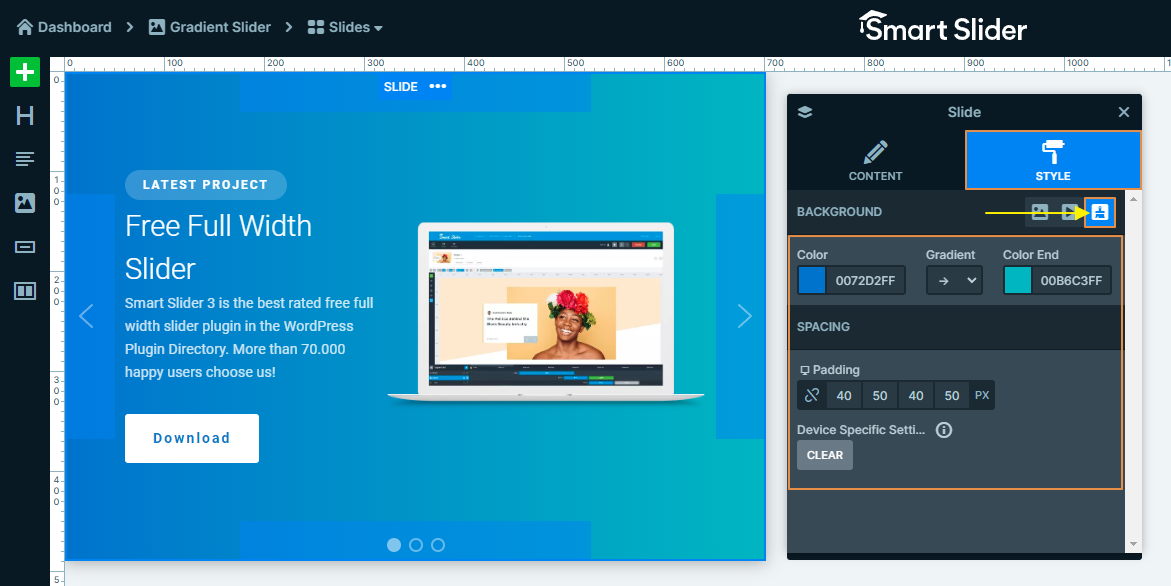
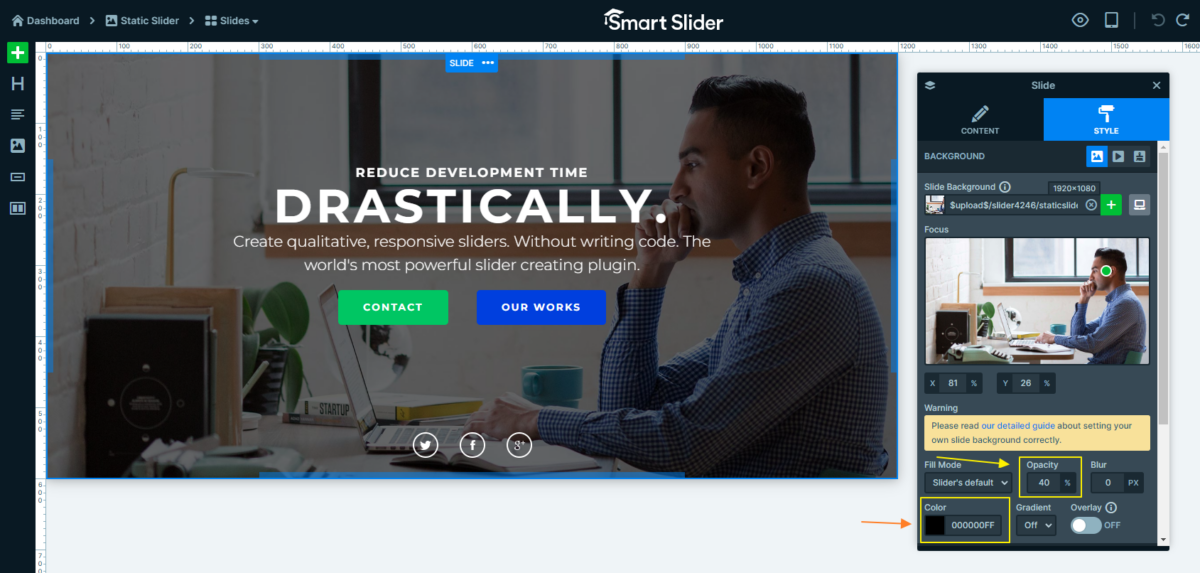
Select the slide you would like to edit, once you are in the slide editor. Then, on the right side, look for the slide settings panel.
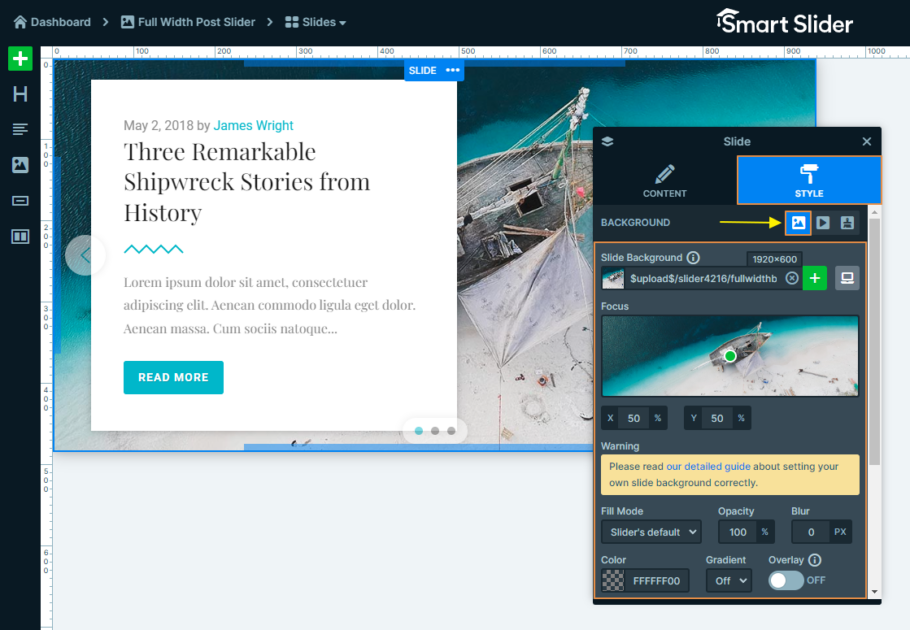
In the Style tab find the “Background” section. There are 3 options to choose from, but as we want to set the background color of the slide, we’ll choose the color option, which is shown as the brush icon.
There are several ways to choose a color in Smart Slider 3. To get the ideal shade you can use the color picker tool, enter your HEX code, or select a color from the color palette.
And finally, you just need to click on your selected color and voilá! Your slide’s background color will be instantly updated.
In addition, you can add a gradient to your slider background, and choose its direction to make the color pop.
Applying Background Color
Now that you got the basics of changing the background color covered, let’s take a closer look at how you can use it effectively to make your sliders stand out:
Maintain consistency: Stick to the same color throughout your slides to ensure that your visitors have a consistent and visually appealing experience.
Contrast between your background color and your content: Make sure that the text on your slides and other layers can be easily read against the background color.
Experiment with different background colors: Don’t be afraid to try different background colors on your slides to get the look and feel you are looking for. With Smart Slider 3, you can preview your changes in real time. Remember that your background color defines the tone and mood of your slider, it’s important to take your time and experiment with them.
In the next part, we’ll explore background images and how they can take your sliders to the next level.
Working with Background Images
Not only do you have background colors, but background images also have the power to turn your sliders into amazing visual experiences. Let’s take a closer look at how you can set up custom background images, make them transparent, and take advantage of Smart Slider 3’s unique features.
Setting a Custom Background Image
Here’s how you can set up your own custom background images with Smart Slider 3:
Just like it was mentioned above, there are also two ways to add a background image to your slider.
First, let’s look at how to set the whole slider’s background. You just need to navigate to the General Settings tab, and right next to the Background Color, there’s a section for the Slider Background Image. Here you can upload your chosen image.
The second option is to set different images for each slide. To accomplish it you need to select the slide you would like to modify. Then, just like you did it before, find the Background section in the Style settings tab. After, clicking on the image icon you can upload your image file. Play around with the additional image settings to see what works for you best.
Finally, when you are done with setting up your background image, don’t forget to preview the changes, then if you are satisfied with the result, save them.
Using Images as Backgrounds
If you want to make your sliders look amazing, you can use background images to add depth and interest. Here are some tips to help you get the most out of them:
Relevant images: Select images that match your content and message. Think about the color scheme, subject matter, and mood.
Experiment with Smart Slider 3’s editing features, like opacity and blur effect, to get the best results. By applying these tips, you can make your background images look amazing and captivating.
Choosing the Right Background Color for Images
The color of the background of your sliders can have a big impact on how people perceive your images. Let’s take a look at some things you need to know and some tips on how to choose the background color for your sliders.
Exploring Color Psychology
What is color psychology? Color psychology is the study of how emotions and perceptions are influenced by the color of the environment.
Here are some things to keep in mind when choosing the background color for your images:
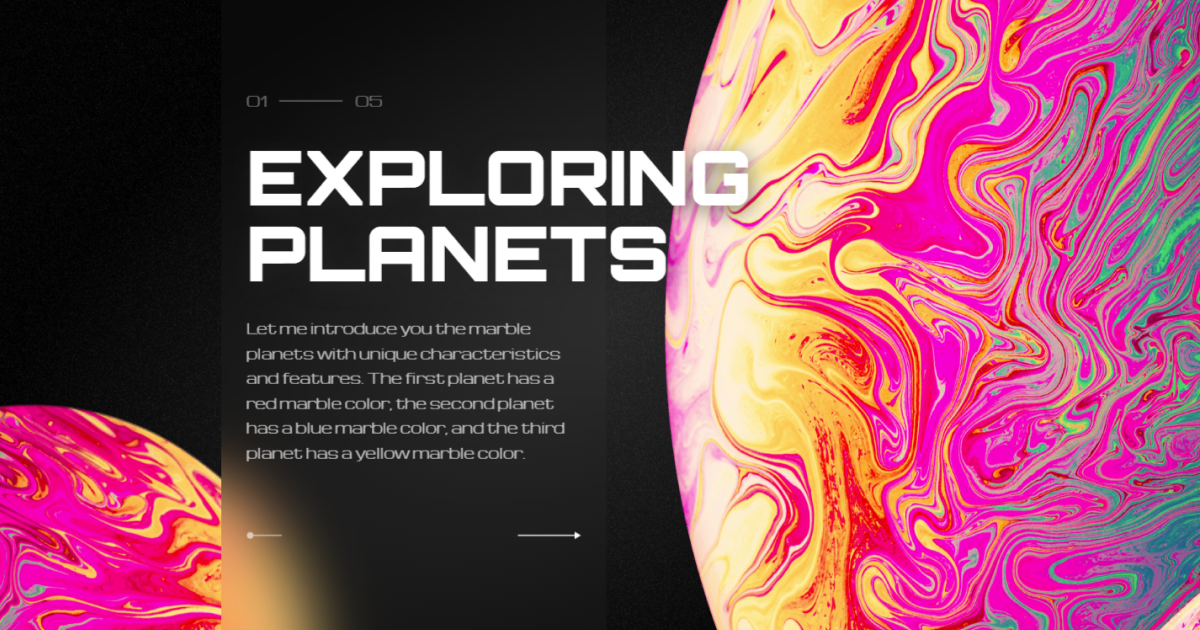
Warm Colors: Warm colors, such as red, orange, and yellow, evoke feelings of excitement, energy, and passion. These colors work well for images that are dynamic and vibrant, such as adventures and celebrations.
Cool Colors: Cool colors, such as blue, green, and purple, evoke feelings of calm and serenity. These colors are great for images that show serenity, and nature.
Neutral Colors: Neutral colors, such as white, gray, and beige, provide a clean, minimalist background. These colors can be used for a variety of images. They are timeless and versatile.
It’s important to note that everyone’s perception of color is different, so take into account the context and your target audience when selecting background colors for your images.
White or Black Background: Which is Better?
What’s the difference between a white background and a black background? It’s a never-ending discussion. Both have their advantages and disadvantages, but ultimately, it comes down to your content and what you want it to look like.
Here’s what you need to know about them:
White Background: A white background looks clean and classic. It adds brightness and contrast to your images, making them look lively and interesting. It’s often used for product photography to highlight details.
Black Background: A black background adds depth and a dramatic effect to your images, especially for high-contrast or moody photos. They are commonly used in artistic and fashion photography.
At the end of the day, it all comes down to the style and intent of your sliders and the images you want to emphasize.
Setting Custom Background Images
Smart Slider 3 has one of the most amazing features: the ability to customize your slider’s background images. This means that you can add your own unique style and branding to the sliders!
How to Set a Custom Background Image
Let’s look at how you can make it happen in Smart Slider 3:
Upload an image in either of the two ways we mentioned above (you can set the background for the whole slide, or individually). You can choose the image from your media library or upload a new one.
Once you upload the image, you have several options to adjust the display of the image. You can change the size, position, etc.
Always make sure to preview your changes, then if needed, make necessary adjustments. If you are done, save your design.
Making the Background Image Transparent
Sometimes you might want to make your background images transparent, allowing the content and other elements to seamlessly blend with the webpage. Smart Slider 3 makes this possible with a few simple steps:
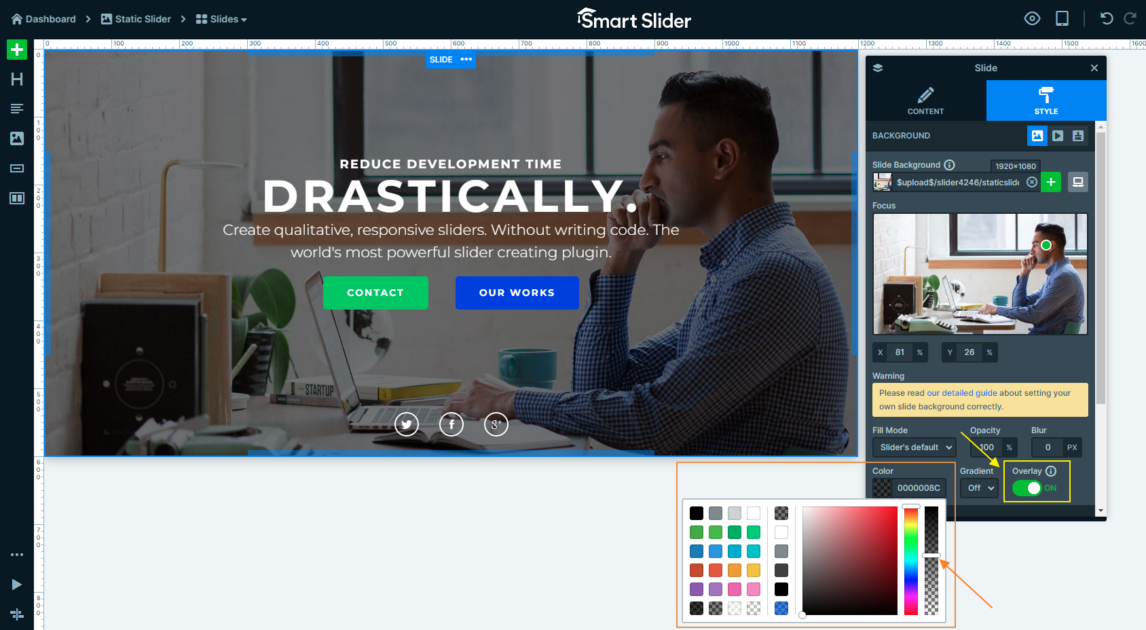
Open the slide you want to edit, then in the Style tab find the “Background” section.
If you’ve already uploaded an image then you will easily find the Opacity option. On the other hand, if you haven’t yet, then that should be your next step.
You can either toggle the Opacity bar or write the value you would like to receive. This will make the background image transparent. To add an overlay, use a color with the opacity setting.
The same happens if you turn on “Overlay” and select a partially transparent background color.
Experiment with it and adjust it to your preferences, to find the perfect balance between readability and engaging visual effect.
Then finally, take a moment to preview your slide to make sure the transparent background looks exactly how you want it. Once you are happy with the effect, save your changes.
To create a one-of-a-kind experience for your viewers, customize your background images and experiment with the different effects Smart Slider 3 offers its users.
Conclusion
It’s time to take your sliders to the next level! And Smart Slider 3 is here to give you all the flexibility and creativity you need to make your background color and images stand out from the crowd.
Whether you are looking for a vibrant and colorful display, a clean and minimalistic look, or anything in between. You will find everything you need to take your vision to the next level. What’s more, it’s a powerful tool that can help you turn your ordinary sliders into extraordinary ones.
Why not download or try it out and see what it’s all about?
Get on board! Join our 142,416 subscribers!
Get our latest news, tutorials, guides, tips & deals delivered to your inbox.
Hey there! I’m Sara, and I’m part of Nextendweb’s team. When I’m not working, you can usually find me baking up a storm in the kitchen. I also love going outside for a run. Above all, spending quality time with my friends and family is what makes me the happiest.