Settings
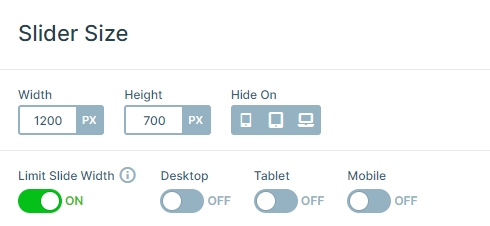
The Security block is a full width slider. The slider size is 1200*700 pixels with limit slide width enabled. What does it mean? The block will be 100% width of the screen but the content is limited to 1200 pixels. Also the limited width prevents the slide to getting too tall. It means that the block won’t be bigger than 700 pixels, if you don’t have too much content.
🎓 Free Version Available
Did you know you can create Blocks in the Free version of Smart Slider 3? If you like this template take a look at its Free alternative.
Layers
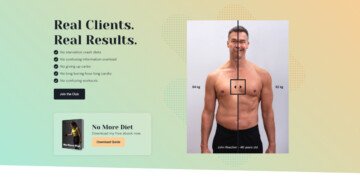
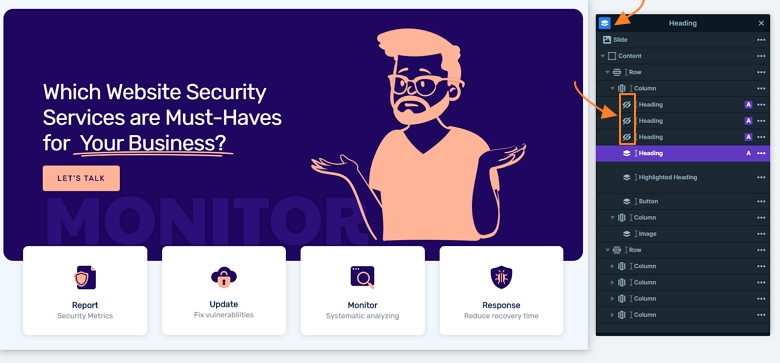
When you check the block, the first you will see is the Highlighted heading layer. This helps visitors focus on your heading. You can freely change the highlighted text or the way of the highlight. It is an animated, underlined effect now.
The block uses a modern combination of colors. The underline highlight and the bottom uses the same color as the image. This stands out from the dark blue background color.
Animations
As you surely noticed, every layer has a layer animation in the Security block, but now I would like to highlight the bottom section. This is a special section because when you hover over the boxes, they will move up, and a text will appear above that. This can be made with layer animations, events and with absolute positioning.
There are 2 parts of it: the hover effect – when the box moves up, and the other part – when the text displays.
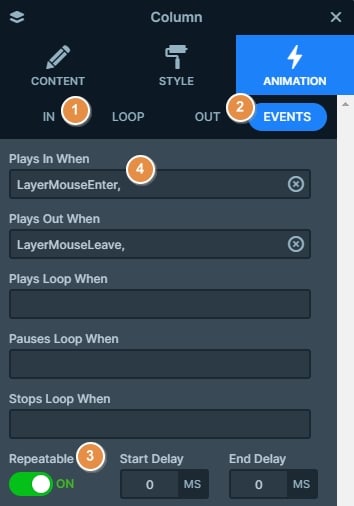
How to achieve this hover effect?
- Select a layer you want to animate. This layer is the column box in our example.
- Add an incoming and outgoing animation for this layer.
- Turn on the Repeatable at the Layer window → Animation → Events tab
- Trigger the layer animation with the LayerMouseEnter and LayerMouseLeave events.
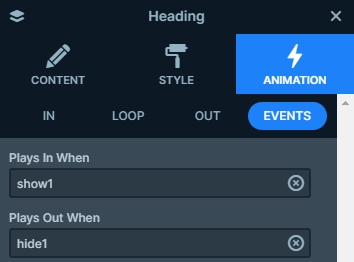
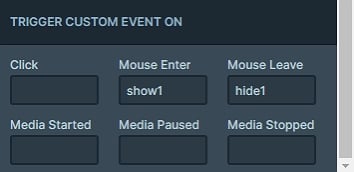
How to display text on hover?
- Select the layer which you want to display on hover.
- Add an incoming and outgoing animation for this layer.
- Create custom events, and enable the Repeatable option.
- Trigger these events on Mouse enter and Mouse leave.
Layout
All layers are structured in rows and columns. Firstly, it is important to mention the Heading layers in absolute position. They are on each other. If you want to change the text, or you want to move it to another position, use the layer list. Here you can find your layers, and you can hide them in the editor if you want.
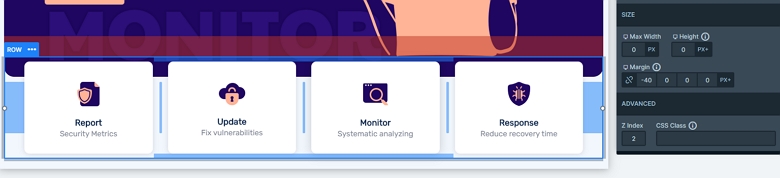
The row of the bottom overlaps the row on the top. For creating this kind of layout you can use negative margins.
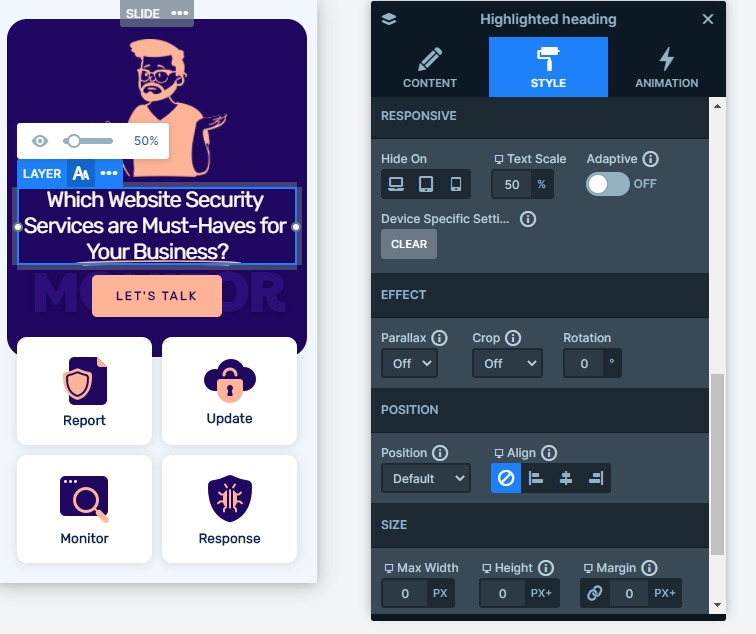
Responsive
The block looks good in every device. Use the Text scale to make your text lower. The bottom row wrap after value is 2 which means you will see 2 columns next the each other, and 2 wraps below them. Some layers are hidden on mobile to avoid the block will be too tall, but if you want to enable them, you can find them in the layer list.
Related Documentation: Layer events
Related Post: Use Beautiful Layer Animations in Smart Slider 3 Pro