Smart Slider and Slider Revolution are two very popular plugins for creating sliders. They’re both super powerful and let you create gorgeous sliders. However, you might come to a decision to switch to Smart Slider. This can raise the question: how to migrate from Slider Revolution? What’s the fastest way to have your sliders up and running?
The new way to build a Slider
Next generation visual editor, customizable animations & effects, and access to hundreads of premade templates.
Get Started
Can Smart Slider automatically recognize Slider Revolution’s sliders?
Every plugin stores and handles their data in a different way. For this reason, neither Smart Slider nor Revolution Slider will recognize the sliders you have created in the other plugin. Unfortunately, there’s no automatic way to migrate your Slider Revolution sliders. So you’ll need to create the sliders you have made in Revolution Slider again in Smart Slider.
How to migrate from Slider Revolution to Smart Slider?
Although both plugins offer very similar features, there are major differences between them. For example, their UI looks very different, so it can take some time to learn how to find your way around. Additionally, the options might have different names. So in this guide I’ll walk you through the most important differences between the two plugins. After you finish reading, you should get a headstart on creating your sliders.
How to start to migrate from Slider Revolution?
Before you start the migration process, it’s best to understand the main differences between Smart Slider and Slider Revolution. One of the most important differences between the two plugins is the “levels” where you work. Slider Revolution has two levels: a dashboard and a slide editor. On the Dashboard you can see every module you have created. Clicking any module takes you to the configuration of the module. Everything happens on the same screen. You can configure your module (such as it’s size or layout) at the same right-hand panel where you edit your layers.

Smart Slider has 3 levels. First, there’s the Dashboard where you can see the sliders you have created. Once you go to any slider, you end up in the Slider Settings page. This is where you can configure the slider itself, such as changing its size, layout or controls. You can also find the list of your slides on this page, at the top of it. To be able to work with layers, first you need to go to the Slide Editor. You can do that by clicking on any of the slides. Here you can set the background of the slide. Also, you can add and configure your layers on this screen.

Creating your first slider
One of the most important tasks in a slider software is to create a slider. However, the exact process is a little bit different in every slider plugin. For example, they might ask for different data (such as name or dimensions) before creating the slider. Or, they might not ask anything at all, and just use some default settings.
How to create a slider?
When you create a slider in Smart Slider, first you need to click on the New Project button. Then, the plugin asks you whether you want to start from scratch or import a template. If you choose to start from scratch, you’ll need to select what kind of slider you want to create. For example, you’ll need to choose the type, size and layout of your slider.
In Smart Slider there are 4 slider types available: Simple slider, Block, Showcase and Carousel. The Simple type is equal to Slider Revolution’s Slider type. The Block is the same as Scene. Revolution Slider’s Carousel is what Smart Slider calls Showcase. The type that Smart Slider calls Carousel is like the Showcase type. The main difference is that it can only display the slides without cropping. Additionally, it can display an even number of slides as well.
How to change the slider size?
Smart Slider asks you to set the size of your slider right before you create a new slider. Should you need to change it, you can always do so at Slider settings → Size tab.
How to change the slider type and layout?
Smart Slider asks you to select the type and layout of your slider before creating it. If you choose the wrong type, or change your mind, you are free to change them later. To change your slider’s layout, go to Slider Settings → Size tab. If you need a different slider type, you can change it at the Slider actions → Change Slider type.
How to enable and configure the Autoplay?
The autoplay is not enabled by default in Smart Slider. If you want your slider to rotate automatically, you need to turn it on at Slider settings → Autoplay. Here you can select the duration of the slides, and the action that stops and resumes them. You can also enable the autoplay button and indicator here.
Working with layers
Layers are the elements you can place on your slider to create its content. There are different types of layers for every purpose. For example, there is a layer to display images and there’s another layer to display texts. Layer creation happens in the slide editor, and you can get there by clicking on the slide you want to edit.
How to add a layer?
To add a layer in Smart Slider, you’ll need to go to the Slide Editor first. Simply click on the slide you want to edit and you’ll end up there. You can add layers by clicking on the green plus icon on the left side. Choose the layer you want to add then drag’n’drop it to the place where you want it to appear.
How to work with layers in Smart Slider?
In Slider Revolution you can work with the layers similarly to image editors. You can drag the layer anywhere within the canvas. However, Smart Slider has a unique editing mode, which we call Default positioning. This editing lets you work with your layers as if you’d use a page builder.
Say you have 5 layers in the middle of your slide and you want to move them to the left. In Slider Revolution you need to move the layers one by one. You also need to be careful to ensure that the distances you set don’t change. In Smart Slider the whole process is a lot more simple. Instead of manually moving all layers, you can change the inner align on their parent element. As a result, all layers move to the left side, without having to touch them. Additionally, all spacing will remain the same.
Commonly used layers
In Smart Slider there’s a separate heading and text layer. You can use the heading layer to create a h1-h6 heading or a div. However, you can create text wrapped in p tag using the separate text layer.
The other main difference is the video layer. In Slider Revolution there’s only one video layer. At this layer you can choose whether you want to display an HTML, YouTube or Vimeo video. However, in Smart Slider all videos have their own separate layers. So, if you want to display a YouTube video, you need to add a YouTube layer.
How to style a layer?
You can style your layers by going to the Style tab of the Layer Window. This is where you can set the color, family, size and font-weight of your texts. Also, you can pick a background color for better legibility. If you create a button, you can also set the border radius option at the Style to create rounded corners.
How to add layer animations?
In Smart Slider you can add a layer animation to every layer. To add an animation to your layer, go to the Animations tab of the Layer Window. You can add 3 types of animations to each layer:
- In: The incoming animation that makes your layer appear on the slide.
- Loop: It’s a continuous movement. You can use it, for example, on an image to make it rotate.
- Out: This animation “hides” the layer from the slide, so it will no longer be visible.
Publishing your slider
After you have created your slider, all that’s left to do is to publish it. You can publish your slider using it’s shortcode or Gutenberg module. You can find the shortcode of your slider at Slider Settings → General tab. Additionally, you can find a Smart Slider module in some of the most popular page builders, like Divi or Elementor.
When you migrate from Slider Revolution, make sure you replace your old sliders with the new ones everywhere.
Building your first slider in Smart Slider
Knowing the basics of where to find certain options is not the same as seeing things done. So here’s a mini-tutorial on how to build a simple slider with a couple of layers on top of a nice background.

If you keep up with the tutorial, you’ll be able to migrate your Revolution Slider modules to Smart Slider in no time!
Creating the slider
Go to Smart Slider and click on the New Project button. As we’re building from scratch, choose “Create a New Project”. Here you’ll need to select the basics settings of your slider. Since the slider I am creating will have only one slide, I’ll choose “Block” at the Project Type. Give the slider a meaningful name to make it easier to find it later. Next, set the slider size.
You do not need to make the width 1920px to have a full width slider. The Layout setting will decide how big your slider will actually be. In fact, generally we recommend leaving the width on 1200px – it makes it easier to work with your content. The image I’ll use is 1920x800px so I will set the height to 800px. As I want a full width I will leave the layout on Full Width.
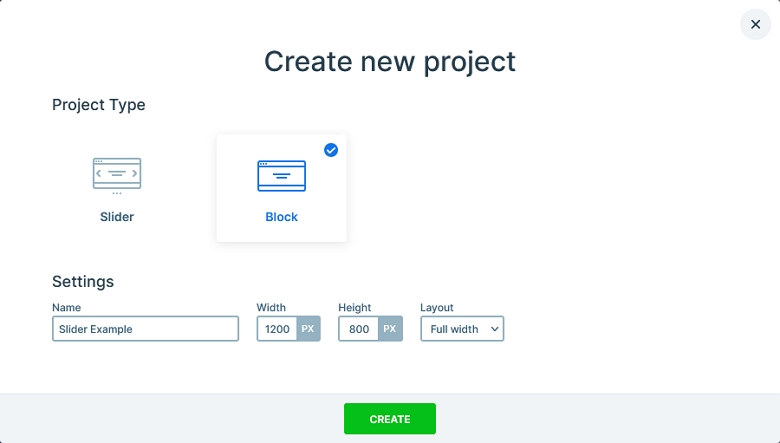
Once all is set, click on Create.
Creating a slide
After you press the Create button, Smart Slider takes you to the Slider Settings page. Here you can configure your slider. For the basic slider we will create, the default settings are fine. So, let’s create our first slide.
Locate the large green button with the “Add Slide” label and click on it. Here you can choose the kind of slide you want to create. Our slide is based on an image, so let’s choose the Image type. WordPress’ Media Library opens and you can select your image.
Adding layers
You can add (and manage) layers in the Slide Editor. Click on the slide you added in the previous step to get there. When you go to the Slide Editor, the Layer Window with the Slide options opens automatically. We don’t need to make any changes to the slide, so let’s just ignore this window now.
What we need to do is to add some layers. Let’s start with the main heading. On the left side, just under the breadcrumbs, there’s a green button with a + sign on it. Click on this button to open the layer list.

Configuring the main headline
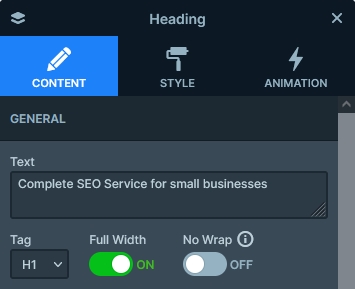
We need to create a main headline, so choose the Heading layer under the Basic category. You can drag’n’drop it to the slide, or you can just click on it and it will be added automatically. After the layer is added to the slider, the Layer Window opens and you can start customizing the layer. At the Content tab, change the text the layer displays. Then select the tag that’s best for your content.
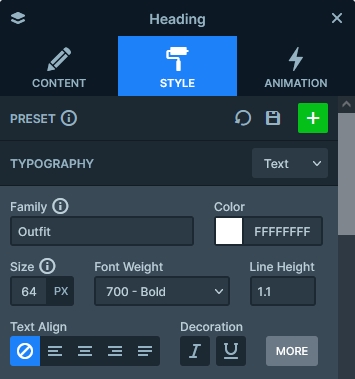
After your text and tag is set, go to the Style tab. This is where you can set the size, family and color of the text. Set your heading as you’d like it to look like.
You can set a maximum width for every layer to avoid them getting too wide. Select the layer, locate the small white dot at its side and start dragging it until you get the desired width.
Setting up the description
There’s a descriptive text just under the headline. To create such text, add a new text layer. Change it’s text the same way as you did at the heading. The main difference between the heading and text layer is the tag they use to display the content. The text layer always uses the p tag. However, at the heading layer you can choose from a div or h1-h6 tags. Once your content is set, style your layer and give it a maximum width.
Adding the buttons
At this point the only thing your slider misses is the two CTA buttons. When adding the text and heading layers, you probably noticed you can only put them below one another. However, you can’t move them next to each other.
To create a layout where two (or more) layers are next to each other, you’ll need to add the Row layer. The Row layer, by default, has two columns, and you can place layers into each of them. Since the columns are next to each other, any layers you place into the columns will be next to each other as well.
So, add your row, and place a button to each column. Set the label of your buttons and style them. Use the Border radius option at the Style tab, under Border to create rounded buttons.
Configuring the row
Once your buttons are set up, you’ll notice that they’re too far away. To solve this problem, simply set a maximum width for the row.
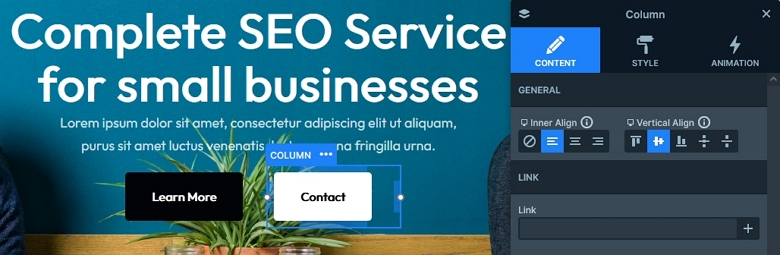
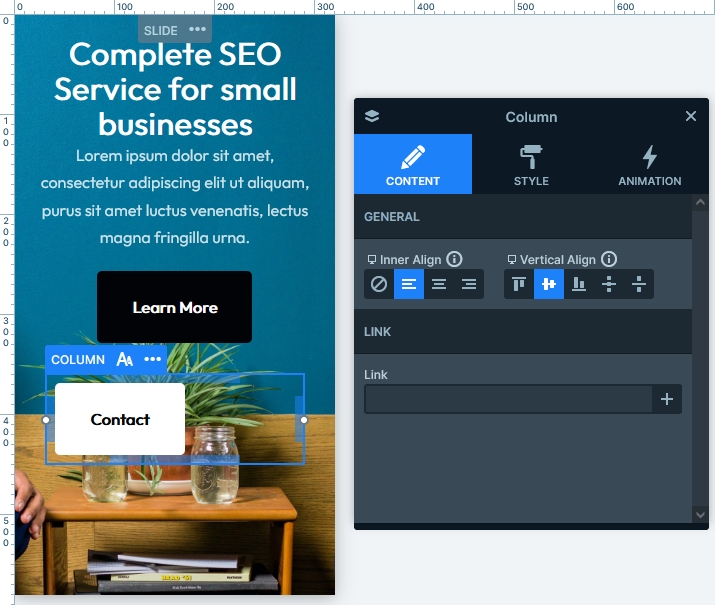
Here’s a tip if you’re aiming for a pixel perfect result. Select the columns and change their Inner align option. This option tells the content inside them (the button layer) how to display. So, at the left column, choose the right align, and at the right column, choose the left align.
Creating space around the layers
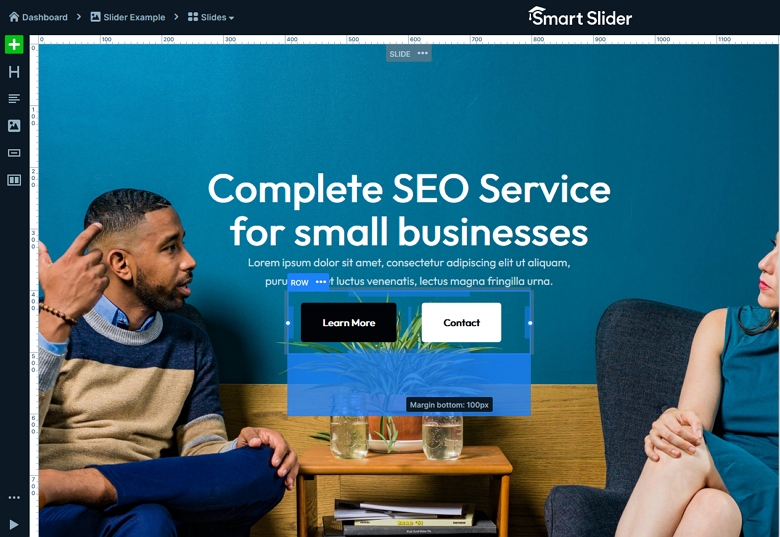
You can create space between the layers using paddings and margins. Layers by default don’t have any margin set. However, the rows and columns by default have 10px padding on each side. You can remove or change that if you want. But right now these paddings create a nice spacing between the text and button layers. I want the content to have a bigger distance from the bottom of the slide. So I will set up a bottom margin for the row.
However, you should not use paddings or margins for aligning. They’re only for creating distances. So, if you want the content to be at the top of the slide, don’t use these options. Instead, find the container of the layer and change its vertical align option. In this case the container of the layers is the Content layer.
Responsive settings
The slider you create might not always look well on all screens immediately. Sometimes, you need to make a couple of small responsive changes. Usually you need to reduce the font size and the spacings to create a good look on small screens. So, let’s get this slider to look good on tablet and mobile.
To check how your slider looks on tablet or mobile, use the device selector on the top bar.
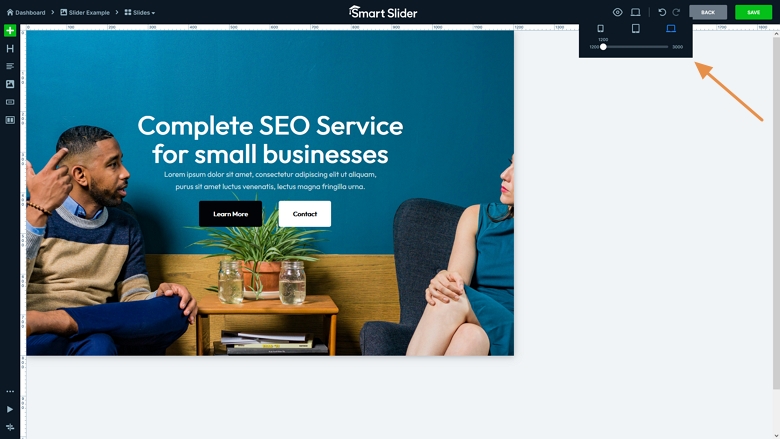
Configuring the tablet view
First, let’s switch to tablet view. The main issue here seems to be the font size. Also, the bottom spacing could be smaller. Let’s focus on the font problem first. If you click on any layer at tablet (or mobile) view, you’ll see a font icon appearing. Click on it to access the Font resizer which you can use to adjust the font size for this particular view. It will not affect other views.
Make sure you reduce the Max width of this heading layer as well. The other layer’s texts are not that big, so you don’t necessarily need to reduce them.
Configuring the Mobile view
Once you’re satisfied with the tablet look, switch to mobile view. There’s a lot more to do here, but again, let’s start with reducing the font size. While doing so, notice how the slider height is reduced as your font gets smaller. The basic behavior of Smart Slider is that the height of the slider gets bigger if the layers need more space. Reduce the font size of the heading and text layer to make the height smaller.
If you have changed the column alignment before, then you’ll need to change that back to center now. Don’t worry, this option will not affect the desktop view. In fact, any option that’s marked with the little device icon is device specific. So you can freely change it in tablet or mobile without affecting the other views.
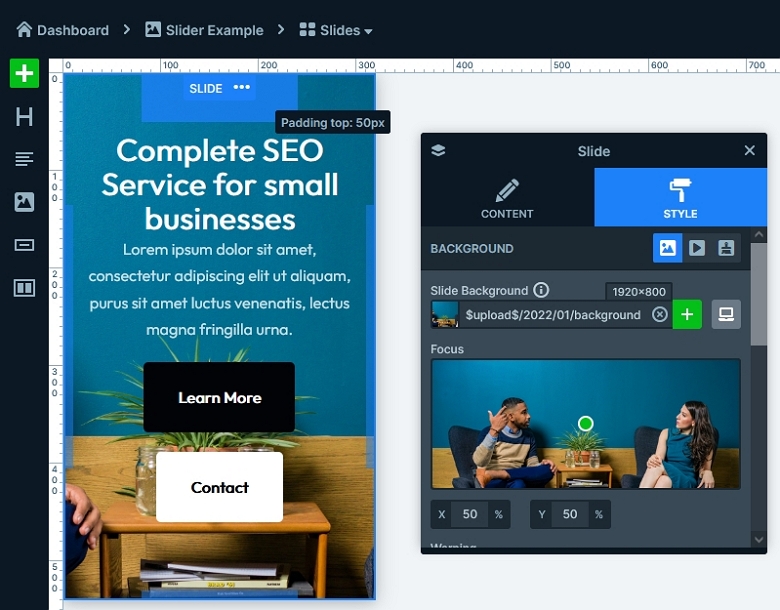
Here’s a tip on how to have a more even spacing around your content. Reduce the row’s bottom margin and set a top padding to the slide.
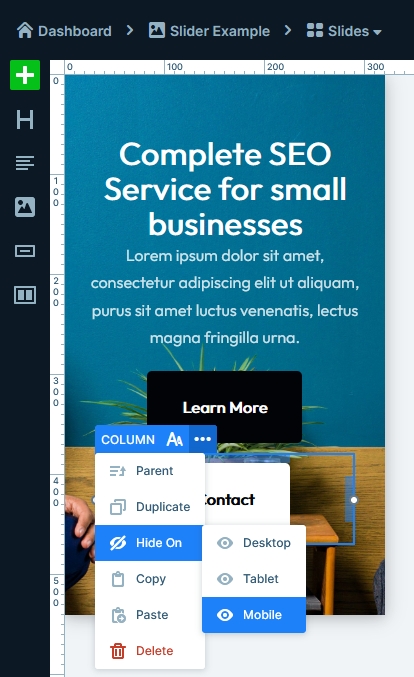
If you have any layers you don’t want to show on a particular device, click on the layer, select the “…” menu and pick the device you don’t want to see the layer at the Hide on option. You can find the layer anytime later at the Layer List.
Conclusion
Smart Slider and Slider Revolution are both great products to create sliders. However, they have many differences in their UI, name and location of features and so on. Having to convert your sliders manually is a huge and difficult task. Hopefully this guide can help you migrate from Revolution Slider more easily.