When it comes to sliders for WordPress, there are two premium plugins that stand tall above the rest: Slider Revolution and Smart Slider.
What is Slider Revolution?
Revolution Slider or Slider Revolution by ThemePunch is a responsive, premium WordPress Slider Plugin. You can use Revolution Slider to create modern sliders for your WordPress site. Slider Revolution can be found in most premium themes, making it incredibly popular amongst WordPress users.
What is Smart Slider?
Smart Slider is an easy to use, responsive WordPress Slider Plugin. It has everything you’d ever look for in a slider plugin, such as layers and special effects. Unlike most other premium sliders, Smart Slider has a free version, which is a great alternative to many premium plugins.
Do Smart Slider and Revolution Slider has anything in common?
Both are feature-rich plugins that enable you to create beautiful and responsive sliders complete with impressive animations, layers, buttons and dynamic content. But comparing these two plugins is a challenge. Unless you want to spend time setting each of them up and creating sliders, there aren’t any reviews that compare these plugins against each other. Until now.
In this post, I’m going to put these plugins to the test, comparing them side-by-side for their features, pricing and performance. I’ll also walk you through a comparison project where I’ll create the same slider using both plugins so you can see how they work – and which one is better to use.
By now you’re probably thinking, “Well, of course she’s going to say Smart Slider is the best because this is the Smart Slider blog!” Oh yeah, I could totally write a biased and boring sales post with a big “Buy Smart Slider!” button at the bottom of the page. But that’s not my style. I like facts and not fake news. So this review is an honest to God account of my experiences with both plugins and what I genuinely think about them. Here we go.
Get on board! Join our 142,416 subscribers!
Get our latest news, tutorials, guides, tips & deals delivered to your inbox.
Slider Revolution and Smart Slider push the boundaries (and even blur the lines, in Smart Slider’s case) in terms of what a slider can and should be able to achieve in web design. Both enable designers and developers to create stunning hero headers, testimonials sections and more.
As far as features go, these plugins share many similarities but also have their own unique selling points. Here’s a side-by-side comparison of their features:
Slider Revolution
Smart Slider
Slider types
3 (standard, carousel & block)
4 (standard, carousel, showcase & block)
Template library
80+
100+
Layers
8
23
Dynamic generators
8
22
Object Library
✅
❌
Extra Addons
✅
❌
Default/Absolute layers
❌
✅
Slide library
❌
✅
Animated Shape Dividers
❌
✅
Slide Mixing
❌
✅
Slider types
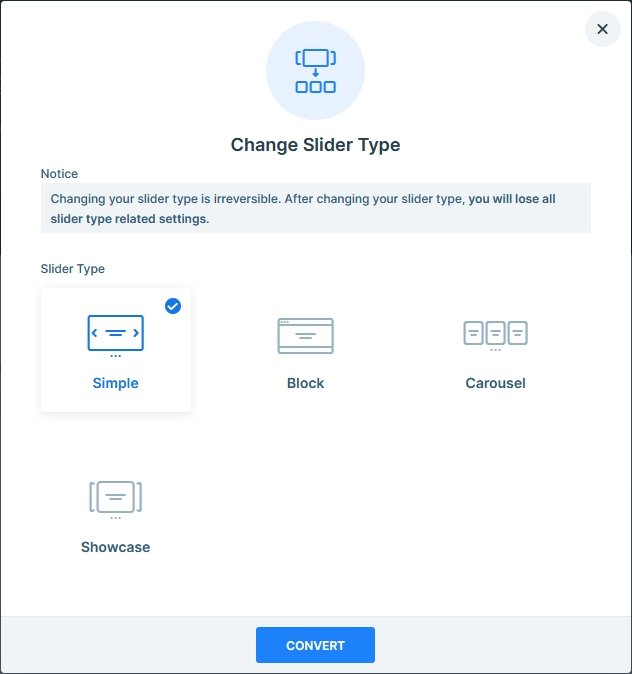
Smart Slider comes with two extra types of sliders: showcase and block. While you’re no doubt familiar with standard and carousel sliders, here’s a quick look at what all four of Smart Slider’s slider types look like:
Available slider types in Smart Slider: Simple, Block, Carousel and Showcase
Template library
When you’re time poor or just have no idea what you’re doing when it comes to design (like me), you need a bit of guidance. Fortunately, both Slider Revolution and Smart Slider come with a stack of beautifully designed templates to get you started.
Here are some examples of the templates that come with Slider Revolution:
Here’s what the template library looks like for Smart Slider:
Layers
Both plugins come with the standard layers – heading, text, button, image etc. But Smart Slider has a bunch of extra ones for content (list, captions, transition, progress bar, counter, circle counter), media (Vimeo, video, YouTube, audio), and advanced layers (area, input, iframe, HTML).
While the basic layers might seem like enough for a slider, I found the advanced options in Smart Slider, in particular the row layer, indispensable, as you’ll see later in this review.
Animations
Animations are a lot of fun to play around with when you’re creating sliders, and Slider Revolution and Smart Slider deliver. Both plugins come with a stack of animation options that go beyond the standard fade, left, right options. Whether you want to add a subtle micro animation or a bolder flip, shake or bounce, it’s easy to implement with both plugins.
Dynamic Generators
Want to auto-populate your sliders with photos from Flickr, videos from YouTube or show off your latest tweets? Both plugins allow you to use dynamic content, including WordPress pages and posts and WooCommerce. Smart Slider provides lots more dynamic sources – dribbble, Pinterest and NextGenGallery to name a few.
Unique Features – Slider Revolution
With the object library, you can add background images, transparents PNG objects, SVGs and font icons to your slides. Want to add a picture of a piece of toast to a slide? Easy – just search for it in the object library and add an image layer to your slide.
Slider Revolution also offers some great add-ons, including whiteboard and typewriter effects, slide backups, WordPress gallery, related posts and social sharing, coming soon, particle effects, polyfold effects, adjacent posts, filmstrip, 404, post featured slider, login page, slicey, before and after, weather, panorama, reveal and duotone.
Unique Features – Smart Slider
Smart Slider also has a bunch of cool features that Slider Revolution doesn’t have. There are two different visual editing modes for creating your slider content: content and canvas mode. These editing modes really set Smart Slider apart from any other slider plugin. In content mode, the slider behaves like a page builder, while in canvas mode gives you freedom to work with your layers unobstructed, much like you would in Photoshop.
The Slide Library lets you choose from 100+ premade slides in different skins and in different categories. The library is massive and it’s easy to get lost in all the beautiful designs (and have a hard time picking just one!).
The animated shape divider is another really cool feature unique to Smart Slider. Lastly, Smart Slider offers slider mixing. Basically, you can mix regular slides with sliders that contain dynamically generated content. This is an advanced feature and one that would be awesome to use in hero headers that are regularly updated with new content.
💰 Pricing
Both plugins have similar price points on the Standard packages, however you can see big differences at the bigger packages. Also Smart Slider has a free version.
Slider Revolution
This plugin’s pricing is aimed at two distinct markets: freelancers who are creating sites for clients – there are available one-site and three-site licenses, and theme authors who sell products on ThemeForest.
Starter
Enthusiast
Professional
$29/year
$79/year
$129/year
1 website
3 websites
5 websites
Slider Revolution is often bundled with themes available for purchase at ThemeForest. This has helped make it a hugely popular plugin as many users get a copy of the plugin when they buy a theme from the Envato marketplace. It’s important to point out that the bundled version you get with themes lacks a lot of features:
You can’t import any premium slider templates,
Updates aren’t available,
You can’t access the Object Library or Add-Ons, and
There’s no support.
Slider Revolution has one-time payment packages, in this case you don’t need to pay a yearly fee, but you will get only 6 months support. Let’s see the one-time prices!
1 sites
3 sites
5 sites
10 sites
$95
$250
$415
$765
1 website
3 websites
5 websites
10 websites
Smart Slider
There are five different pricing options, including a free version that’s available for download. If you decide to give the free version a try, you can upgrade to the pro version at any time.
Free
1 sites
3 sites
5 sites
10 sites
$0
$49
$99
$149
$249
–
1 website
3 websites
5 websites
10 websites
Smart Slider offers a handy 14-day money back guarantee if you change your mind.
What I like about the free version of Smart Slider is that it doesn’t constantly nag you to upgrade. You know all the ugly ads and nags you see in some free versions of plugins? There’s none of that in Smart Slider. Instead, the plugin prompts you to upgrade only when you try to use a feature that’s pro-only. It’s unobtrusive and allows for an uninterrupted user experience.
The new way to build a Slider
Next generation visual editor, customizable animations & effects, and access to hundreads of premade templates.
I have a confession to make: I’ve only ever created a slider once before. It was a WordPress carousel slider using a free plugin I downloaded from WordPress.org. The user experience was so bad that I hated on sliders for the longest time and never used them again…
… Until the guys at Smart Slider asked me to write this review.
I’ve reviewed a ton of plugins over the years. The fact I haven’t used either of these slider plugins is in my favor since I’m approaching this without bias any preconceptions about how they work. Yes, I know I’m writing for Smart Slider, but as I mentioned, I don’t like BS reviews so what you’re reading is all honest.
The Project
In order to compare these plugins, I’m going to create the same slider with both plugins. Rather than design a new slider, I’m going recreate the testimonial slider from the Help Scout homepage:
Since I’m a total noob when it comes to sliders, I knew recreating this slider would be fiddly. While it looks fairly simple at first glance, there are quite a few things going on:
There’s an image (with a drop shadow),
There’s a quote on the left,
There’s a name,
There’s a logo,
The quote is inside a white box (with a drop shadow),
When you scroll through this slider, the images fade rather than slide right to left, and
The navigation arrows are in the bottom-right
Well, time to start building my sliders! 🙄
🔄 Creating a Slider with Slider Revolution
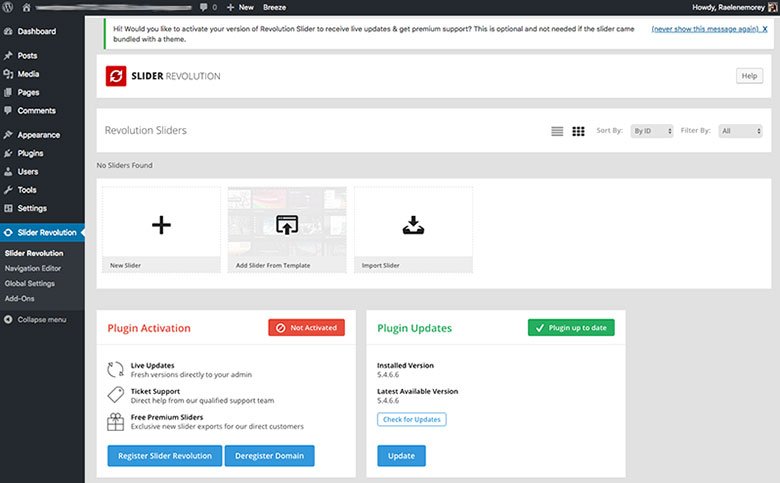
First thing’s first: I installed Slider Revolution and here’s what the welcome screen looks like:
I gotta say, it’s pretty ugly. There are boxes everywhere and no real focal point (like a getting started wizard) to help me work out what to do. Fortunately, I’m not a complete noob when it comes to plugins, so after scrolling down the page to check out all the content, I clicked on “New Slider.”
The “New Slider” screen provides a set of options for creating a new slider:
I clicked “Default Slider” and then gave my slider a name and alias. Under “Select a Slider Type” I chose “Standard Slider” and clicked the expander to select a preset. The “Thumbs-Right-Auto” option looked the most similar to the slider I wanted to create so I selected that. In the “Slide Layout” section I selected “Auto” and left the defaults enabled for the different responsive sizes.
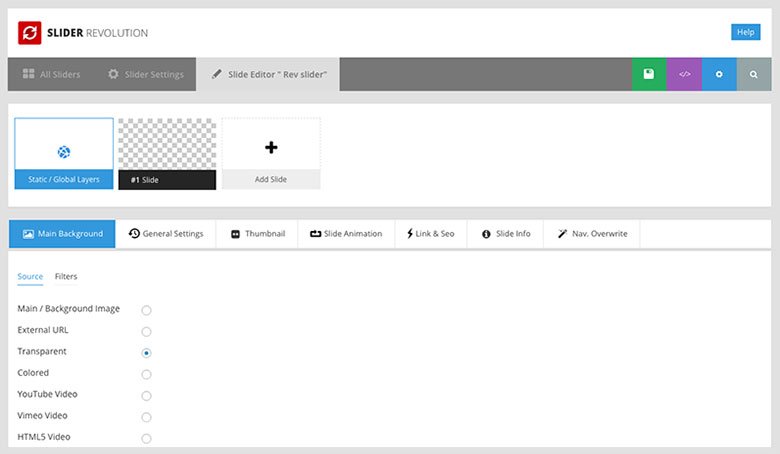
Scrolling to the bottom of the page, I clicked “Preview” to check out my slider so far but nothing happened. Hmm. What’s the point of having a preview button if it doesn’t work? I clicked “Save Settings” and was taken to the slider editing screen:
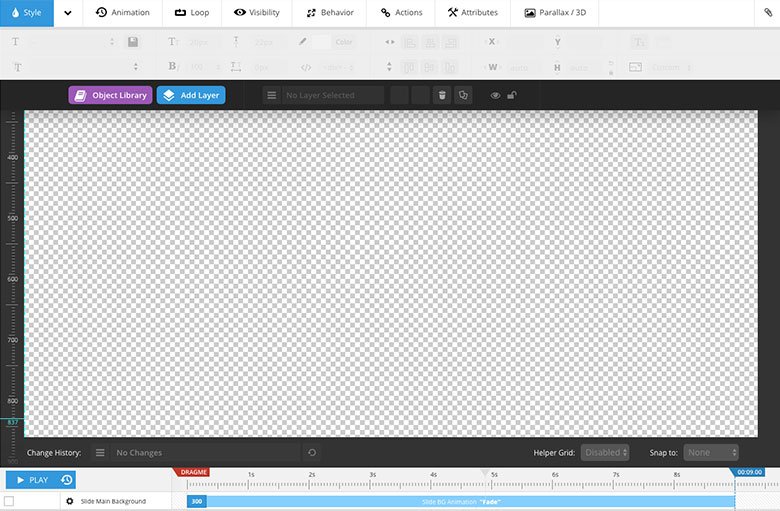
For someone who hasn’t built a slider before, this screen was intimidating. When you scroll further down the page you see the visual editor and underneath it the animation player:
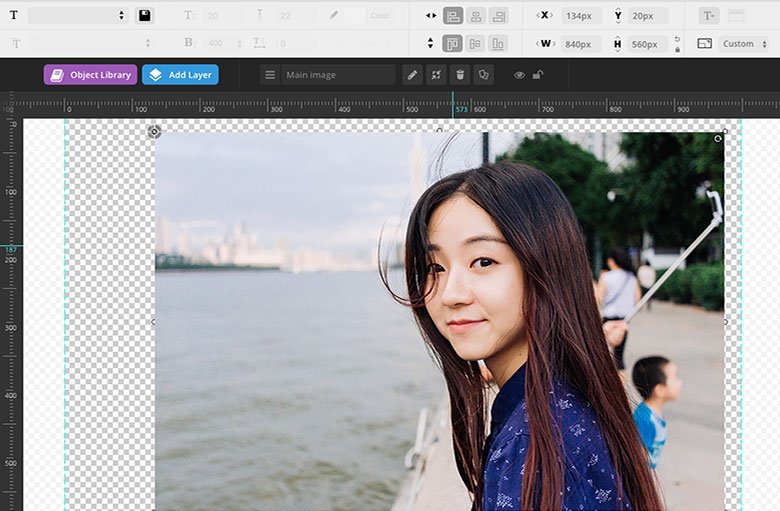
After clicking, hovering and just generally poking around the editor to try and understand what was going on, I decided to get started by adding an image to my slide. I often use Unsplash for its stunning images, so I downloaded three images of people for the three slides I wanted to create. I cropped, resized and optimized them in Photoshop to match the dimensions of the Help Scout slider I wanted to recreate.
With my images ready, I clicked “Add Layer,” selected “Image” and uploaded my image.
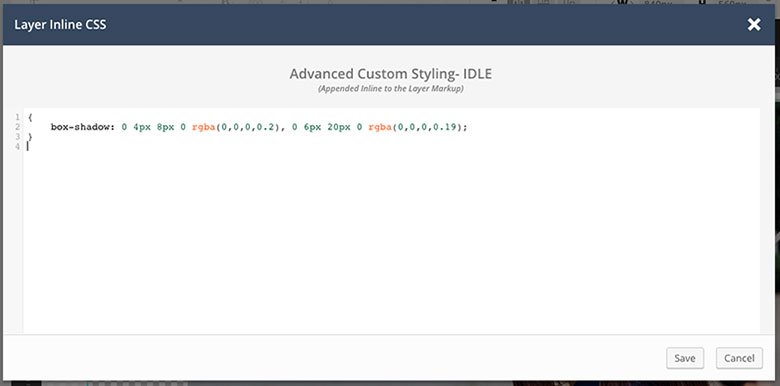
Next, I needed to add a drop shadow to the image. After clicking through the tabs above the editor, I eventually worked out that I needed to right-click the image. I clicked on Style > Advanced CSS and entered my CSS:
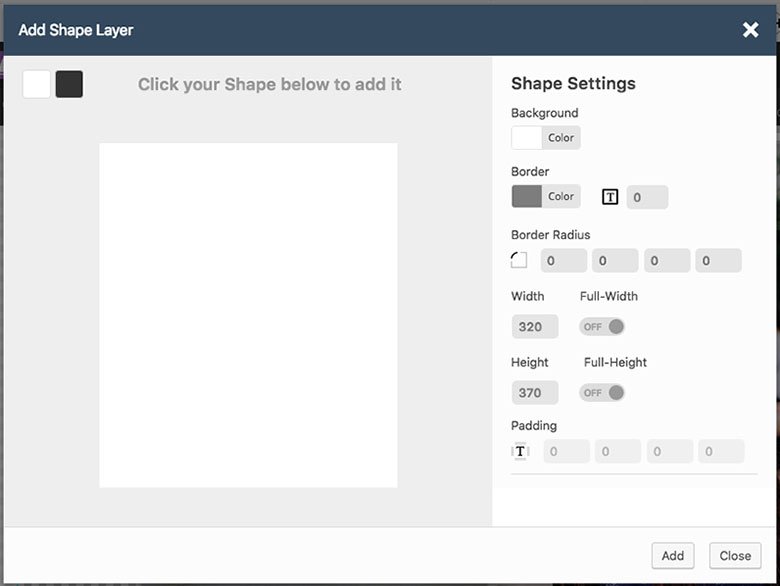
Next, I needed some kind of white background to sit behind the quote. I clicked on the “Add Layer” button and thought the “Shape” layer might work. It brought up a modal with styling options.
After updating the settings, I noticed when changing the background color that the opacity was set at 50% by default. I thought this was odd since wouldn’t most people want it at 100% by default?
With my white shape looking good, I added a drop shadow to, similar to the main image.
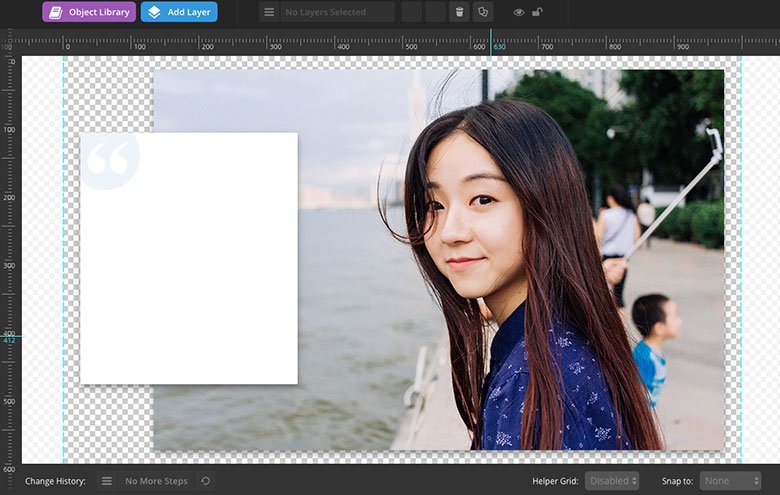
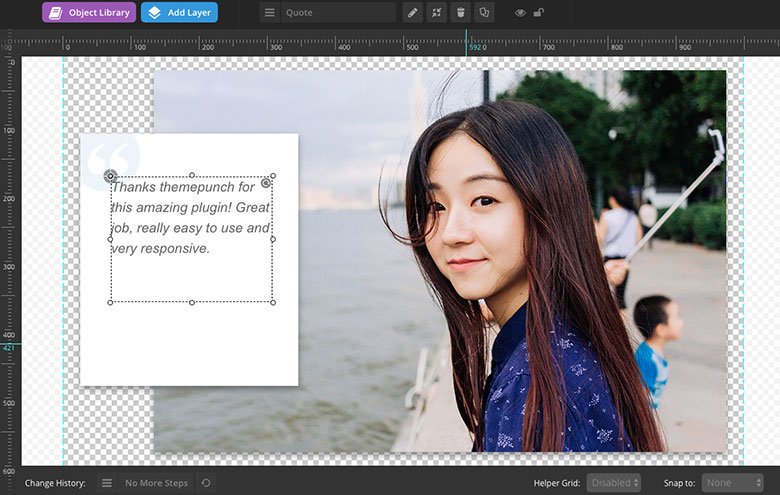
Next up: quotation marks. The Help Scout slider has subtle quotation marks that sit to the top-right of each quote. I wanted to emulate this, so I create an image in Photoshop and then added it as an image layer over the white shape I’d just created, like so:
It took ages to get it looking like this, TBH. I had a lot of trouble ordering the layers even though I had them sorted in the right order in the animation area below. It took a lot of ordering and re-ordering to work out that I needed to have my images in descending order, i.e. the image I wanted at the back of the slider needed to be at the top of the order. WTF?!
I had been ordering my slides with the main image at the bottom since the last image was being assigned the largest z-index number. Urgh… confusing.
Moving on. Next up, I added a testimonial quote (using the “Text/HTML” layer), which I found on the Slider Revolution ThemeForest page and styled it using the options at the top of the visual editor. It took me a while to work out how to make the text italicized – you need to click on the arrow next to the “Style” tab. I found this confusing because there’s an italics icon next to the bold icon.
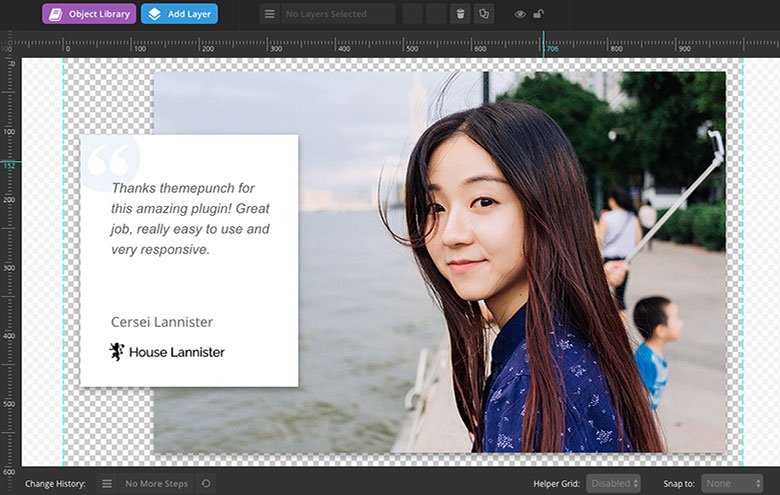
Then I added a name using a text layer and went about creating a fake logo using Squarespace’s free logo creator. I found it a bit cumbersome trying to align the name with the quote and the logo. While there’s a “Snap to” option it doesn’t work very well and I ended up using the arrows keys on my keyboard to try and line things up as best I could.
Here’s my first slide all finished!
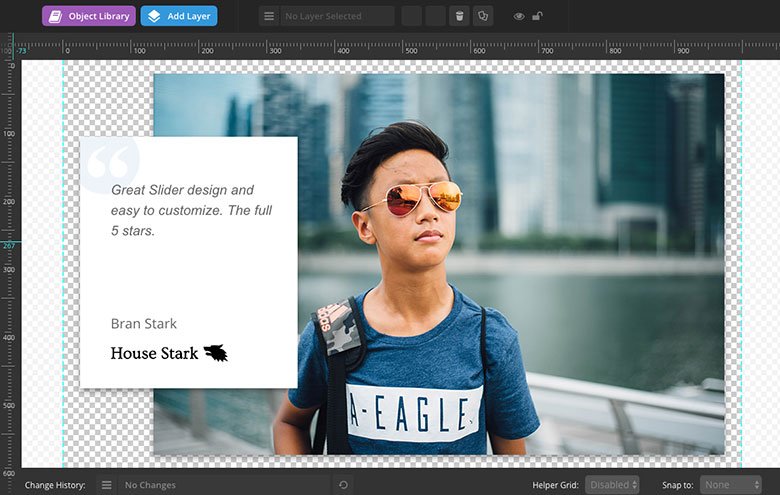
Looking good so far, but I still needed to create another two slides before my slider was ready to preview. I scrolled to the top of the screen, hovered over my first slide and clicked “Duplicate.” It only took a minute to update this second slide with a new image, testimonial, name and logo.
With my second slide ready, I created another duplicate with new images and text (which you’ll see shortly in my finished slider). Next: navigational arrows.
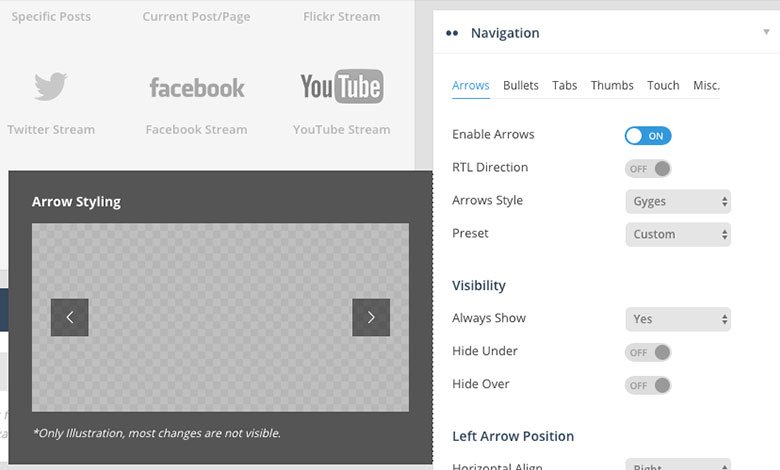
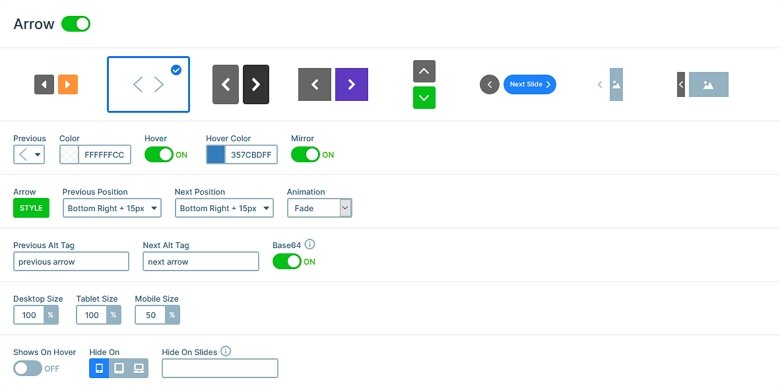
By default, arrows aren’t enabled in Slider Revolution. In the Slider Settings, which you can find at the top of the screen, I found the “Navigation” options. I enabled arrows and chose a style.
Scrolling further down the navigational settings, I was able to configure the placement of the arrows so they appeared in the bottom right-hand corner, and even set horizontal offsets.
Lastly, I needed to configure how the slider animated. I returned to the Slide Editor and clicked “Slide Animation.” Here, I selected “Fade” and set the animation duration to 800ms.
Then I hit “Save” and “Preview” and waited in anticipation…
First slider done! Overall, I’m pretty happy with the result. If I was going to use it on a live site I’d make some more tweaks to perfect alignment of the text and logo.
Okay, let’s move on to Smart Slider…
🎓 Creating a Slider with Smart Slider
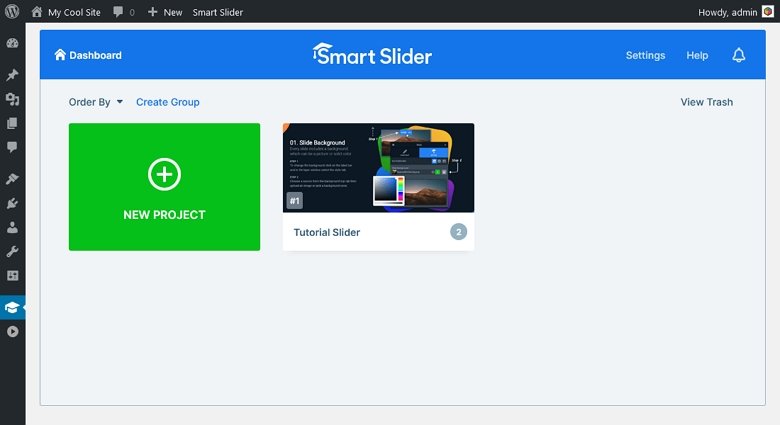
First up, I activated the Smart Slider PRO and here’s what the welcome screen looks like:
Smart Slider Dashboard
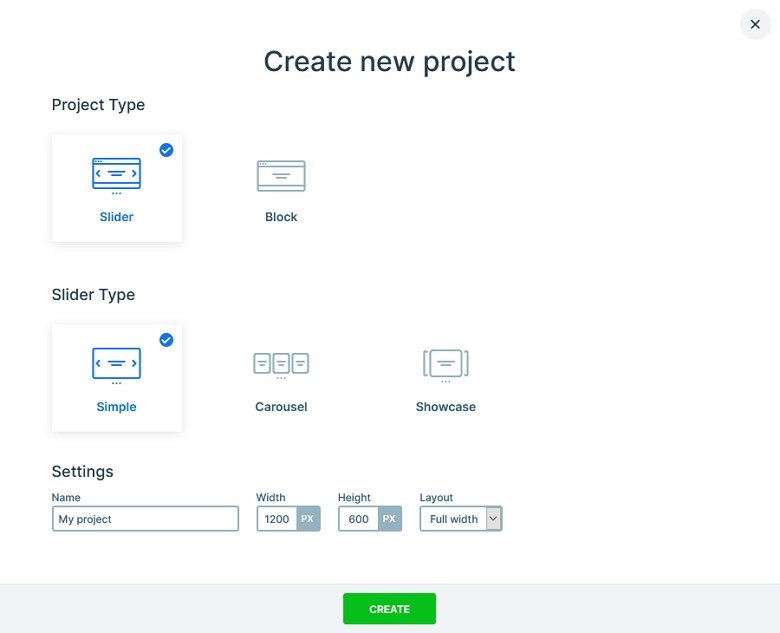
It’s very different from Slider Revolution. It’s not a cluttered collection of boxes and information, just two buttons that prompt you to choose your next adventure, so to speak. I clicked on “New Project.” A modal popped up asking me to choose whether I want to Create a New Project or Start with a Template. I choose the first, then I gave my slider a name, specified dimensions, and a slider layout.
Smart Slider – Create a new slider
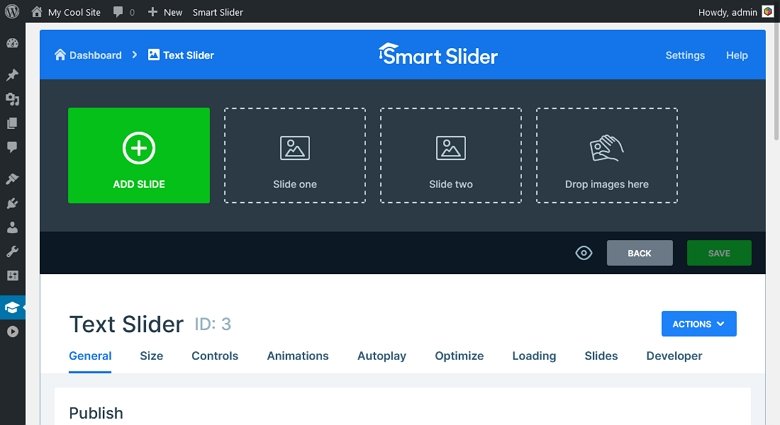
I clicked “Create” and another screen loaded with the dashboard for my new slider:
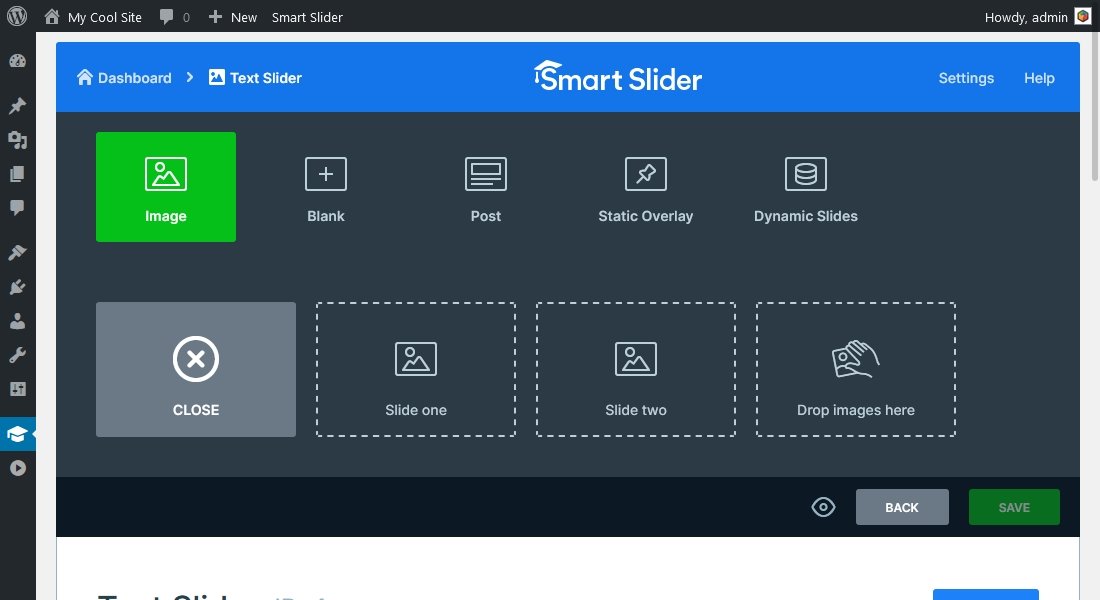
At this point, I clicked “ADD SLIDE” and selected “Blank.”
Moving on, I clicked on this slide and a new screen loaded with the Slide Editor. Unlike Slider Revolution, this screen wasn’t like an overwhelming slap in the face – it’s minimalist and provides only the basic options to start with. Perfect for a noob like me.
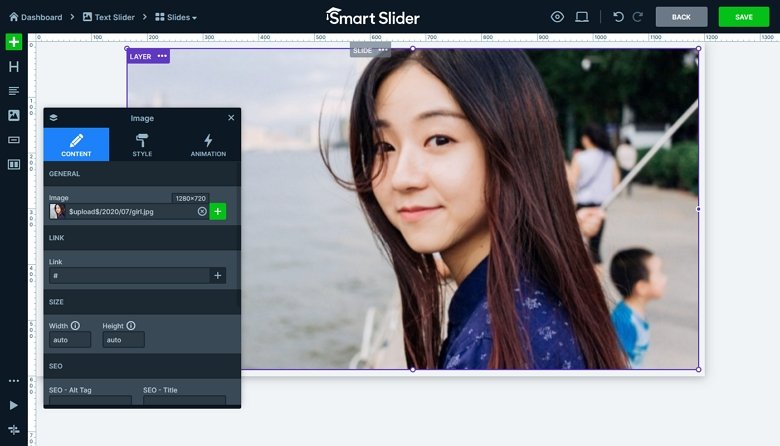
I jumped right in and started building my first slide. First up, I needed to add an image. I added a new Absolute positioned image layer with my main image.
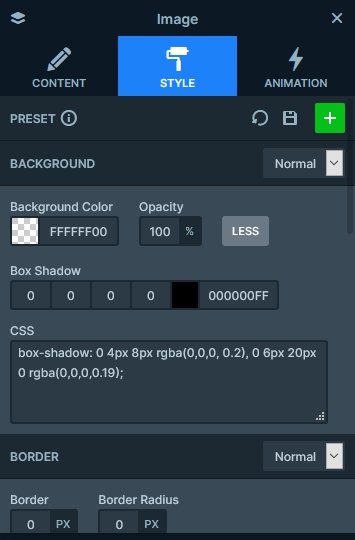
Next, I needed a drop shadow. Clicking through the available options in the modal, I quickly discovered that I could add extra CSS in the “Style” tab of the layer window by clicking “MORE.” So I entered my CSS:
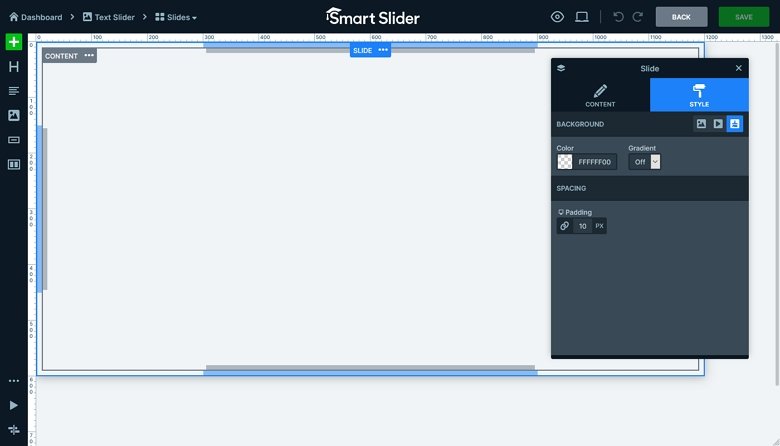
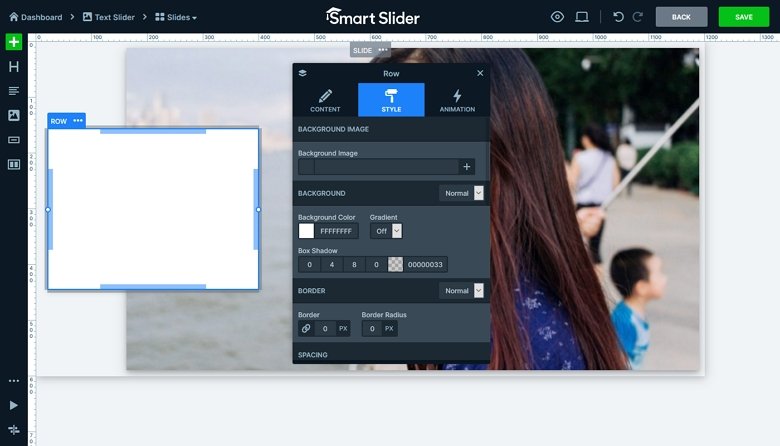
Next, I needed a white background. After initially dragging across a text layer and adding a white background to that, I had a thorough look through the available layers and noticed the advanced “Row” layer. I dragged it across to the canvas, made some changes and voilà!
The row also needed a drop shadow similar to the main image. Luckily, the row has a box shadow option for this.
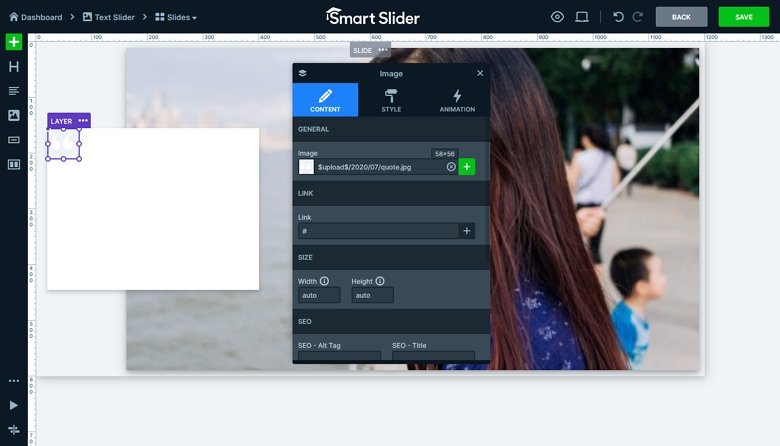
Next, I created another Absolute positionted image layer for the quotation marks and dragged it into place over the Default positioned row layer. Too easy.
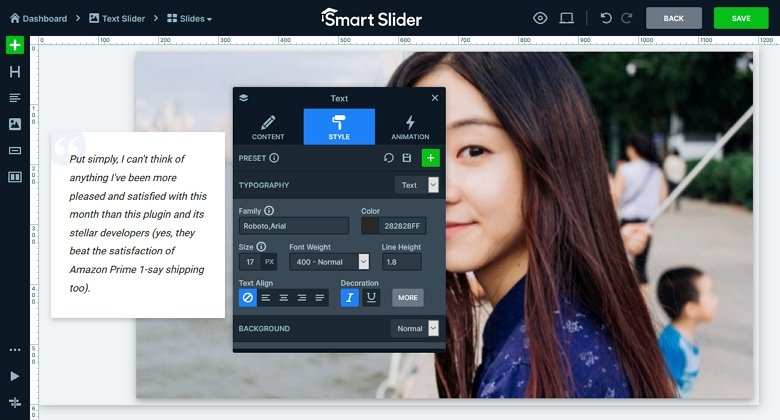
Then I added a text layer and went hunting around for a nice testimonial. I styled the text, making it italicized, increasing the size and line height.
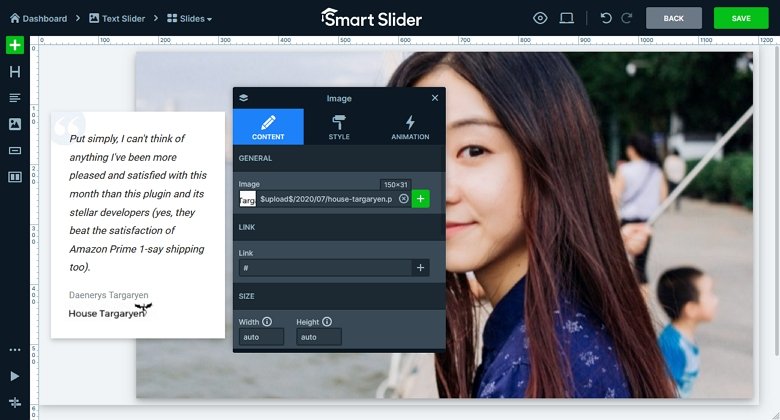
I gotta say, making design changes to text and images is so easy with Smart Slider. It was much quicker to access and edit styling options compared to Slider Revolution. Next, I added a heading layer for the name and another image layer for the logo:
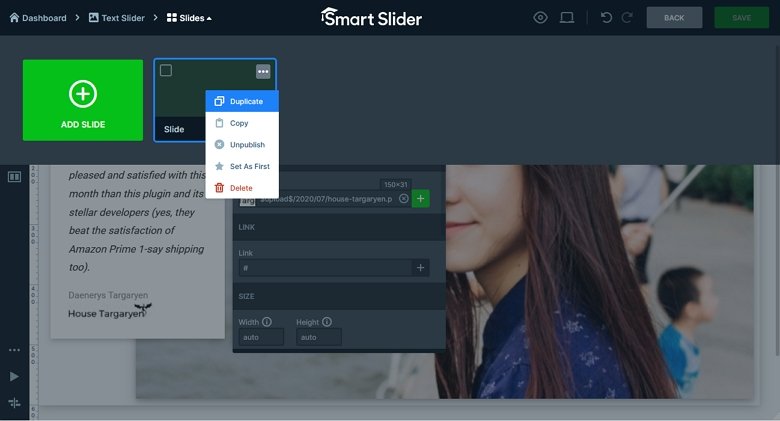
First slide complete! I hit “Save” and then clicked “SLIDES” at the top of the screen and right-clicked on the first slide to Duplicate it, so I could worked on my second slide.
I then got to work replacing the image, text, name and logo for the second slide.
Repeating the steps above, I created a second duplicate for my third slide and updated it with different content.
Now, for the animation. I needed each slide to fade into the next one. So I returned to the main screen for my slider and went to the Animations tab. I selected a crossfade, set the duration and the easing. It wasn’t hard to find these settings at all – they’re all organized and laid out in a logical way.
After previewing the slider, I realized the arrows needed to be in the bottom-right but instead were on either side of the slider. I went to the Controls tab to adjust the arrow positions.
And that’s it! Here’s what my finished slider looks like:
I’m really happy with the results. Smart Slider was really easy to use and I found all the editing options intuitive. Finding everything I needed to create my slider was straight forward and it didn’t take long at all to create my slider, maybe 20 minutes with all my assets ready.
⏳ Performance Test
There’s a common perception that sliders negatively impact website performance. So I was keen to put this theory to the test. Often, people add images to sliders that are too big or not optimized. So if the plugin adds to that, it’s a double whammy for page load speed.
The sliders I created used images that were 840px by 560px and each slide was 1000px by 600px. In order to test the plugins, I used a similar methodology to Chris Lema in his performance post:
I scanned each of the plugins five times using WebPagetest before saving the results.
I did each test on its own page with the other slider plugin deactivated.
The page I tested featured the slider and no other content.
I cleared the cache after testing each plugin.
My test site is hosted with Cloudways.
Slider Revolution:
Smart Slider:
The results were marginally faster for Smart Slider, which made fewer HTTP requests and achieved a load time of 1.7 seconds. Even though both sliders were identical in almost every way, Slider Revolution was slightly behind, loading in 1.8 seconds.
🏆 The Best Slider Plugin Is… Smart Slider.
I was impressed with both plugins but found Smart Slider much easier to use. The content and canvas modes, along with the modals that pop up for editing settings made the user experience so much more pleasurable. In comparison, the Slider Revolution editing screen wasn’t quite as polished or as intuitive.
It’s obvious the Smart Slider guys have put a lot of time and thought into designing their plugins, so props to them! It’s one of the best-designed plugins I’ve ever used. Learning how to use it was far easier than trying to figure out Slider Revolution.
Speed-wise, Smart Slider performed slightly better than Slider Revolution in the speed test. In future, I’d be interested to see how adding more layers and animations would affect the performance of these plugins.
Overall, if I had to pick one plugin for creating sliders, I’d choose Smart Slider. And not because I’m being paid to say that! It out-performed Slider Revolution for me in terms of ease of use, plus it has so many more cool features. All it needs is an object library (which I’m sure is coming in a future version!) and extra add-ons and it will have everything Slider Revolution has and more.
Raelene Morey is the Chief Bird at Words By Birds , an agency that helps WordPress businesses make better content. Computer science grad turned newspaper journalist and ex-managing editor at WPMU DEV. Raelene has been developing WordPress sites for over 10 years.