Whether you are updating an existing page, rebranding your website, or debugging an error, you don’t want to frustrate your site’s visitors. However, this can be a real possibility when you are making changes to your website. That’s why you need to put WordPress into maintenance mode.
This is a guest post written by Juliet Jones, who is an Editor at PRable.org. If you would like to write a guest post on our blog feel free to contact us.
The maintenance mode will help you work at peace behind the scenes while displaying a user-friendly notice to your visitors about what’s going on.
So, what is WordPress maintenance mode, and how do you use it on your website? In this article, we will help you understand the right way of putting your WordPress in maintenance mode.
Why and When to Put WordPress in Maintenance Mode
Let’s learn the fundamentals. WordPress maintenance mode is a message you use to inform users about maintenance on your website. You can add the estimated time when the website will be live again on this page.
Remember you don’t have to put your website in maintenance mode every time you are publishing new content, performing minor tweaks, or updating plugins or themes.
However, as your website grows the changes may be many, take longer, and require extended downtime. During this period, your website may appear broken to your visitors.
If your website has a lot of traffic, then you don’t want to create a bad user experience. A broken website can create a wrong impression of your brand.
Website owners deal with this situation by working on a staging website which is usually provided by their WordPress hosting company. This allows them to clear any issues before pushing the changes to a live website.
Remember that you still need to put up a maintenance page in WordPress for a short period, to give an insight into what going on.
If you aren’t using a staging site, you need to enable maintenance mode since you are applying changes on a live website. This allows you to solve the user-experience problem you might face.
Having known that, let us dive into how to set your WordPress site in maintenance mode easily.
Option 1: Use Code to Activate the Default maintenance Mode
If your website requires short-term downtime – less than an hour – you might want to avoid the trouble of setting up a custom maintenance mode page. You can use the WordPress default maintenance mode page and let users know you will be back soon.
The first step is to activate maintenance mode by going to the theme editor in WordPress. It is located under Appearance.
The second step is to open the functions.php File or Theme Functions. Click on the file to open it in the code editor.
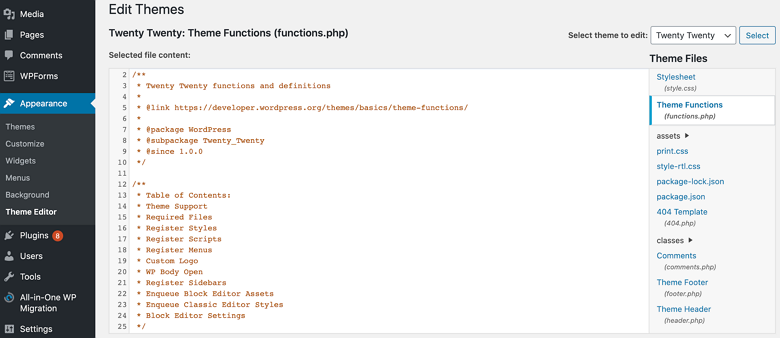
The third step is to add the maintenance mode code to functions.php. You can add “Website under planned maintenance. Please check back later” lines.
If you want you can customize your maintenance message, then click “Update File“. Always confirm that the maintenance mode is active by either opening the WordPress in a new browser or by logging out and visiting the website.
Don’t forget to turn off maintenance mode once you are done. You do this by removing the code you added to functions.php file.
Option 2: Use a WordPress Plugin
Repairing a bug or rebranding website may require more extended downtime that might be boring for visitors to see the grey page. Leaving the default WordPress message might not leave a good impression either.
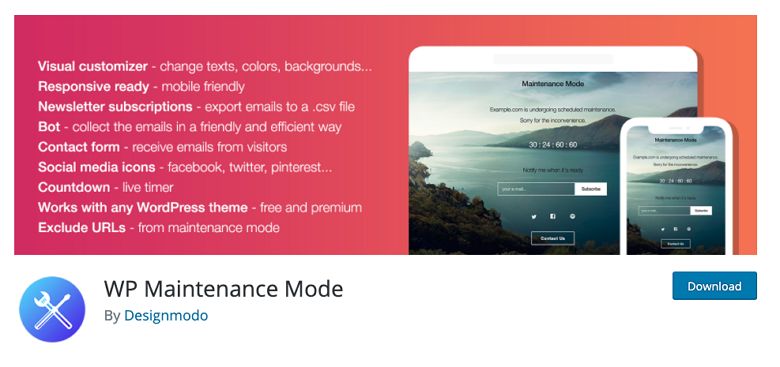
A WordPress maintenance plugin will help you put up something more engaging. Not only will you have a nicely designed page, but you can also provide more details on what’s coming or leave contact information.
First, you need to download and install the WP maintenance mode plugin. After activation, go to Settings » WP Maintenance Mode and configure the plugins setting. The plugin’s setting is divided into five tabs.
General Tab
The first option under General tab is Status which by default is set to Deactivated. To set your WordPress into maintenance mode, set it to “Activated”. If you want search engines to access your search website while in maintenance, then you set up the “Bypass for Search Bots” option to yes.
There are Backend Role and Fronted Role options that allows you to choose which user roles to access the front or backend while the website is in maintenance mode. It is set to administrator only by default.
Design
If you want to create an attractive page, then this is the tab to click. On the title option (HTML tag), you can add the title of your page, the Heading and the Text.
After setting up the message, you can customize your maintenance page background. You can choose to change the color or even use an image as a background.
Modules
If you want to let visitors know when your website will be up, then you can set the countdown timer found in this tab. Also, you can request your users to subscribe and get notifications when the website is up and running again. These visitors will be notified through the plugin, and they will not be subscribed to your email marketing list.
Also, in the Modules tab, you can add links to your social networks. Put your social media profile URLs, and the plugin will automatically display the social medial button icon.
Manage Bot
With this tab, you can add a chatbot to your page. This tab will allow you to maintain an interactive communication with your visitors while the website is under maintenance. You can even give the bot an avatar to make it more engaging.
GDPR Tab
If you ask your website visitors to subscribe to your page or you are collecting user data via sign up forms on your maintenance mode, then you need to set up your GDPR Tab. Switch to the GDPR tab on the plugin’s Settings page and enable the privacy module.
Remember to press the save settings button and visit your website in a new browser. Guess what! You will be greeted with coming soon or the maintenance mode page. Once you are done with the maintenance, you can turn off maintenance mode by clicking the disable button.
Conclusion
That’s it! You now know how to put your WordPress in maintenance mode both manually and with a plugin.