


💡 Best features in this slider
- Row with layer event
- Image layer with layer parallax
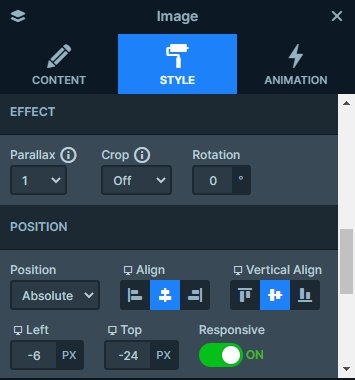
- Image layer in absolute position
- Shape divider
Settings
The biggest challenge for any web designer is to craft a creative website for their clients. They use various techniques to amaze everyone who visits the website. One of today’s coolest trends uses illustrations. An illustration can make any website leave a memorable experience for the visitor. The most common approach to present such graphics is a header illustration. A header illustration helps grab the visitors’ attention as fast as possible.
When you create a slider and publish it, it will start on the first slide by default. But Smart Slider gives you more control over this, as it lets you change the first slide. This way you can decide which slide you want to start your slideshow on. When we created the Header Illustration slider, we made it start on the second slide, which is in the middle. You can change the first slide if you click on the 3 dots on the top right and click on the “Set as first” option. The star icon marks the starting slide in the slider.

Layers
The first slide of the illustration header has two large CTA-s, which you can use for navigation. These CTA-s are rows with 2 columns. Also, there’s a layer event connected to each row. When you hover on them a layer animation launches on the right side. This subtle effect gives a nice touch to the header slider.
When you click on the first row it takes you to the last slide of this slider. You can find a bunch of new illustrations and blobs here, and the parallax effect is present as well. What’s pretty cool on this slide is the counters. With the counter layer, you can count from a given number to another. This lets you create, for instance, animated statistics for your illustration slider.
Animations
The cool illustrations are the best parts of this slider. They occupy more than half of the slider, so it’s hard to miss them. The solid illustrations raise the visitors’ attention and give a neat look to the slider. At the right side of the slider, you can see colorful shapes in the background. These are the blobs, which have the mouse parallax effect, and this gives a fun touch to the slider. The shape divider at the bottom is the coolest floor you’ve ever seen in any header.
Layout
In Smart Slider there are two position modes, the default and absolute positioning. With absolute positioning you are able to put down your layers anywhere, but everything just floats, so the layers aren’t affecting each other or the slide. In default positioning layers are taking up space, where other layers can’t go, so layers won’t crawl under each other, also they are making the slide as big as it needs to be, to leave space for all the layers, margins and paddings.
You can find both positioning in this slider. The absolute layers are decorations and are below the defaultly positioned layers. They look good, and have a layer parallax effect on it.
Responsive
When you check the slider on mobile, you can notice the image layers in the background are hidden. With hiding a layer you can save space on smaller views, and the focus can be on the content of the slider.
Related Post: Add Beautiful Section for your Website with Shape Dividers
Related Post: Everything You Need to Know about the Parallax Effect